Disclosure: As an Amazon Associate, I earn from qualifying purchases.
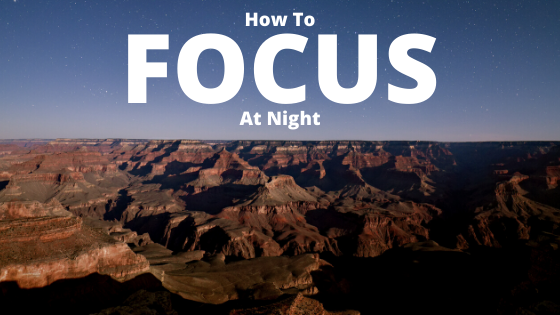
Night photography is all about FOCUS! Literally!
When you’re shooing at night, it requires focus and patience to capture the images you want. It also requires you to literally focus your camera.
If you haven’t read my article on obtaining sharp images, click here.
Basically, sharpness is KEY in a photograph. It is one of the most important things involved in taking a picture. When you zoom into an image, you want it sharp!
This principle transfers over to night photography.
It’s ironic because the whole point of focusing is to focus on something you can see. And obviously, when you’re photographing at night, you can’t see anything.
I know what you’re thinking — You want to spend less time focusing, and more time photographing.
So how do you overcome this issue, you might ask?
In this article, I will check off both of those requirements and explain how to easily focus at night and capture crisp images!
Focus to Infinity
So you’re out there, all setup and ready to focus your lens. But what do you focus your lens too?
First off, DO NOT autofocus. Under no circumstances should you autofocus at night.
Always, always use Manual Focus.
Autofocusing at night just doesn’t work. Your whole goal is to focus on the stars (for the most part). Stars are trillions of miles away, which is really far. Since they are so far away, your camera’s autofocus does not have the capacity to focus on them.
It can try, and it will fail. But look no further, because Manual focus is here!
Manual focus is the only way to achieve focus at night because YOU can control it.
A very popular suggestion is to focus your lens to infinity. But does this work all of the time?
The answer is more or less yes.
Focusing to infinity (∞) is great for wide lenses (14-30mm). Anything above 30mm and it will be close to the inifinty symbol but not quite on it. This method is so popular because when you put your lens to infinity, it is focusing on objects far away, which includes arches, mountains, barns, trees, and you guessed it, stars!
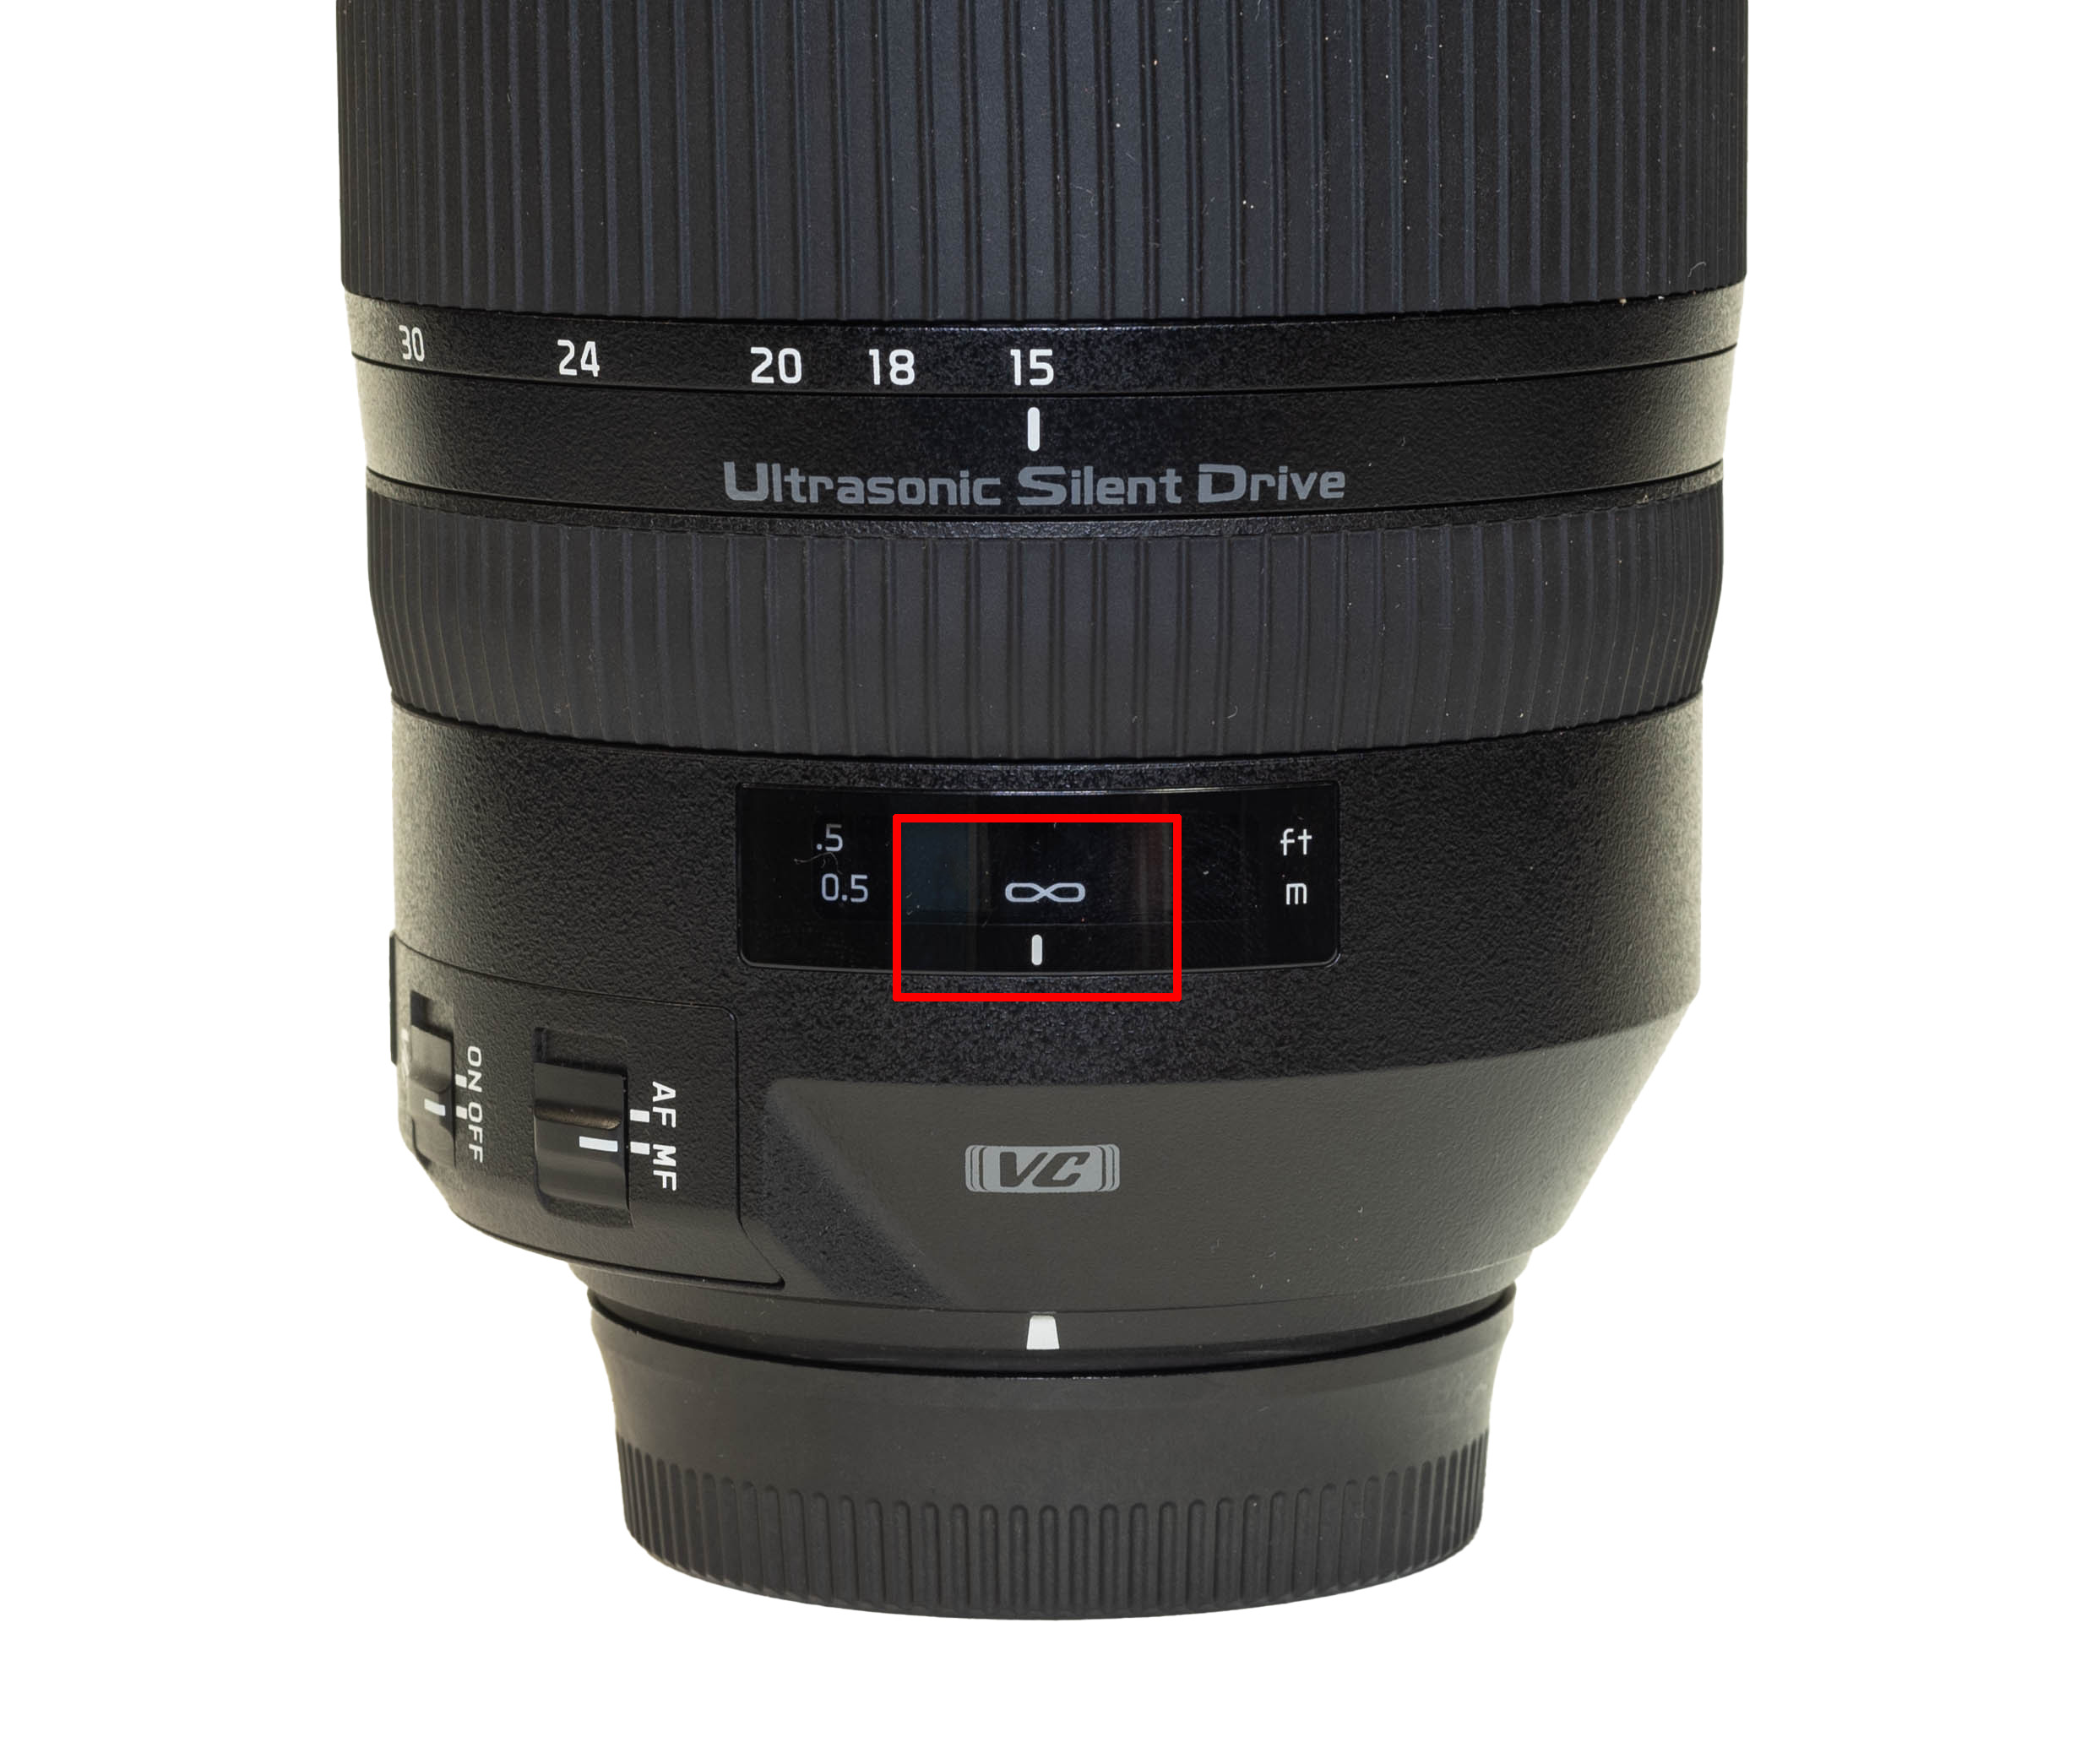
But you can’t just put your lens to the middle of infinity and expect it to focus perfectly every time.
Sadly, focus doesn’t work like that. And if you are off by even a minuscule amount, the focus will not be sharp. We don’t want almost focus, we want perfect focus!
What do you focus on?
So you just put your lens to infinity, you zoom in on your LCD screen, and the focus is almost there but not quite. How do we perfect that focus? Easy! We focus on something.
Most of you are probably thinking, but Adam, it’s pitch black out, what can we focus on?
My answer to that question is many things!
- Bright stars
- The Moon
- Distant City Lights
- A flashlight in the distance
Lets break down this list.
When trying to focus at night, the easiest objects to look for are bright stars, the moon, or distant artificial lights.
I know bright stars seems kind of counter-intuitive. Aren’t they all bright? Yes, but some stars are brighter than others because of their distance to us. The closer the star, the brighter it appears.
These really “bright stars” you see could also be planets. Since planets are so big, they shine extremely bright. The brightest of the planets being Jupiter and Venus.
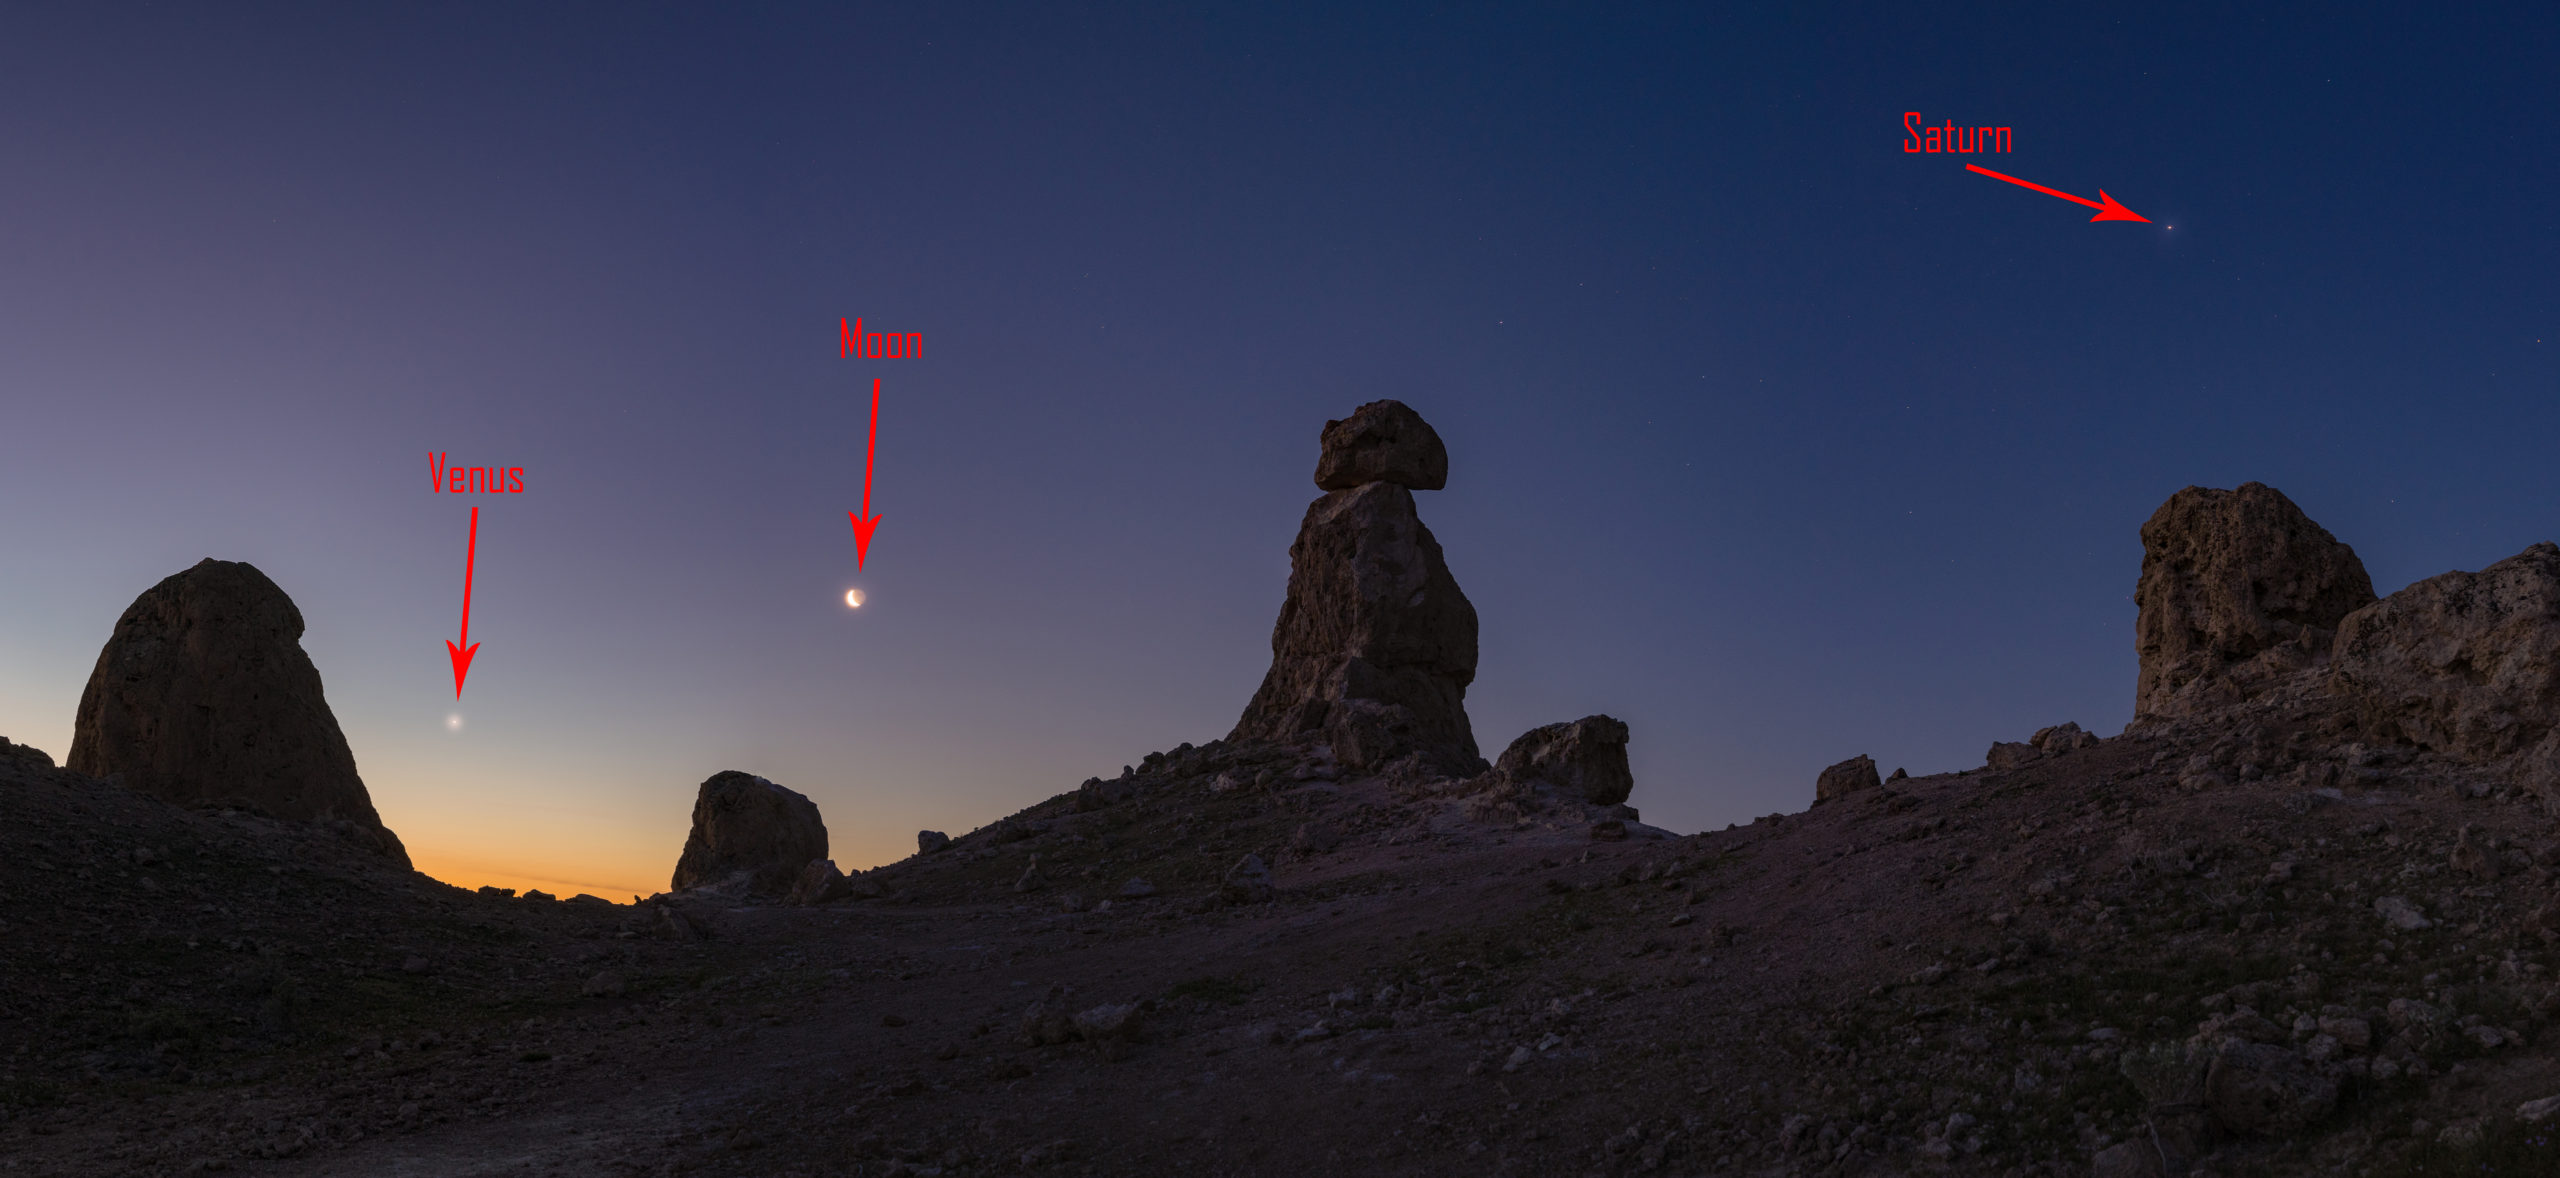
A few planets and the Moon shining brilliantly before sunrise!
The Moon also serves as a helpful guide.
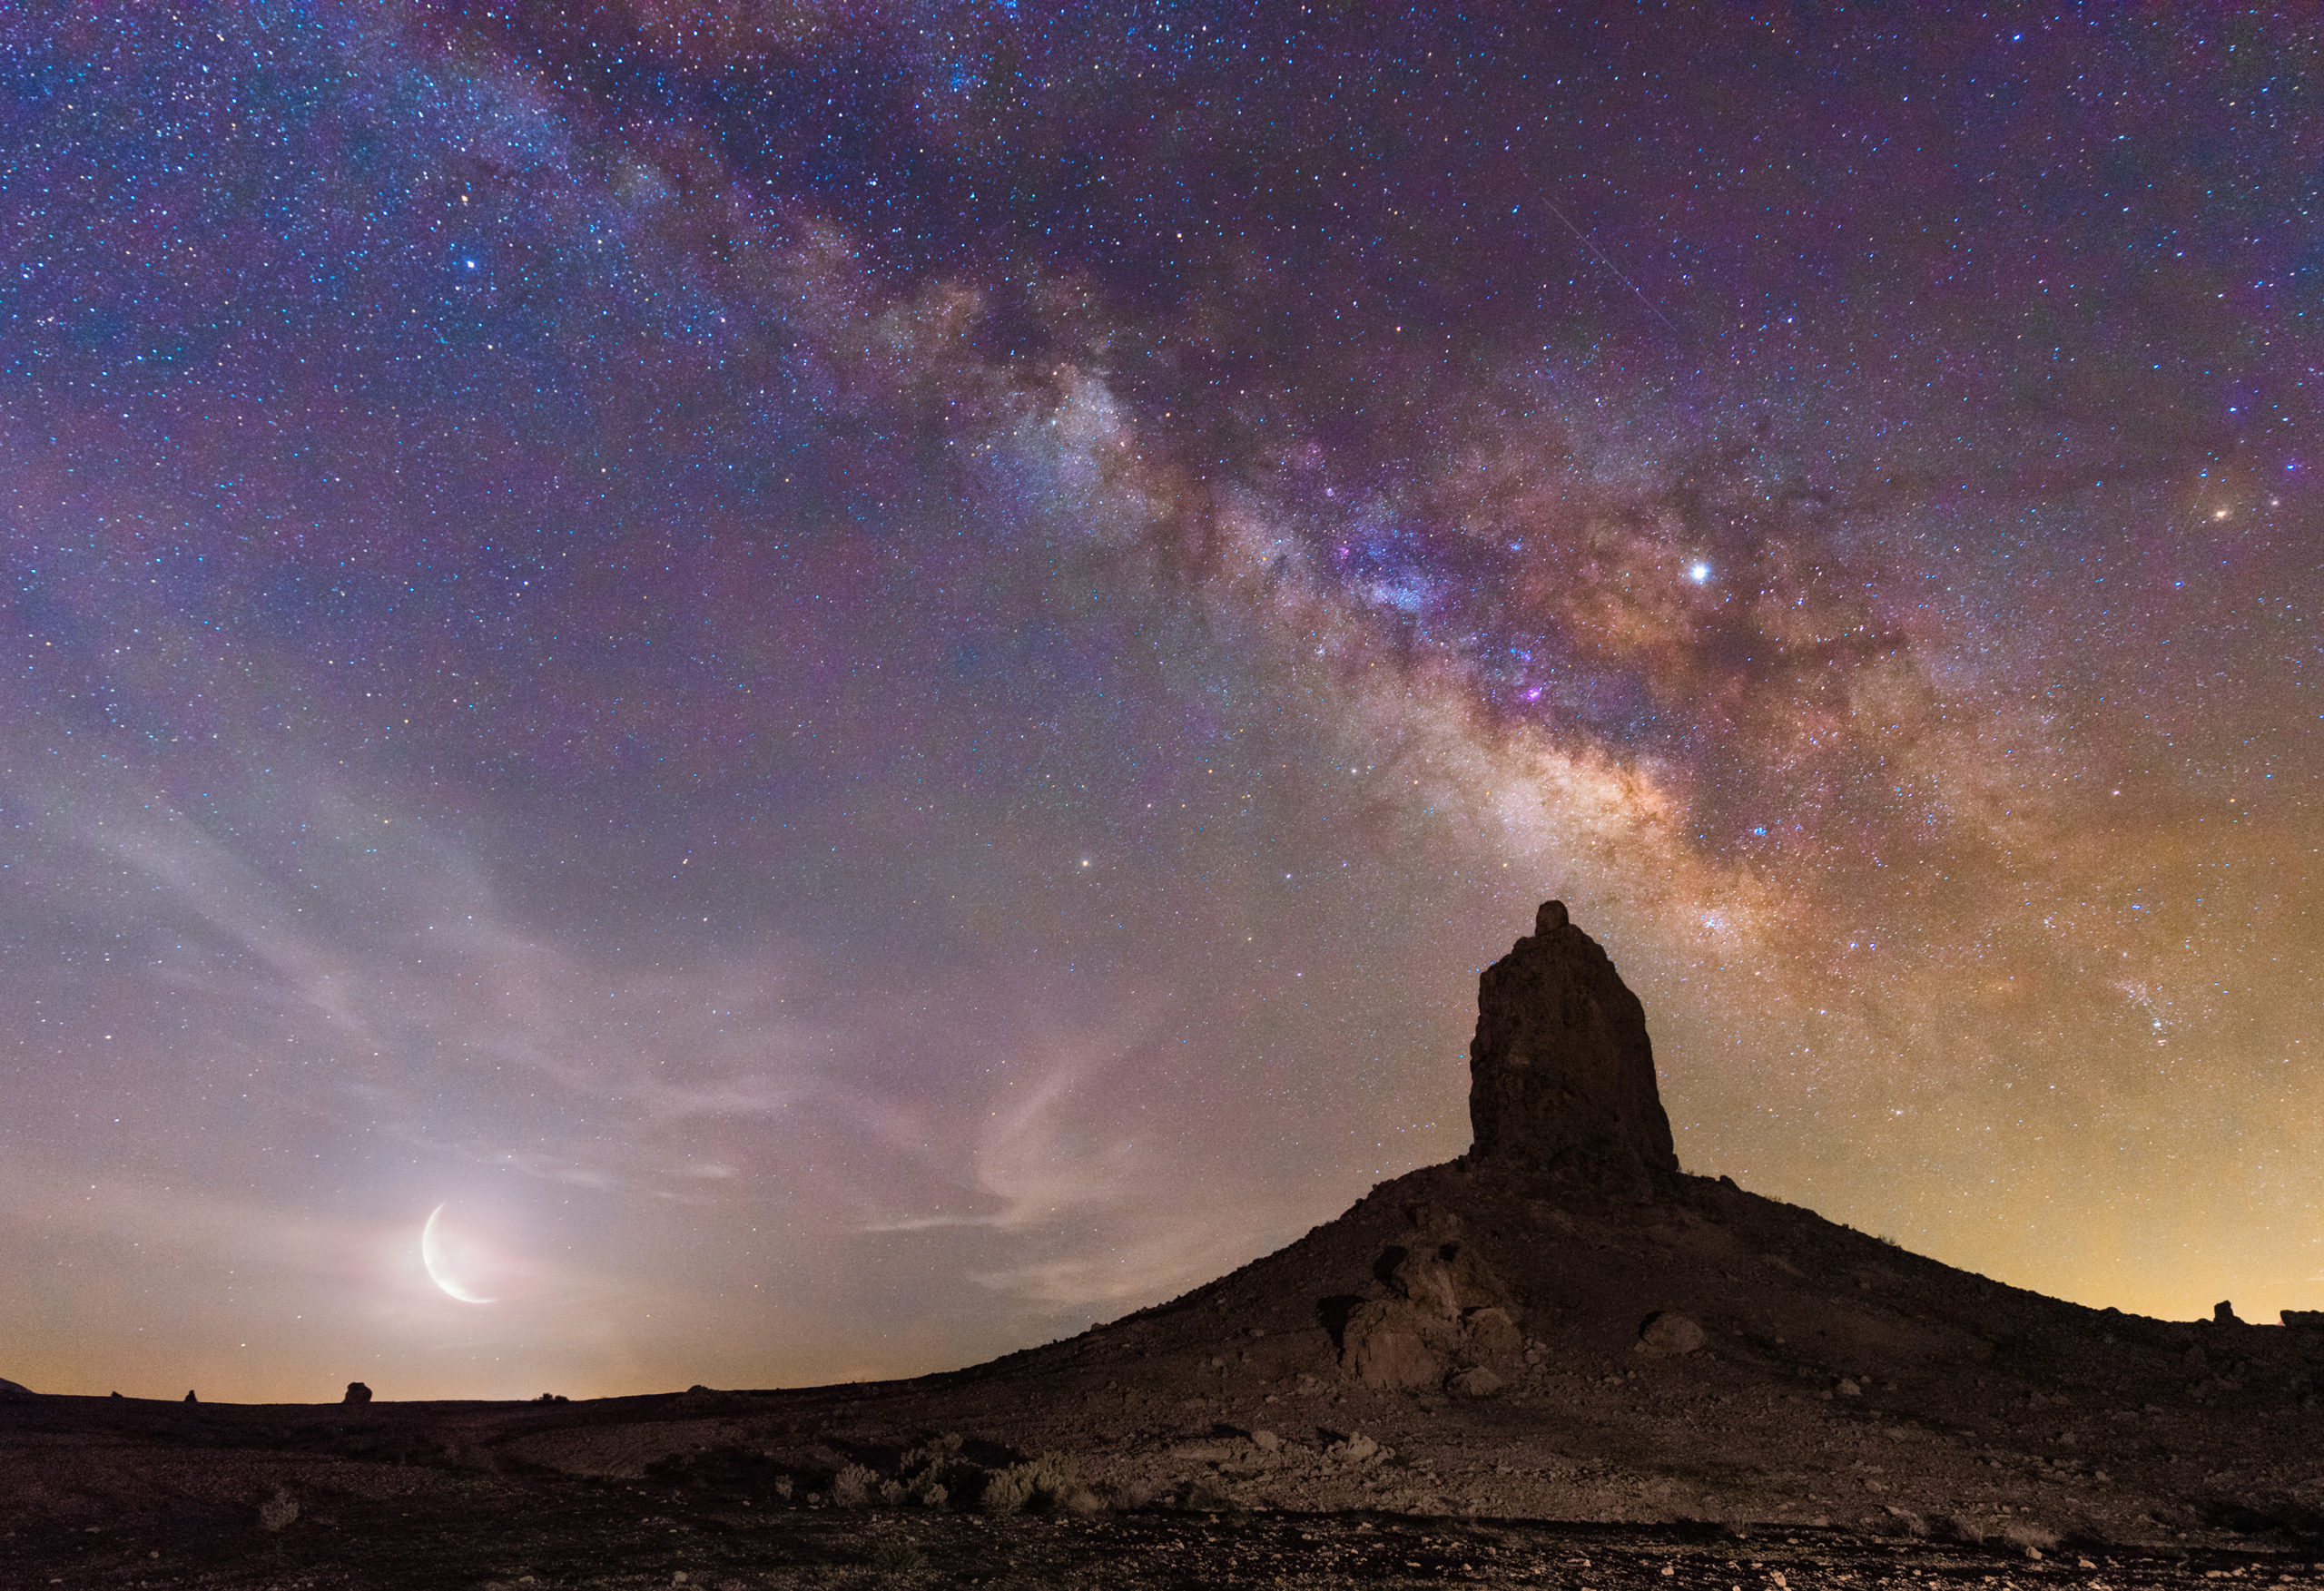
A crescent moon is seen on the bottom left-hand corner and is perfect to focus on at night!
Now, hopefully, you are photographing when it is close to a New Moon (if your objective is to photograph just the dark sky). But even a tiny crescent moon will be enough to achieve perfect focus.
Anyway, before I go full out astronomy geek, let me explain how to focus on these bright stars/planets, or moon.
- Point your camera toward any one of these celestial objects
- Make sure to place the object in the center of your frame
- Zoom in all the way on your LCD screen
- Adjust the focus ring until the star is as small as it can be (the bigger it is, the more out of focus it is)
You can also follow this 4-step plan if there are some lights out in the distance.
A small tool that makes this much easier is the Carson Lumiloupe 10x Magnifier. It lets you see individual pixels on your screen so you can tell exactly when focus is perfect. Check it out here: https://amzn.to/4pGlq3U
Finally, there is a last resort option.
If there are no distant lights, no moon, and none of the stars seem to be bright enough (or maybe it is partly cloudy out) you can always focus on a distant flashlight.
To do this, you do need a travel buddy to go out 100 ft. or so, and shine a light in your general direction. Then, follow the plan above and focus on the flashlight.
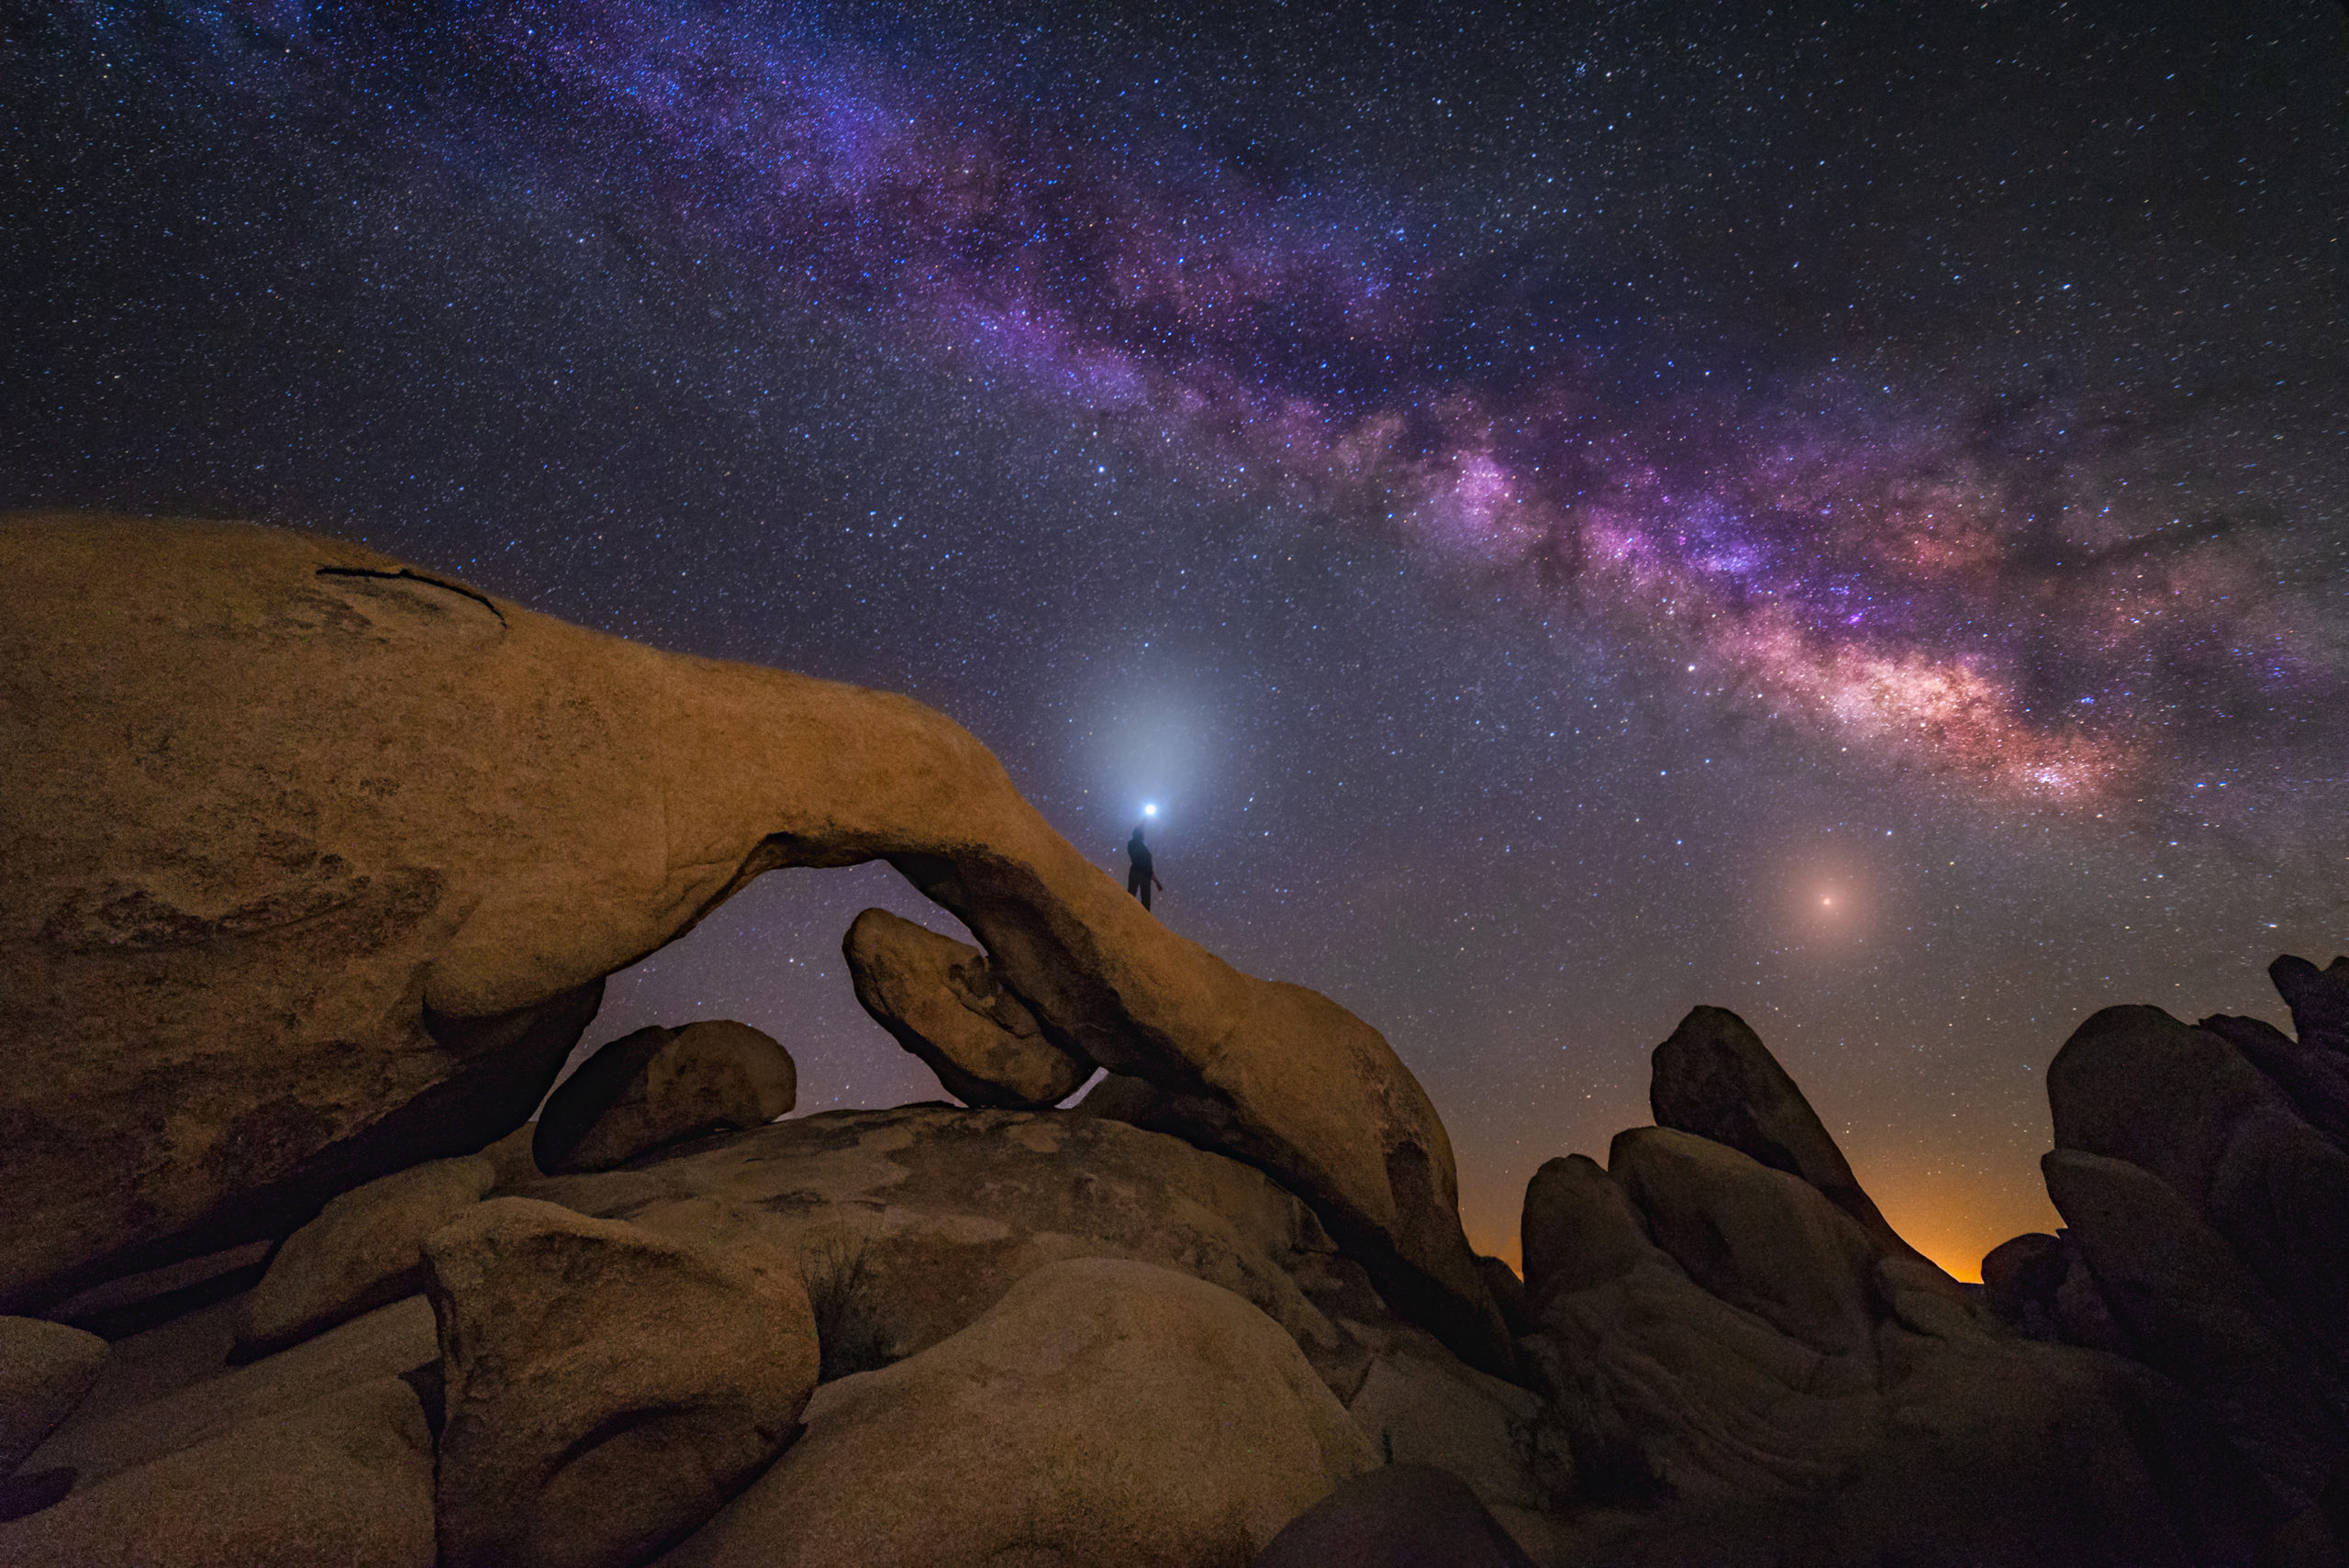
Here is an example of using a flashlight to focus (You do not need to climb on a rock to focus:)
Double Check the Focus
This is just a reminder that whenever you take a picture, ALWAYS DOUBLE CHECK your focus.
Zoom in to the image and make sure those stars and the landscape are crystal clear sharp.
I cannot tell you the feeling you get when you return from a very fun night shooting the stars, only to realize that the focus was off by just a little.
It’s like an itch that won’t go away. It seems to stare at you directly in the eyes, almost taunting you.
Okay okay, maybe I am overreacting a little… NOT.
Double-check your focus every time you take a picture at night. It can make or break all of the images you capture!
With all of these tips, you can now have confidence when you focus at night!
Have fun and clear skies!