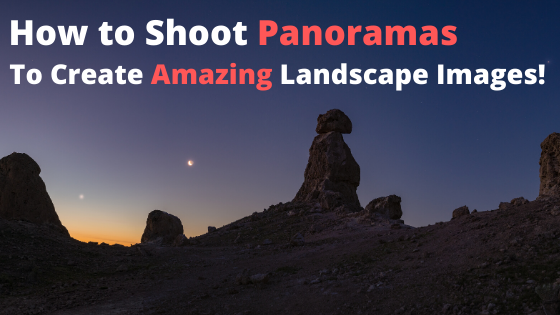
Panoramas are a very fun and creative photography technique.
Ever wanted to capture an entire scene but the lens you had only captured part of it? That is what panoramas are for!
What is a panorama?
A panorama is a technique in which you take multiple pictures that overlap each other and blend them together in a software. This creates a photo that shows a field of view all the way up to 180-degrees and more!
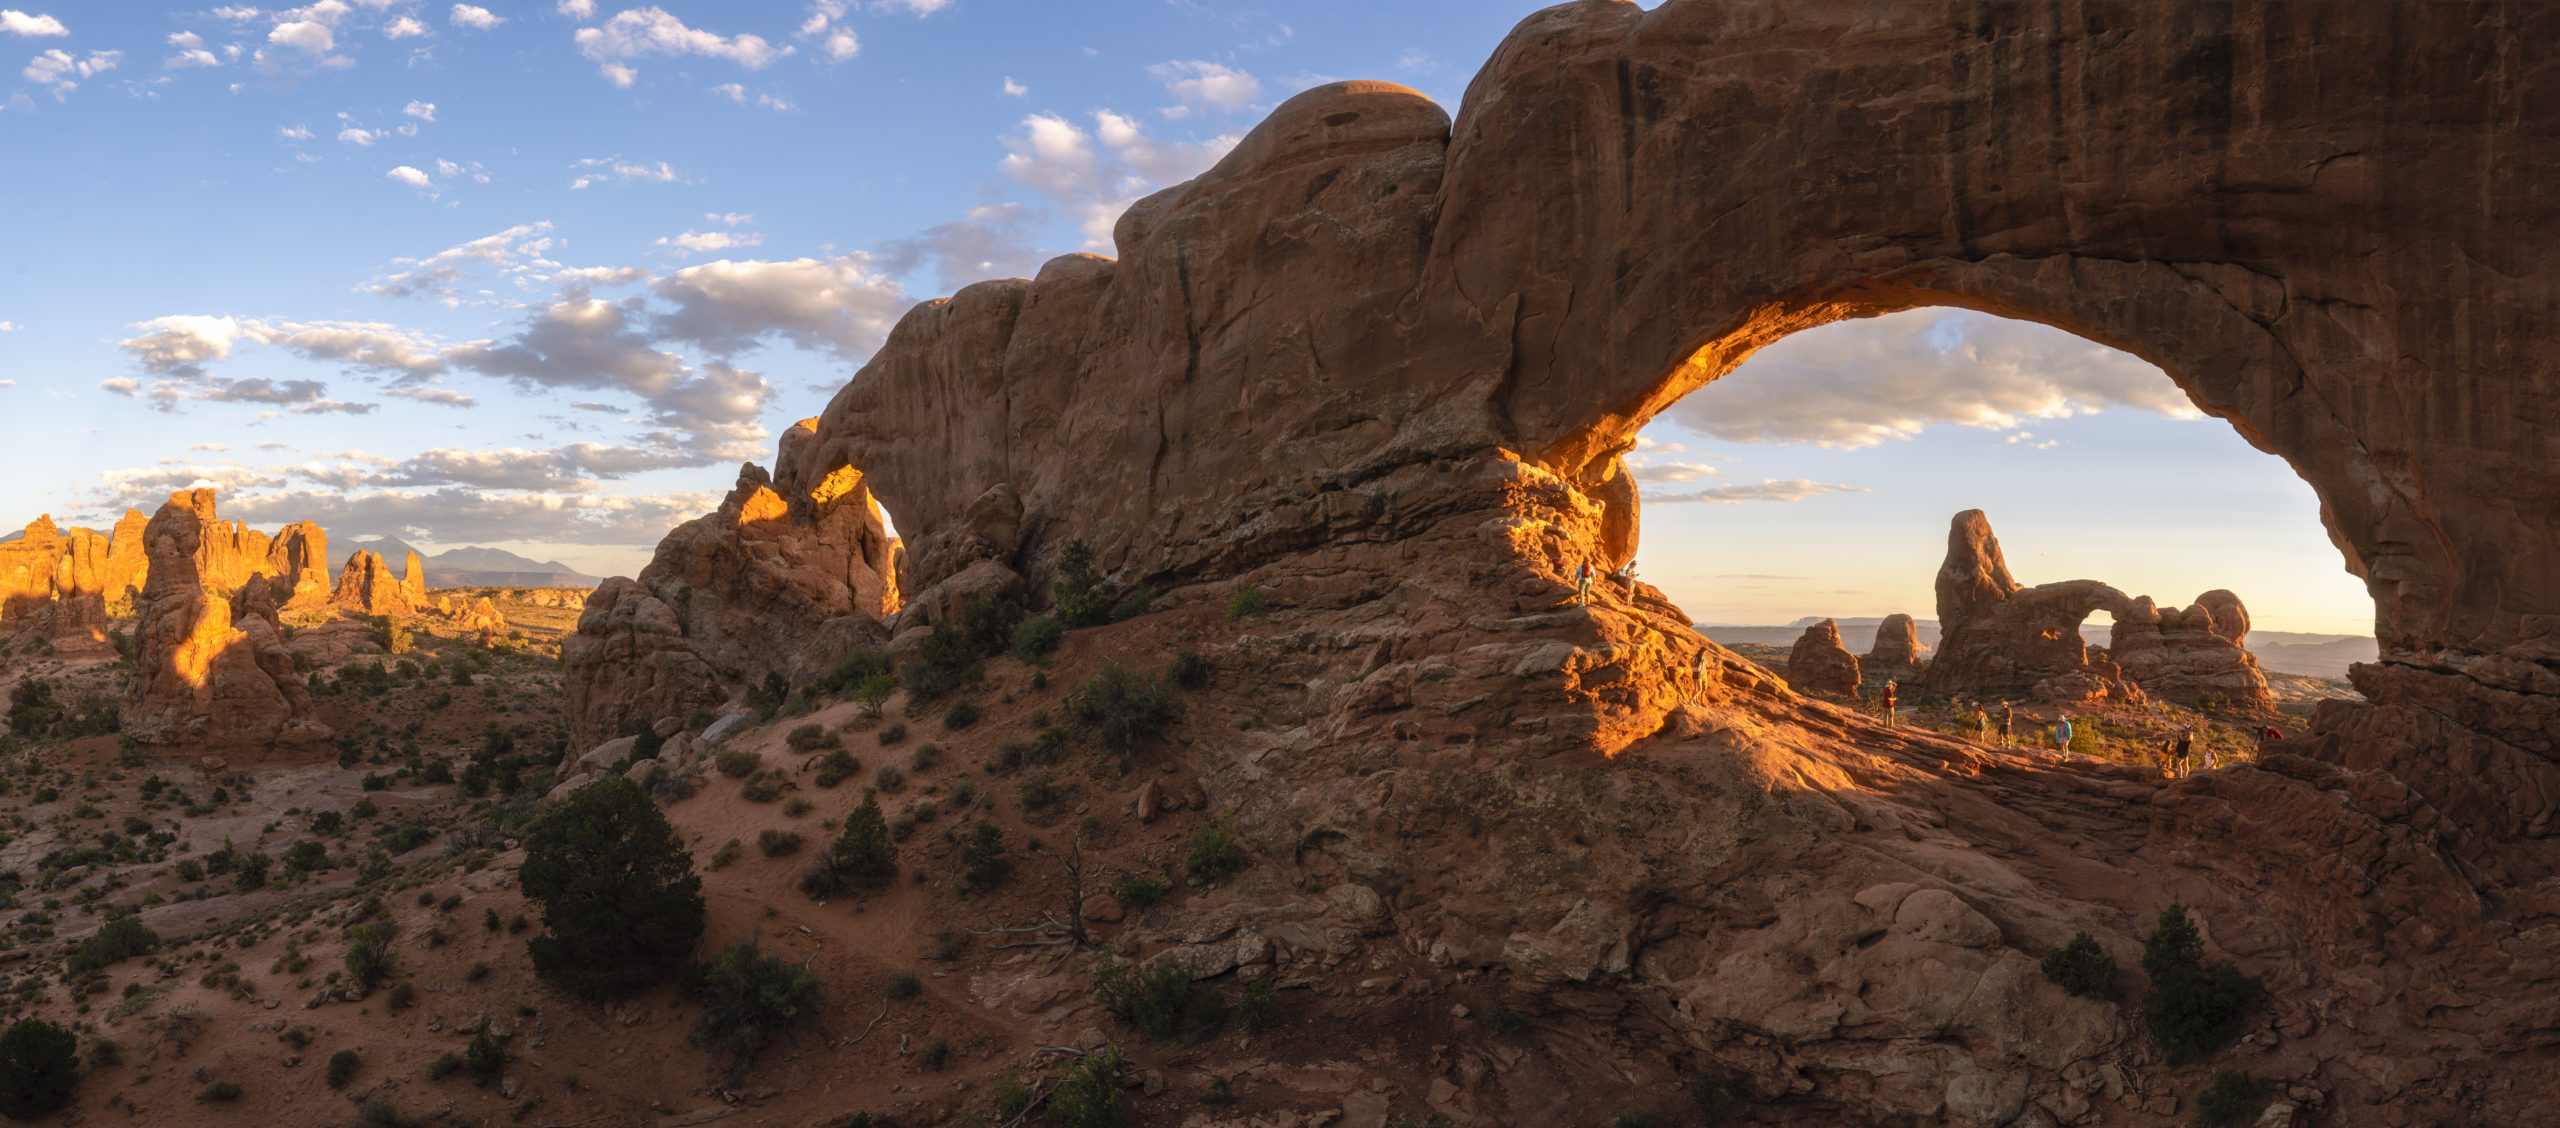
You might be familiar with panoramas from the choice on your phone camera, where there is an option to pan left to right, and bam! A panorama is made.
With DSLR’s, it is the exact same idea, just more steps involved.
But the extra steps are definitely worth it!
Why shoot panoramas?
You might be asking why not just take a single photo with a wide-angle lens? Here are some explanations.
- Wide-angle lenses can produce unwanted distortion
- Your wide-angle lens might not be wide enough to capture the entire scene
- Panoramas produce very high-resolution images, meaning you can print at very large sizes
- Instead of buying a specialist wide-angle lens, a standard lens can be used to get an even more amazing effect
- They can give you unique perspectives to particular scenes
How do you shoot a panorama?
First off, you need a tripod.
This will allow you to have your camera remain stationary throughout the whole process, which will make it a lot easier to align your images in post-processing.
Sure you can try and do a handheld panorama, but it takes a lot of skill, knowledge, and practice to do it correctly.
Main Idea: Always use a tripod when taking a panorama!
To start taking pictures for a panorama, I HIGHLY recommend shooting in a vertical orientation.
You might think, doesn’t it make more sense to shoot horizontally, to capture more of the area? It would require fewer shots, which would make the overall process faster, right?
Yes and no.
Vertical orientation can take a little more time but it allows you to capture the sky as well as the foreground. Trust me, taking a few more shots to include the sky can make your panoramas that much better.
It will also give you more leeway when combining the images in an editing software.
To get your camera in a vertical orientation, you can either swivel the camera sideways, if you are using a ball head, or purchase an L-Bracket, which can place your camera sideways and still have it attached to the “top” of the tripod head.
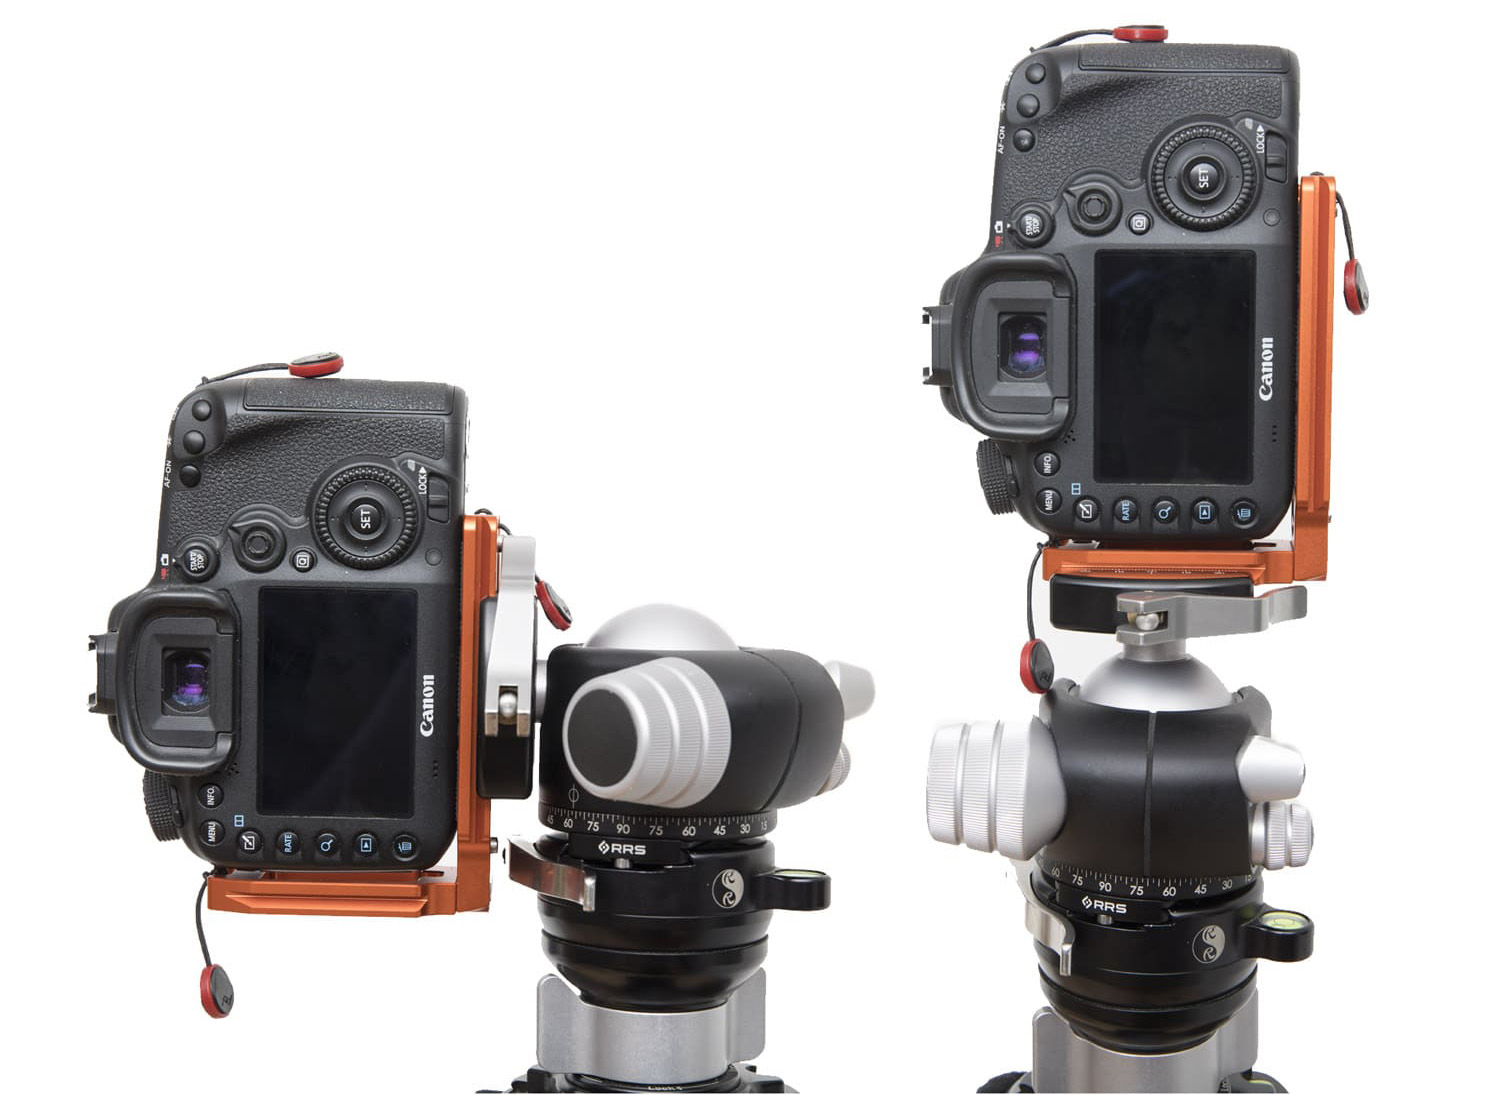
Left side: the camera is turned onto its side by the ball head. Right side: an L-Bracket is being used to keep the ball head positioned upwards.
Which lenses should you use for panoramas?
Panoramas are great in the sense that any lens will work.
I have shot panoramas ranging from 14mm lenses to 70mm lenses.
Ideally, wide-angle lenses are easier for taking panoramas because of how much of the scene they can capture, and it takes fewer shots to make.
For example, taking a panorama of a landscape, a wide-angle lens could capture it in 4 or 5 shots. If you had a zoom lens, you would have to take double the shots and maybe add in additional rows to get the same effect.
So why would you ever shoot panoramas with a zoom lens?
Zoom lenses can be used for shooting a subject that is farther away and if you want to create a more intimate panorama. Just know that taking a panorama with a zoom lens requires more time and has to involve more overlapping areas, bringing me to my next point.
What is overlap and how does it involve capturing panoramas?
When you start taking a panorama, you take a picture, turn your camera slightly and take another picture.
For the editing software to blend those images together, you should aim to overlap them by about 30%.
Instead of trying to guess what 30% is when turning your camera, you can go by the increments shown on the ballhead. That way, each shot is the same amount of overlap. For wide-angle lenses, 30-degree increments are good, and for zoom lenses, 15-degree increments seem to work.
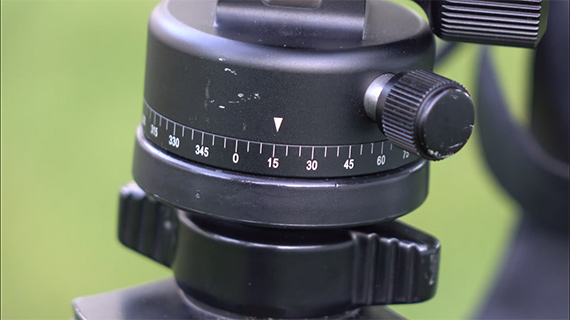
This allows for the software to see where the first photo starts and ends, and makes it easier to align the pictures.
You can imagine if your panorama is made up of 10+ images, how crucial overlap is!
Consistency is key when shooting panoramas.
How do you blend a panorama together in post-processing?
So you took your first panorama and are beyond excited to see how it turned out.
Problem is, you don’t know how to blend it.
Thankfully, it is a very easy process.
However, you will need to purchase (or do a free trial) for an editing software.
My top recommendations are Adobe Lightroom and/or Adobe Photoshop.
Adobe does have a plan called Creative Cloud that lets you use Lightroom and Photoshop for $9.99/month. Sadly, you cannot buy these softwares separately or for a one time fee. I do however, 100% recommend buying the Creative Cloud plan.
Getting back to the editing portion, Lightroom and Photoshop are both capable of blending panoramas. I believe that Lightroom is easier, however.
The steps down below will show you how to easily create a panorama in Lightroom.
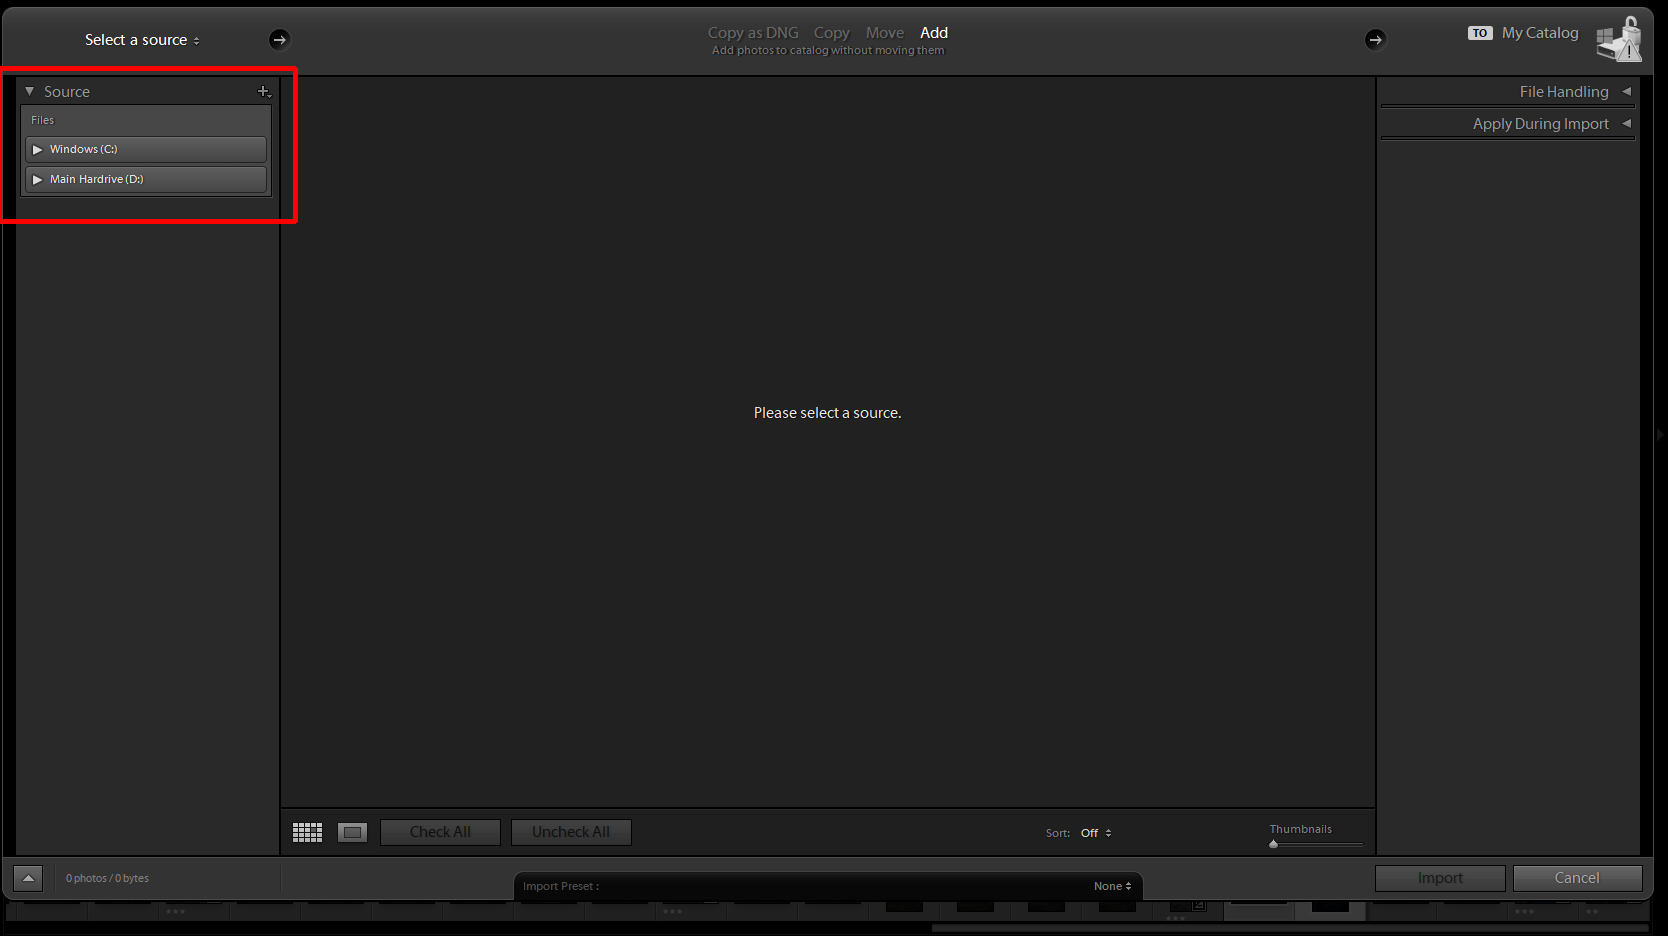
Step 1: Choose images from your computer
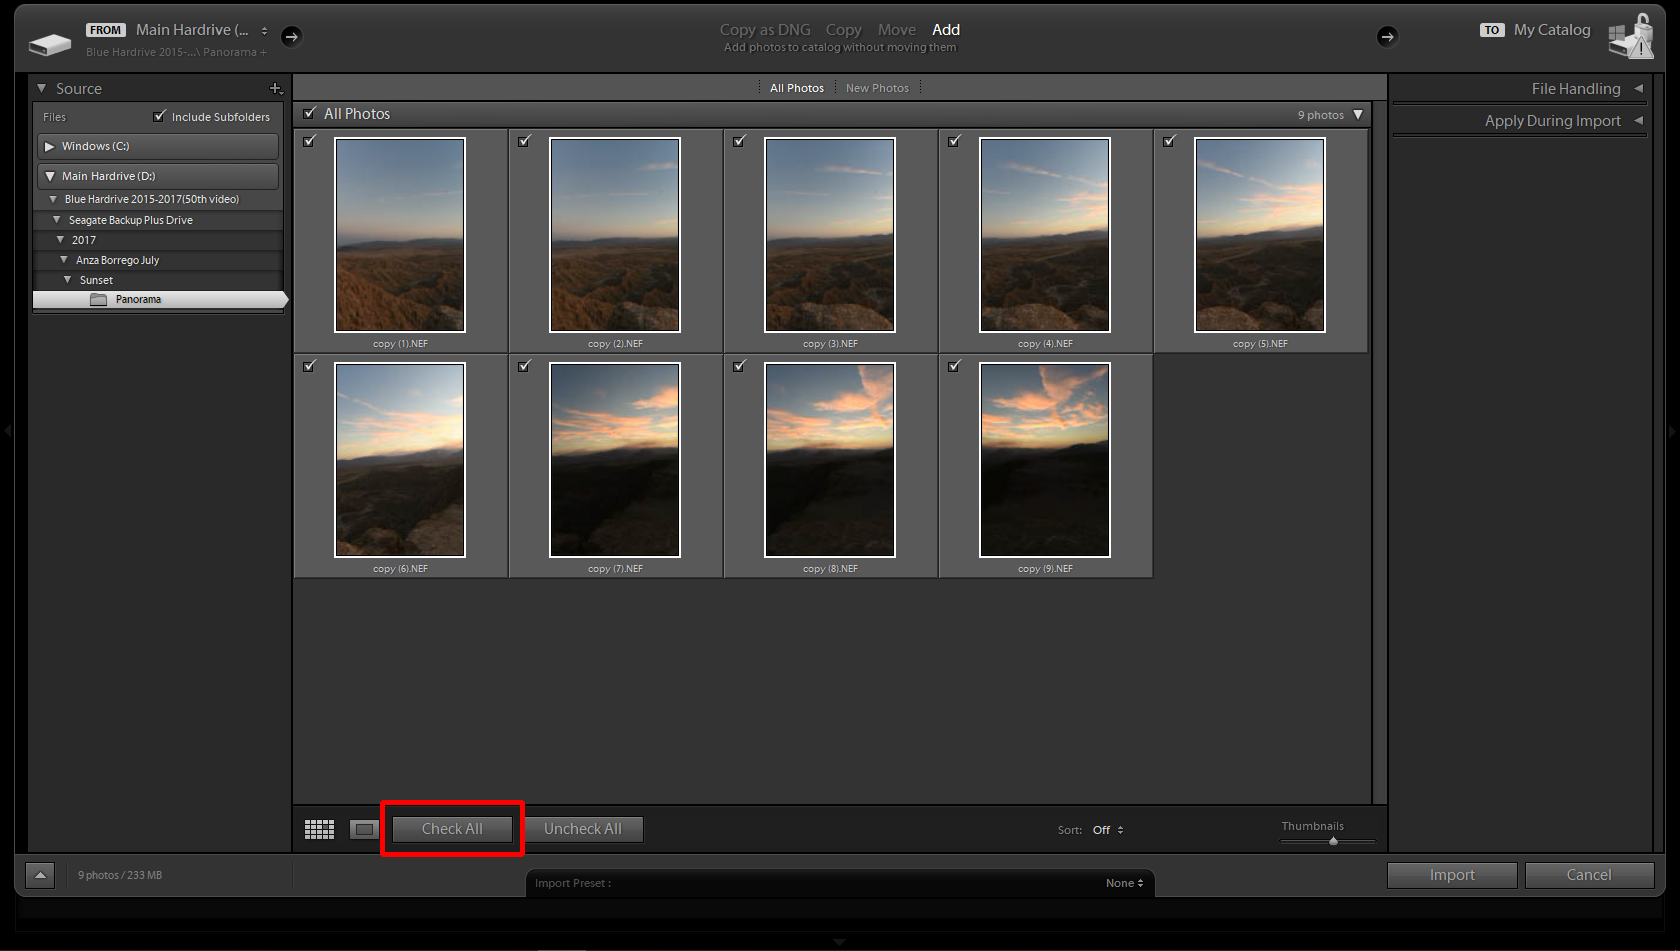
Step 2: Click “Check All” to select all of the images to be imported
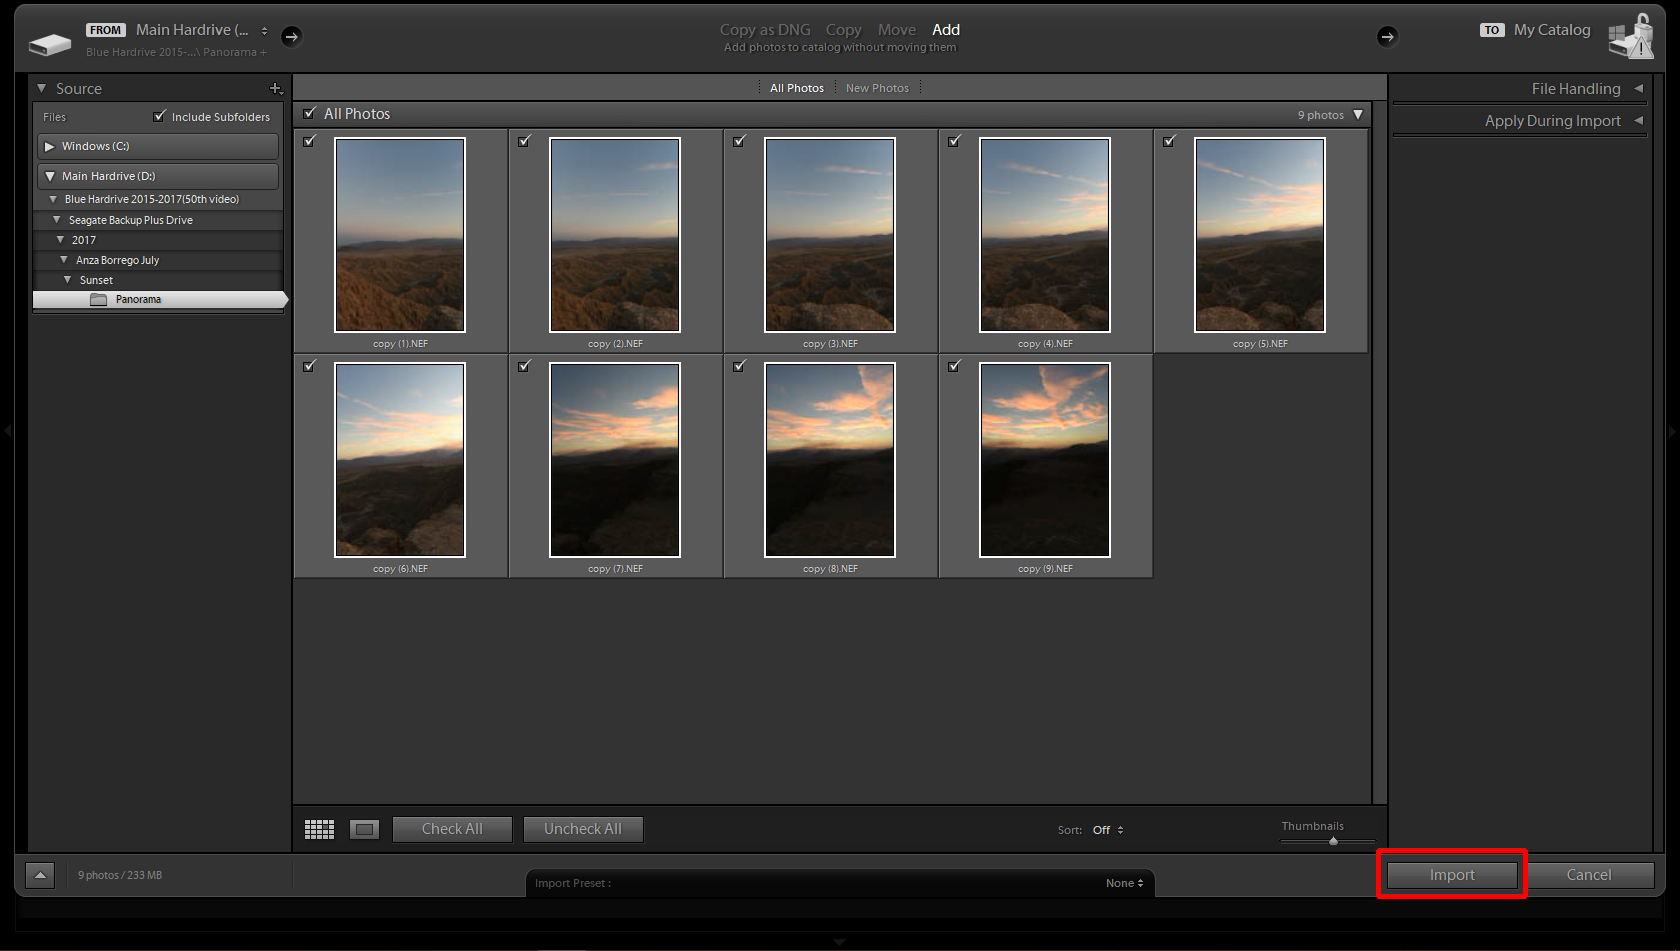
Step 3: Import photos
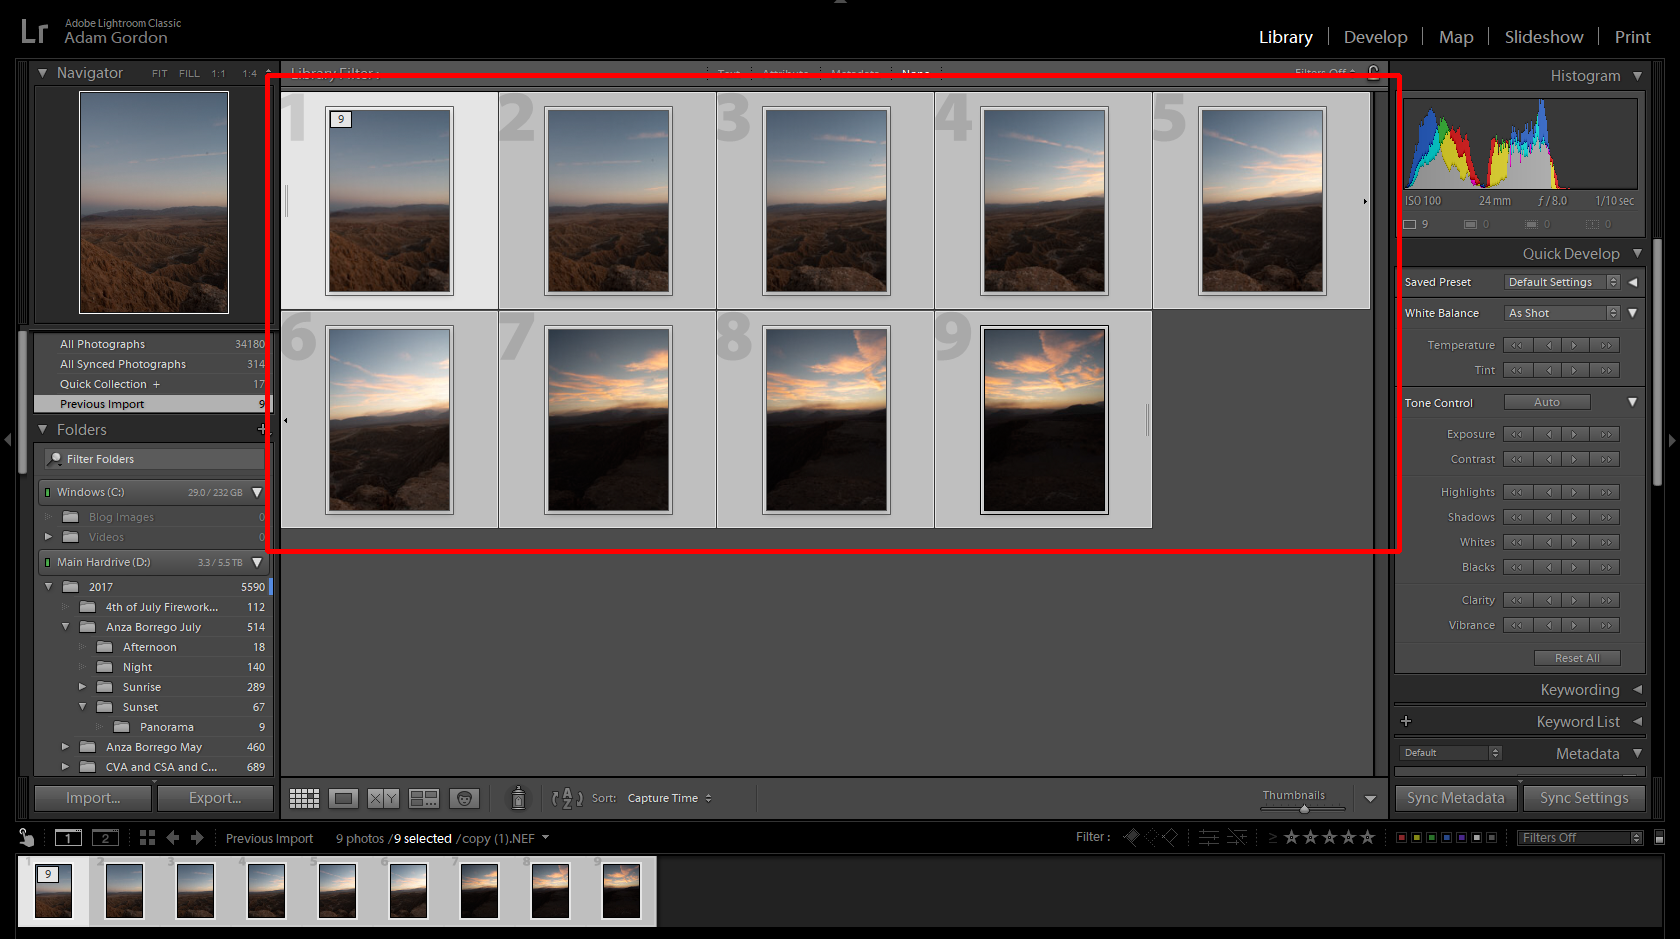
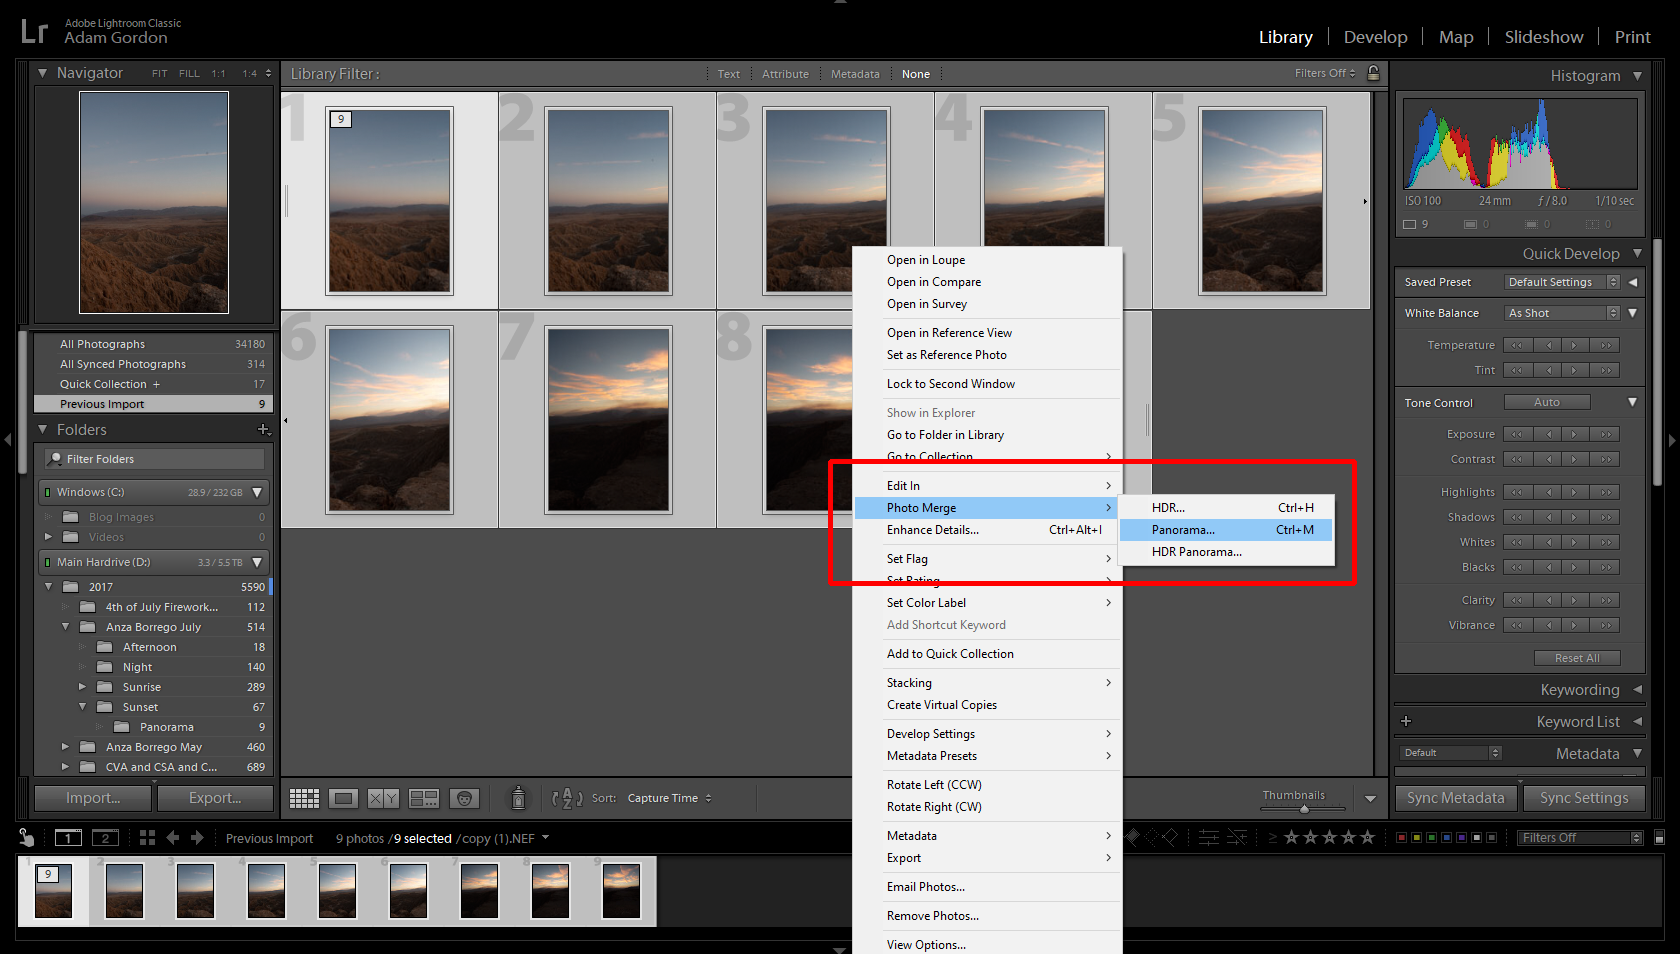
Step 4: Select photos for the panorama (either Ctrl + A or Shift-Click them)
Step 5: Right-click and go to Photo Merge>Panorama (keyboard shortcut Ctrl + M)
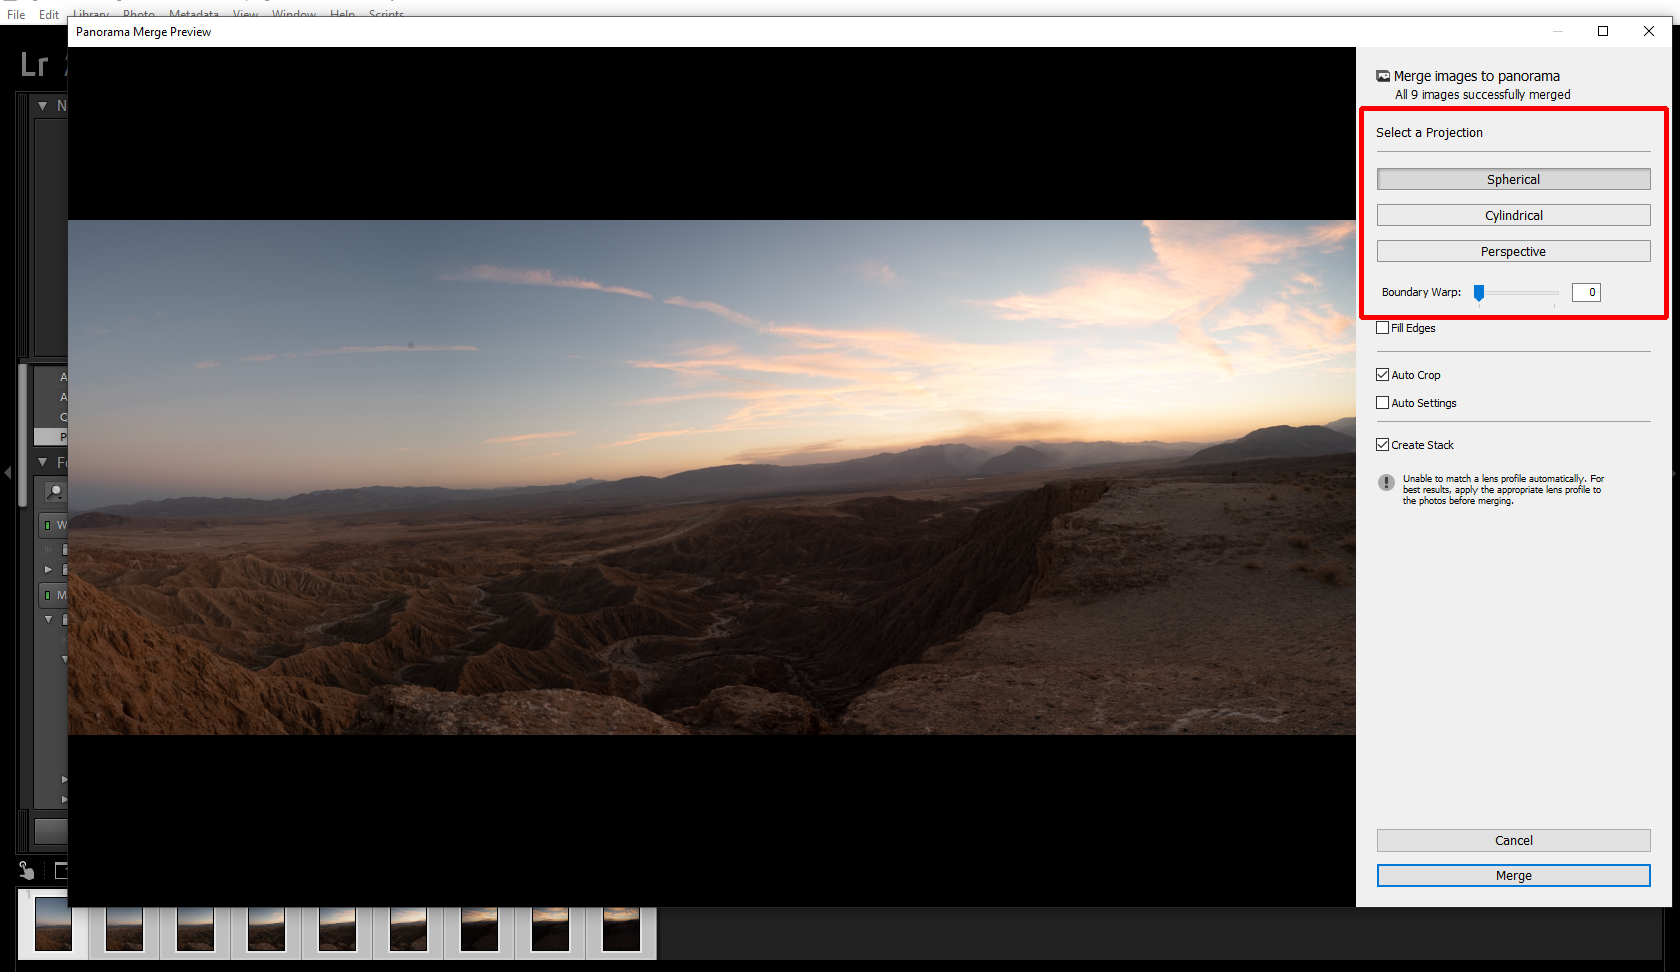
Step 6: Once merged, cycle through the Spherical, Cylindrical, and Perspective options to see which one creates the best panorama
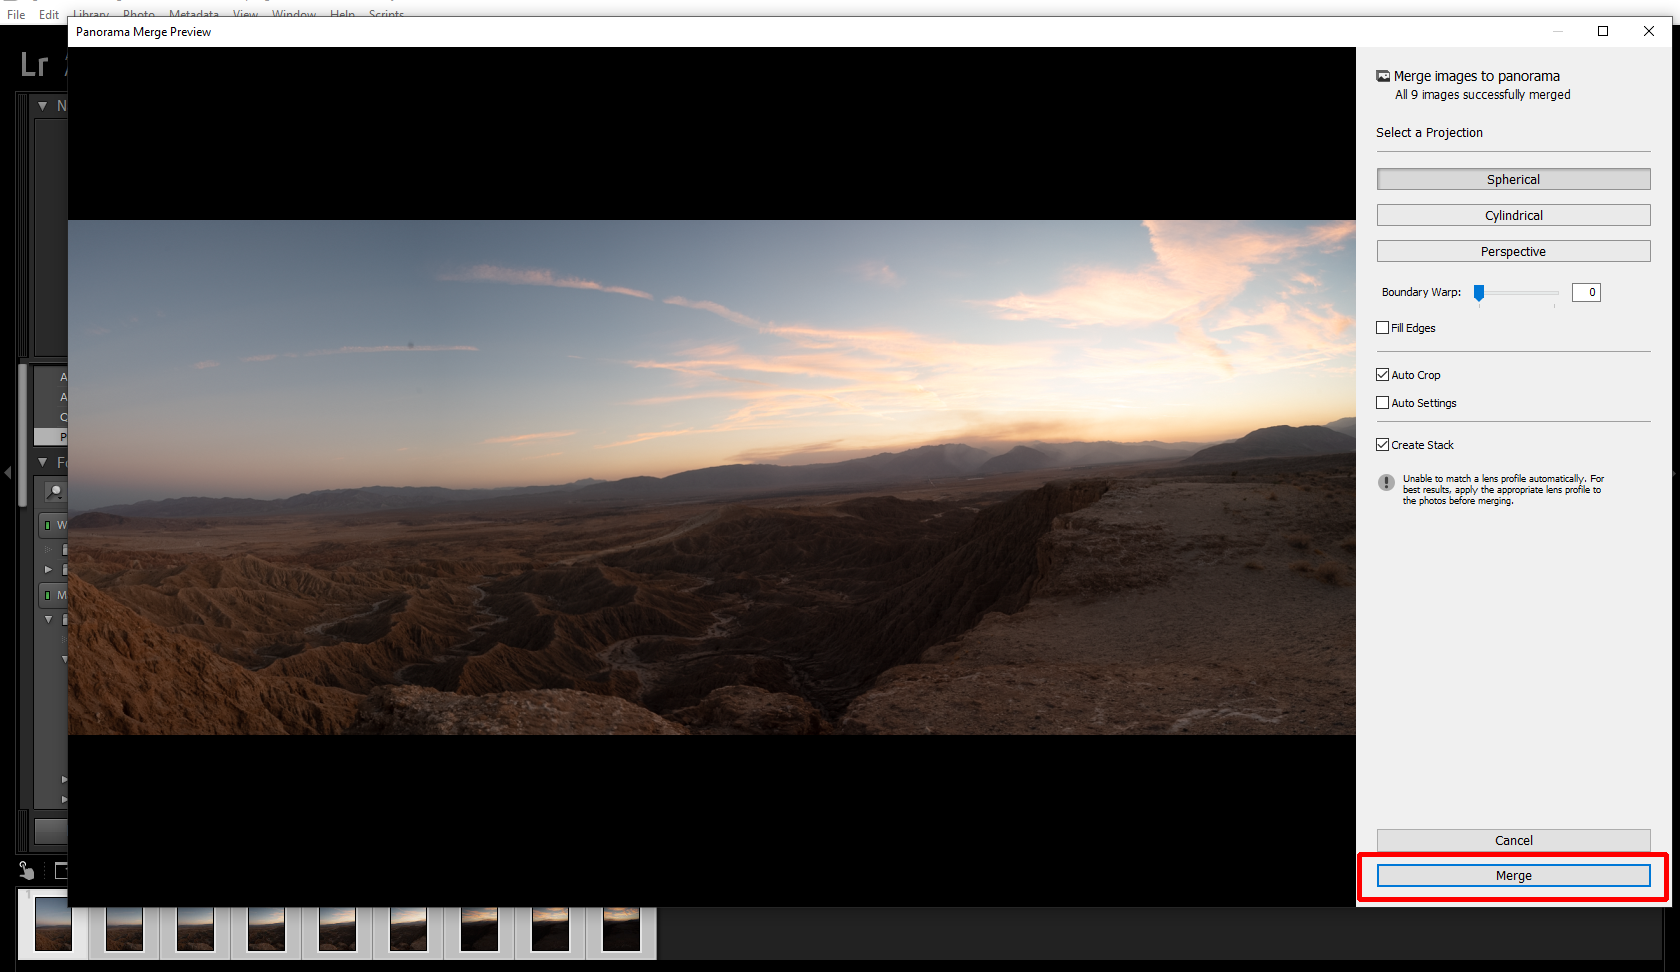
Step 7: Once decided, click Merge
Step 8: View your newly merged panorama
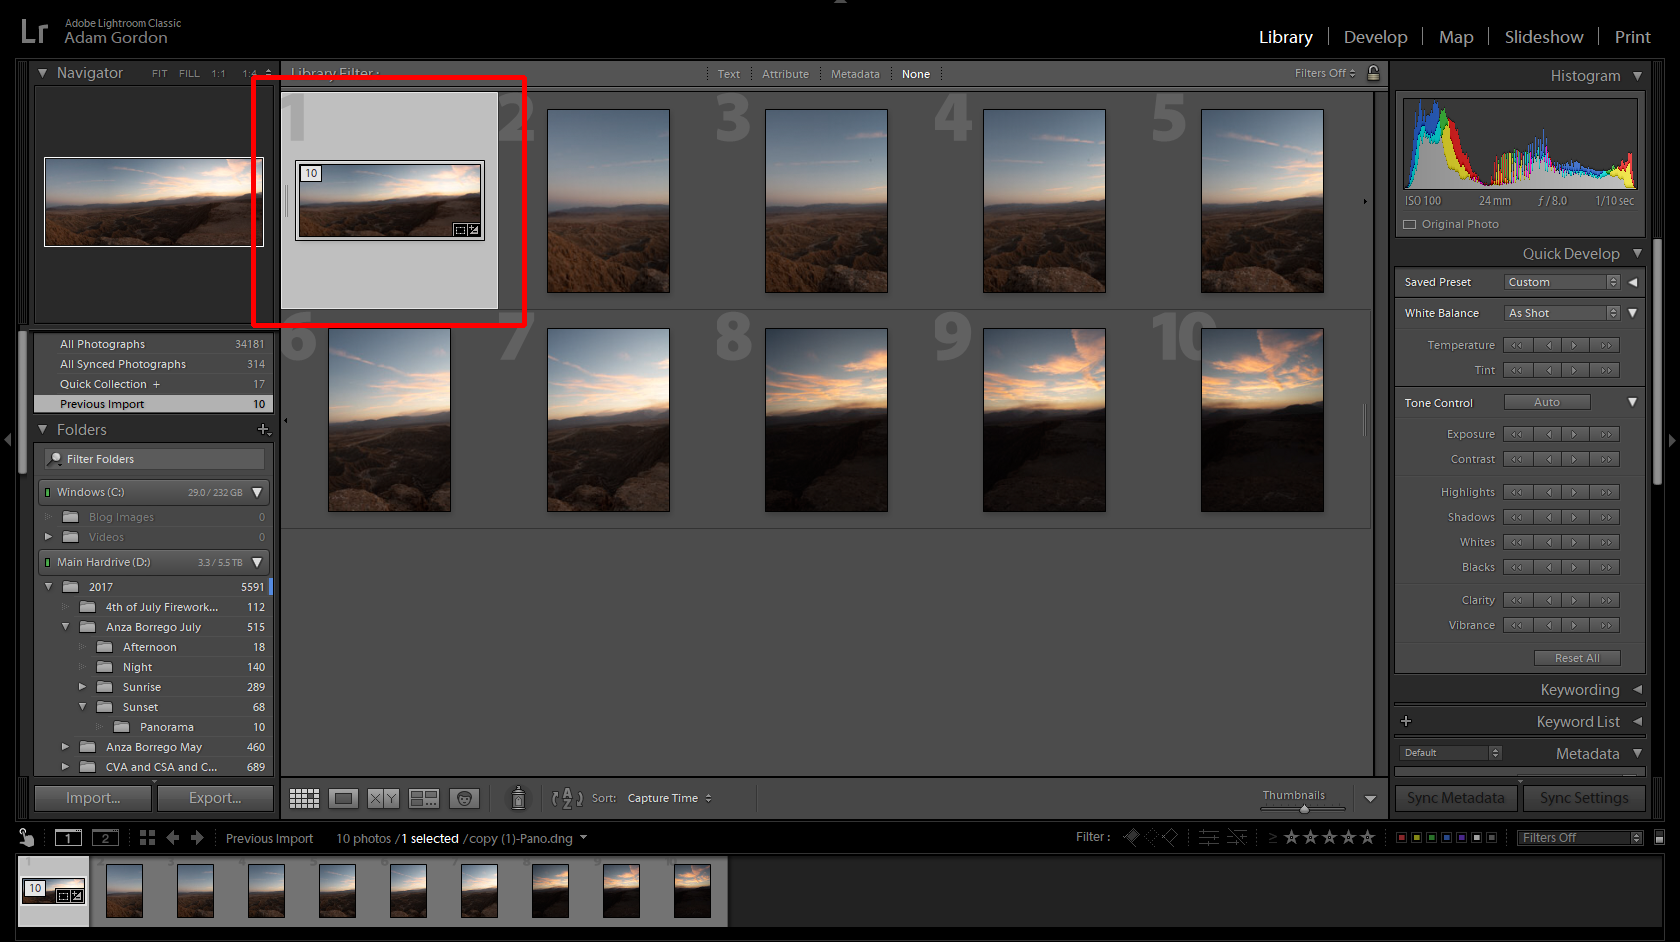
And here’s the result! (with some slight edits)
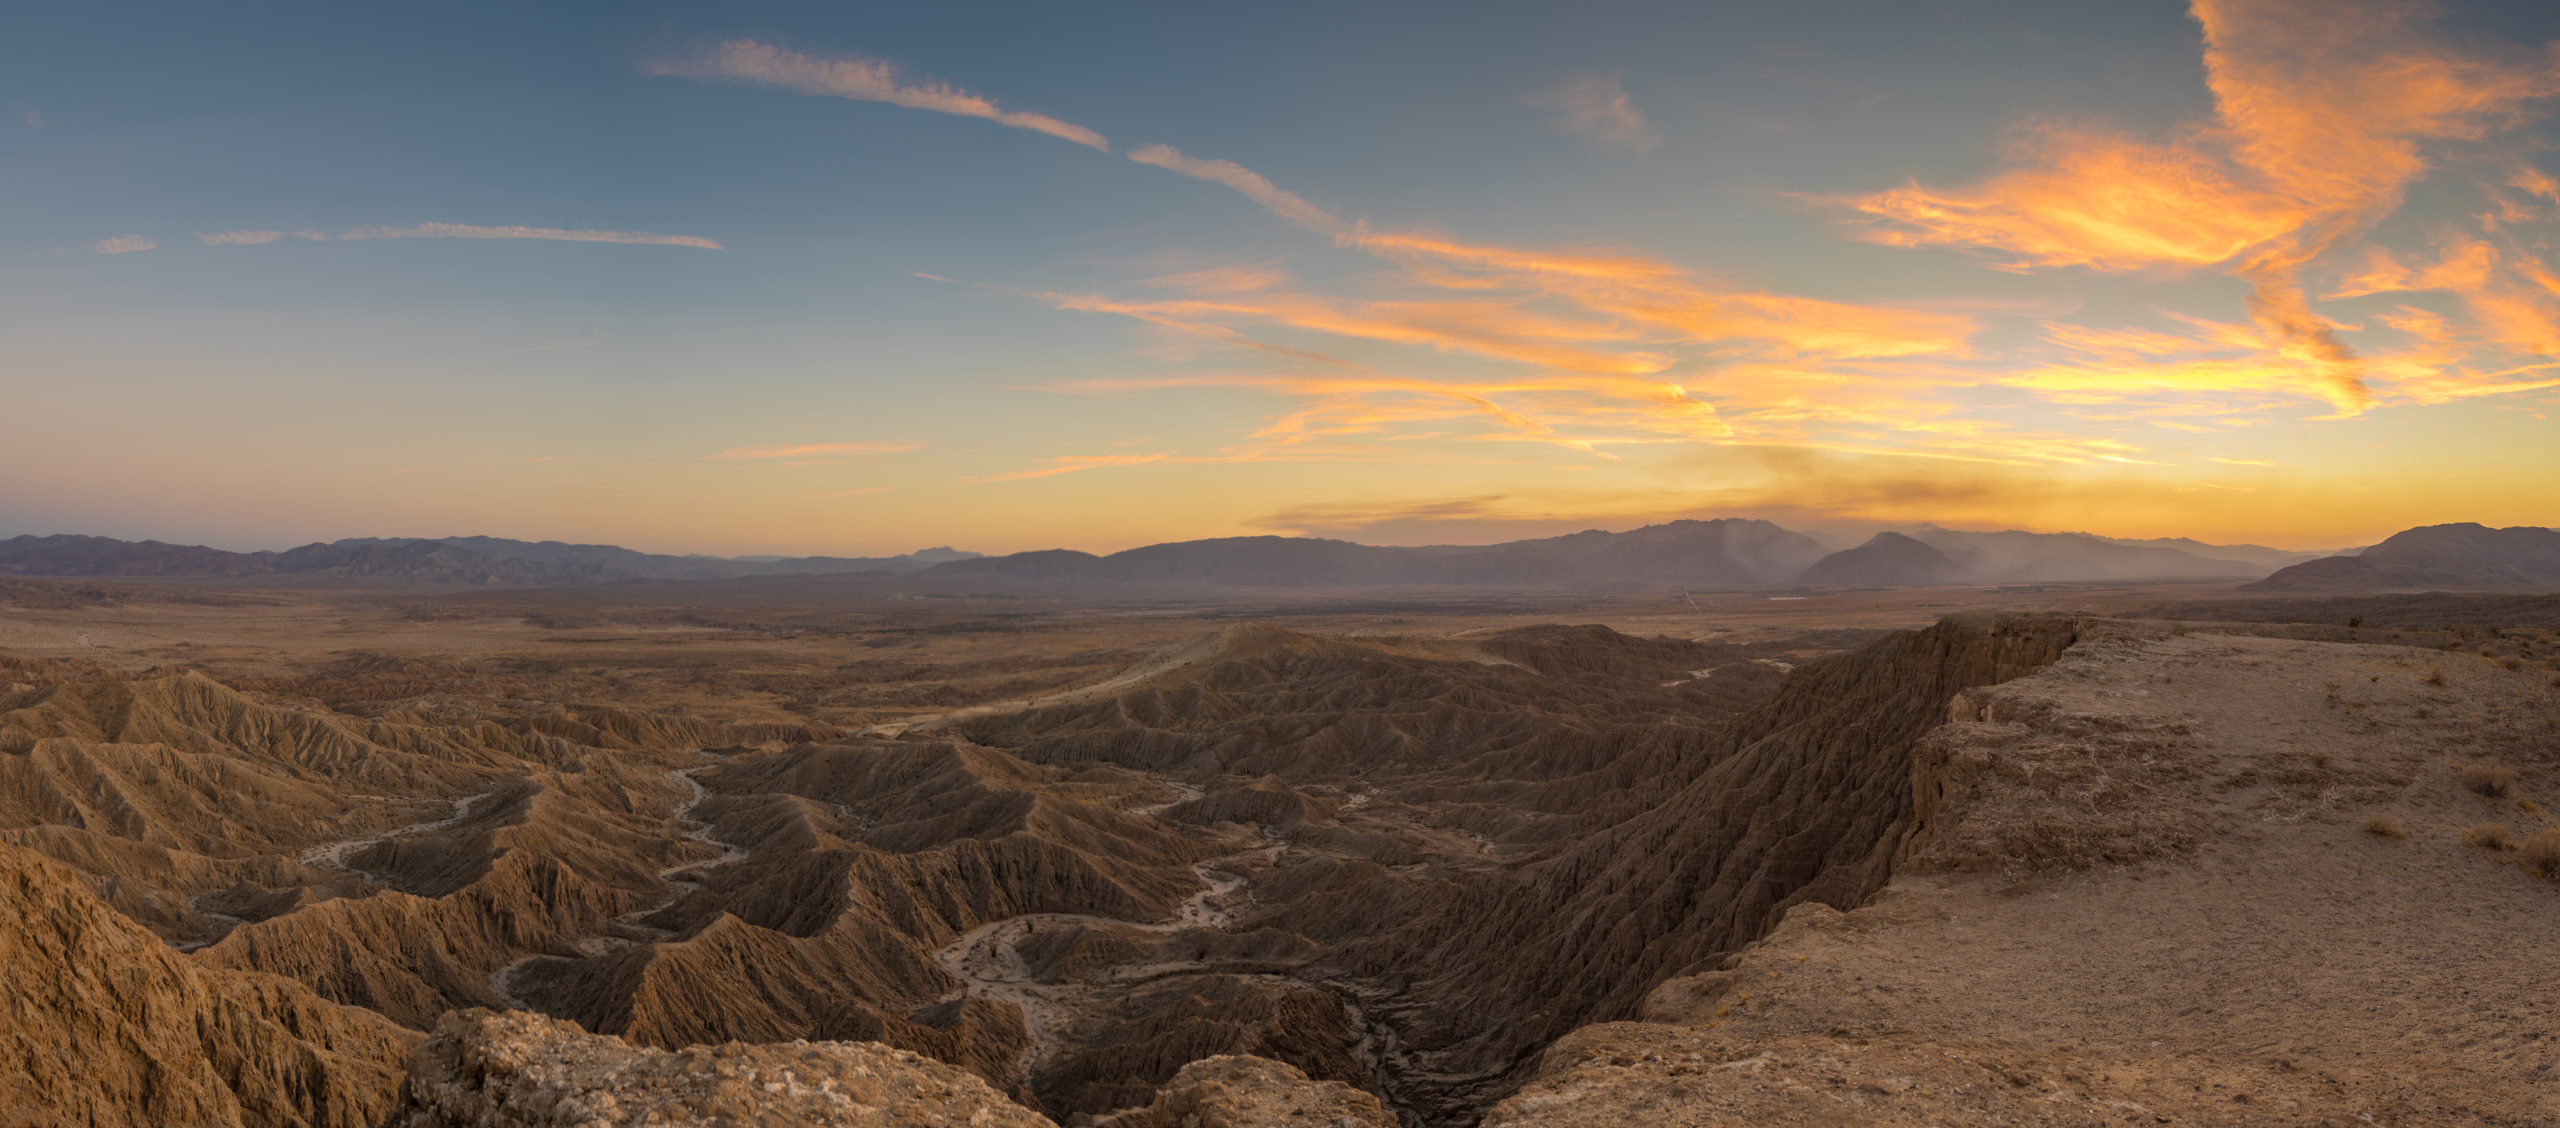
Congratulations! You have officially learned how to shoot and edit panoramas.
With any new photography technique, remember to practice, practice, and PRACTICE!
So go out there and start shooting panoramas! They are a fun and unique technique you can incorporate into your photography.
