So you just bought your first camera and you are beyond excited to start using it. That trip to that national park you’ve been wanting to go to for years might be starting to get planned. You cannot wait to bring your friends along and take amazing pictures of them or capture that once in a lifetime sunrise or sunset. I get it, I’ve been there. It feels like an itch that won’t go away. You cannot wait to start photographing. But before you book that plane ticket, or plan that road trip, there are 11 important parts of the camera you need to know to properly use it. Trust me, you do not want to show up to a location that seems to be beyond words and go to take a picture and not understand why it’s not capturing what you’re seeing.
So, here are 11 of the most important parts of a camera you should know as a beginner.
- The lens cap
- The Lens
- The Mode Dial
- The Shutter Button
- The Detach Lens Button
- The Battery Compartment
- The SD Compartment
- The Playback Button
- The Self Timer Button
- The On/Off Button
- The LCD Screen/Viewfinder
1. The Lens Cap
The lens cap is, just as the name states, a cap for your lens. Its job is to protect the front part of your lens from scratches or dust. Most lens caps are extremely easy to remove, as you just squeeze the two inner parts of the cap and it will come straight off. Others just require you to simply slide them off.
NOW, THIS NEXT PART I AM GOING TO TELL YOU MIGHT BE THE SINGLE GREATEST ADVICE IN CAMERA HISTORY. Whenever you are about to take a picture, ALWAYS ALWAYS make sure the lens cap is off. You might be thinking “Duh, why would I ever not do that.” However, I guarantee that you will do this at least once if not a dozen times while photographing. I have personally made the simple mistake more times than I count. I can embarrassingly say that I have been out in the middle of the night taking pictures for well over 10 minutes wondering why my screen was just black and then finally realizing that my lens cap had been on the whole time.
The good thing about this mistake is that it does not harm your camera at all. It just takes away time capturing
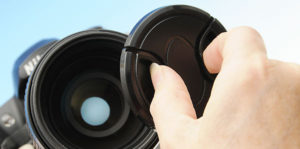
To use most lens caps, you simply pinch the middle “sliders” to either take it off or put it back on.
great images! With your lens cap, you should be able to easily take it off and put it back on in less than 10 seconds. Being able to do this, will make you that more confident when going off to photograph a place or a person. There will be many spurs of the moments when you need to quickly turn your camera on and start shooting. So it is extremely necessary to be able to take your lens cap off in a safe and efficient manner.
2. The Lens
Whether you are taking pictures with a digital camera (DSLR) or a point and shoot camera, you will have to understand what the lens is and what it can do for you and your images. The lens of the camera is the cylindrical part that “sticks out” from the body of the camera. It is considered to be the most important part of the camera. But why is the lens so important you may ask? Because it determines the focal length.
The focal length is a word you will run into a lot when learning about photography. It determines how zoomed in the image is or how wide the image is. For example, say you are looking at a picture of a Moose, zoomed into just its face and another picture of a lake in the mountains. The moose image used a higher focal length, which in turn is why you just see its face and nothing else. The lake and mountains image, however, was captured using a wide focal length, to capture as much of the scenery as possible. Lenses are responsible for this.
When searching for lenses, you might read descriptions like 18-55mm or 70-300mm and be completely confused.
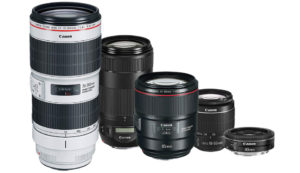
Lenses come in all sizes.
Why are millimeters being used when discussing cameras? The truth of it is, those numbers are “telling” you what kind of picture you can capture with them.
- Wide Lenses: 14mm-24mm (Landscape Photography)
- Zoom Lenses: 70mm-600mm (Wildlife Photography)
- Prime Lenses (no zoom): 50mm or 85mm (Portrait Lenses)
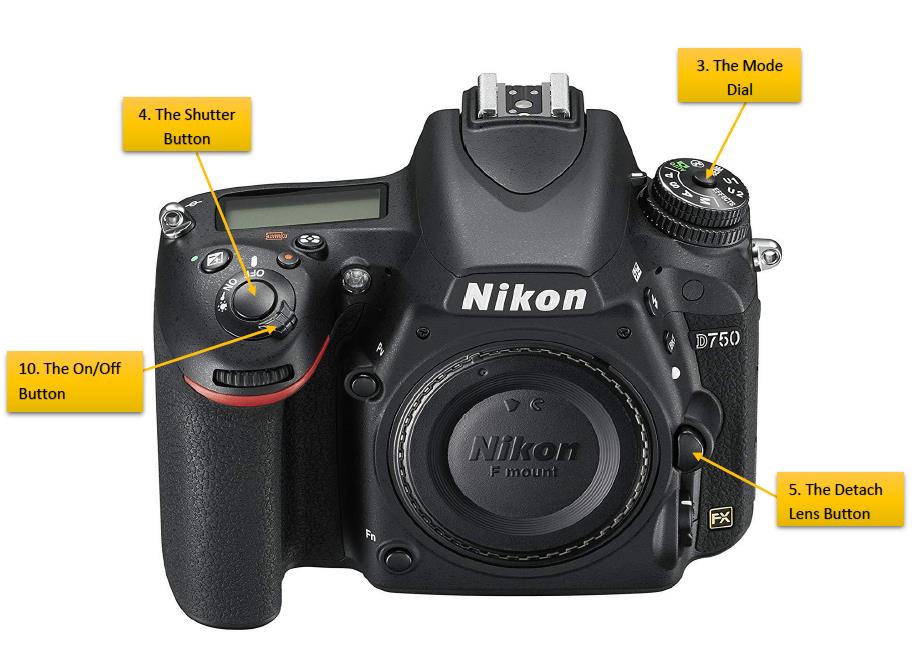
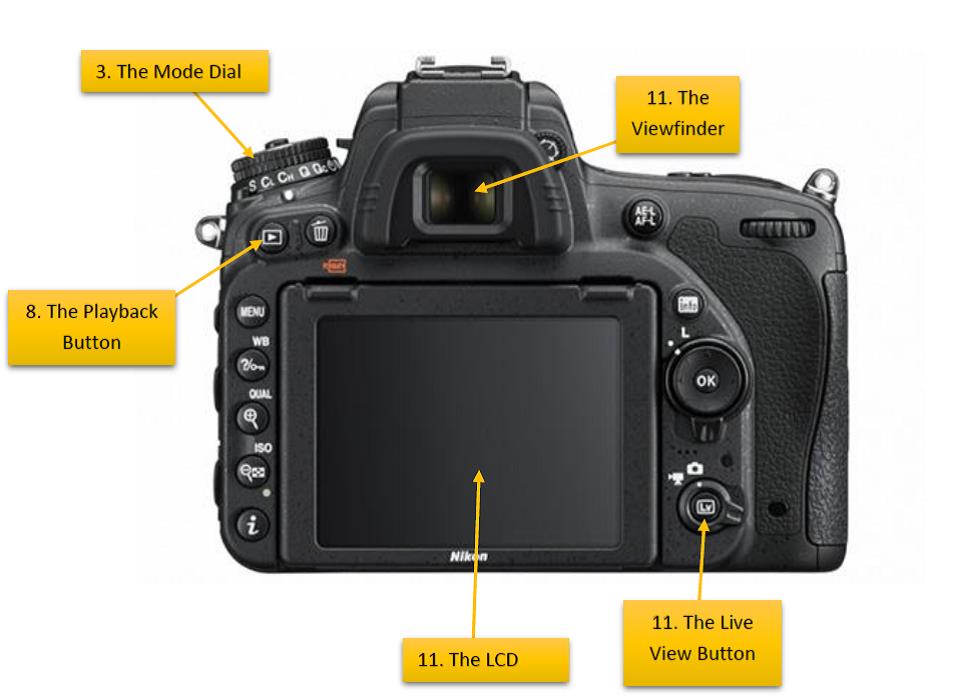
3. The Mode Dial
The Mode Dial is located on the top of the camera on the right or left side. It is a circular nob that has different letters and some images on it. This dial is responsible for choosing whether you are shooting in AUTO mode or MANUAL (M) mode. This is the dial that you would switch to AUTO when giving your camera to a stranger to take a picture of you. This dial also controls whether you have full control of the settings on your camera (like controlling how bright or dark the picture will be).
To summarize, the mode dial is responsible for whether or not you have full control of the camera. (Note that Canon and Nikon’s Mode Dials are fairly similar, yet display a few differences).
Canon’s “TV” is Nikon’s “S” and Canon’s “AV” is Nikon’s “A”.
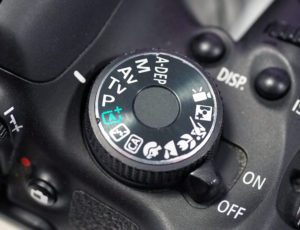
Canon Mode Dial
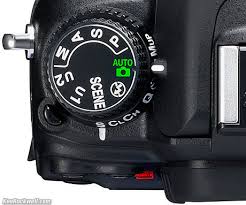
Nikon Mode Dial
4. The Shutter Button
This might be the most crucial part of any camera as it is the literal button that controls the camera to take the picture. It turns that vision into an image. The shutter button is located on the right side of the camera and is positioned specifically for your pointer finger. If you are using autofocus, half-pressing or lightly pressing the button will focus the image, and giving it a full complete push and hearing the unmistakable click of the camera is what takes the picture.
The silver circle is the shutter button and is usually right next to the on/off switch.
5. The Detach Lens Button
This button applies to all who have a DSLR. If you have a point and shoot camera, you do not have this button as your lens is not detachable. This button is located on the left side of the camera right next to the lens. By pressing and holding, you can gently twist your lens for it to come off, allowing you to switch between different lenses i.e. different focal lengths.
When putting your lens back on, there is either a red or white line/dot on the back of the lens. There will be a similar red or white line/dot on the camera where the lens should go. Match up these lines and twist. For Nikon cameras, you twist counter-clockwise (left) to put a lens on and for Canon you twist clockwise (right). Boom! You successfully know how to take a lens off and put one on. This is also a skill you should learn to do in under 10 seconds.
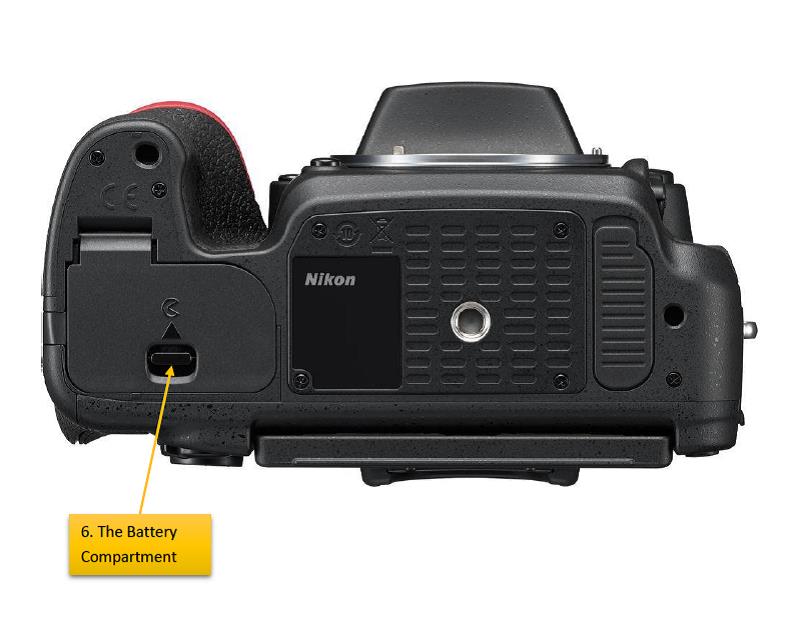
6. The Battery Compartment
As the name suggests, the battery compartment is where the battery of the camera is stored. It is usually located on the bottom of the camera. To access the battery, you flip open the “lid” and then push down on the yellow safety release button. The battery should slowly be popped out. For some cameras, the battery compartment and SD card compartment are shared in one place. For others, they are located in two separate areas. You should learn to take the battery in and out in under 10 seconds as well.
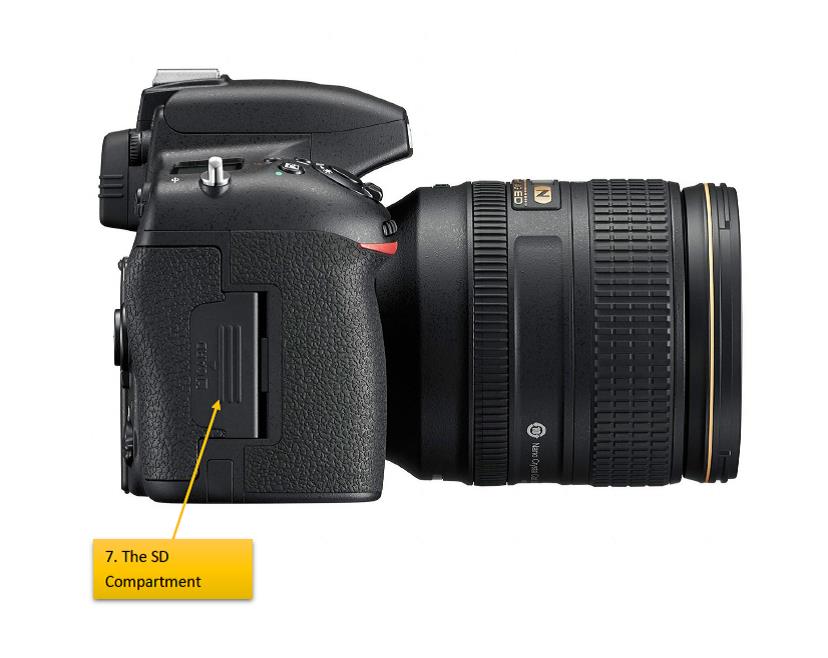
7. The SD Card Compartment
The SD Card is also a very very important part of the camera. It is where all of your images or videos are stored. An important note is when flipping the SD card over, you see little gold bars on the top. DO NOT TOUCH THESE as that is where the information is stored. Always make sure you are gripping the SD card from the bottom and handle it with care. Losing or breaking this means that there is a high chance that all of your images could be gone.
The compartment for the SD card is either located on the bottom of the camera or on the side. Once you flip the lid open, press down lightly on the SD card for it to pop halfway out. After this, you can slowly pull it out. When putting the SD card in, there is only one way it goes in (just like a hard drive). NEVER force the SD card in! Taking the SD card out and putting it back in is another skill you should learn to do in under 10 seconds.
8. The Playback Button
This button has an arrow or sideways triangle symbol on it and is located next to your LCD screen on the back of the camera. This button allows you to view your images. It is a quick and easy way to see what images you have captured!
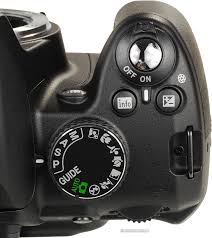
9. The Self Timer Button
Remember those old family photos where mom or dad pushed a button, ran into the frame as quickly as possible, and you all held a smiling pose for about ten seconds waiting for a click. Yep, that’s this button.
The self-timer button is made for the selfie enthusiasts or anyone who wants to take a picture of themselves when nobody else is around. And of course, it can be used for those big family group shots. Depending on what camera you have, this “button” can be in many different areas. For some cameras, it is a literal button next to the lens detach button. For other cameras, it’s accessed by the 4 sided dial on the back of your camera. You will see a stopwatch symbol; click toward it and your camera should show that it is ready to take a timed picture.
Another aspect of this button is you can set different durations. The most standard is 10 seconds, but most cameras have the option of doing a 2, 5, or even 20-second timer. These different times can either be accessed through the menu button or through the area where you got the timer ready in the first place.
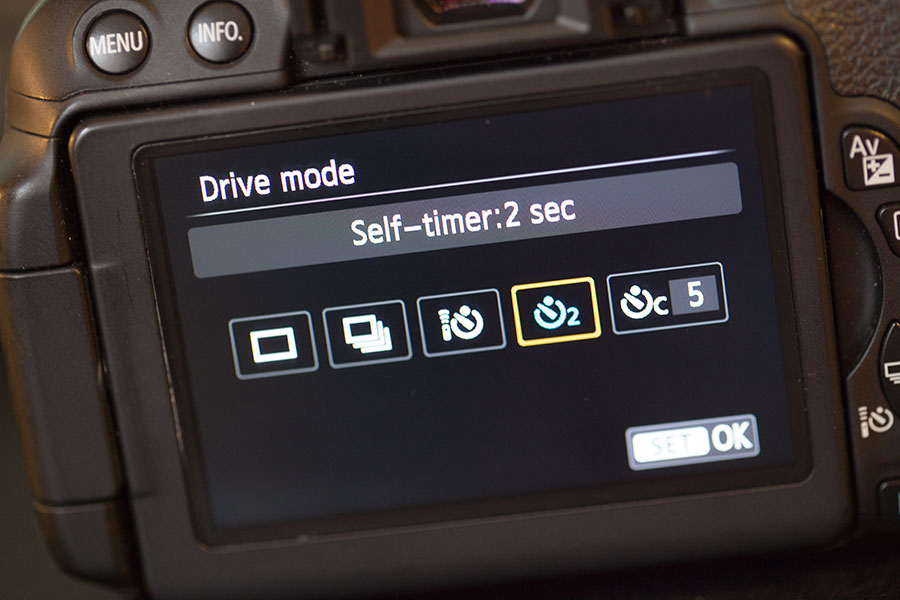
The yellow highlighted region is showing the self-timer logo. It looks a little like a stopwatch.
10. The On/Off Switch
You guessed it, this switch is responsible for turning the camera on and off. It is what allows you to even take a picture or change a setting. Usually, these switches are located right next to the shutter button and are clearly labeled. I always recommend that when not photographing, or simply just walking around, remember to turn your camera off to save power.
11. The LCD Screen/Viewfinder
This one is the screen on the back of your camera. It allows you to view your images, check your menu settings, and see what your camera sees before taking the picture. When you are changing settings and want to see how they are going to affect the image in real-time, you use the LCD screen.
On the other hand, the viewfinder is on the back upper section of your camera and is a small box that you can look through to see what your camera is seeing. It is associated with that stereotypical image of a photographer taking pictures; where there face is smushed against the camera.
The difference between the LCD screen and viewfinder is the viewfinder does not change (get brighter or darker) when you change settings. You can think of the viewfinder as what your eyes see. The LCD screen, on the other hand, is what the camera sees. That is why when you take a picture it does not always perfectly mimic what your eyes are seeing.
The viewfinder is great to look through when you want to stabilize your camera more or just get more intimate with taking a picture. It is hard to explain, but when your eye is pressed up to the viewfinder and you are taking pictures, you feel one with the camera and with the subject or landscape you are photographing.
For DSLR cameras, you have to switch between the two, meaning that if you are in Live View mode (looking at the LCD screen), you cannot look through the viewfinder and vice versa. There is usually a button or switch to shift between the LCD screen and the viewfinder.