Adobe Lightroom is a very popular and powerful tool for photographers.
![]()
Most have heard of Adobe Photoshop, but some have been hidden from another photography treasure. Well, today that changes!
I am going to explain the ins and outs of Lightroom (as best I can in writing and pictures) and tell you why it is a necessity for photographers and digital creators alike!
What is Lightroom?
Lightroom is an editing application that you can get for either your desktop, mobile device, or both. Every year, the application installs new updates and usually a new name.
For the last few years, it has been referred to as Lightroom CC “year of release.” So if you ever get confused on the name, know that as of right now (2020), the newest version of Lightroom for desktop is named Lightroom Classic 2020. The mobile version is named Lightroom CC 2020. (I prefer the desktop version).
It is a designated software for photographers of any trade and is extremely useful when editing.
Lightroom is part of the Adobe Creative Cloud, meaning you cannot purchase Lightroom as a one time fee. It is part of a monthly subscription that combines both Lightroom and Photoshop.
What is it used for?
Since Lightroom and Photoshop are on the same plan, they work seamlessly together. Many photographers edit in Lightroom, edit in Photoshop, and then go back to Lightroom.
Lightroom’s main appeal, however, is to be used as a library or organizer for your photos.
You can categorize your photos with tags, colors, or locations, and even rate them. The photos and files are presented in the same place they are stored on your computer and also use the same names, which makes finding images relatively easy.
Besides sorting photos, Lightroom is a great place to learn how to edit a photograph (especially for beginners)!
I started out in Lightroom and almost solely used it for about a year before I started experimenting with Photoshop.
A great aspect of Lightroom is how user friendly it is. The settings are clearly defined, yet provide numerous options, making the program excellent for beginner and expert photographers.
Now that you know the general information of what Lightroom is used for, I’m going to take you step by step and show you how to import an image, edit an image, and export an image.
How to Import Photos
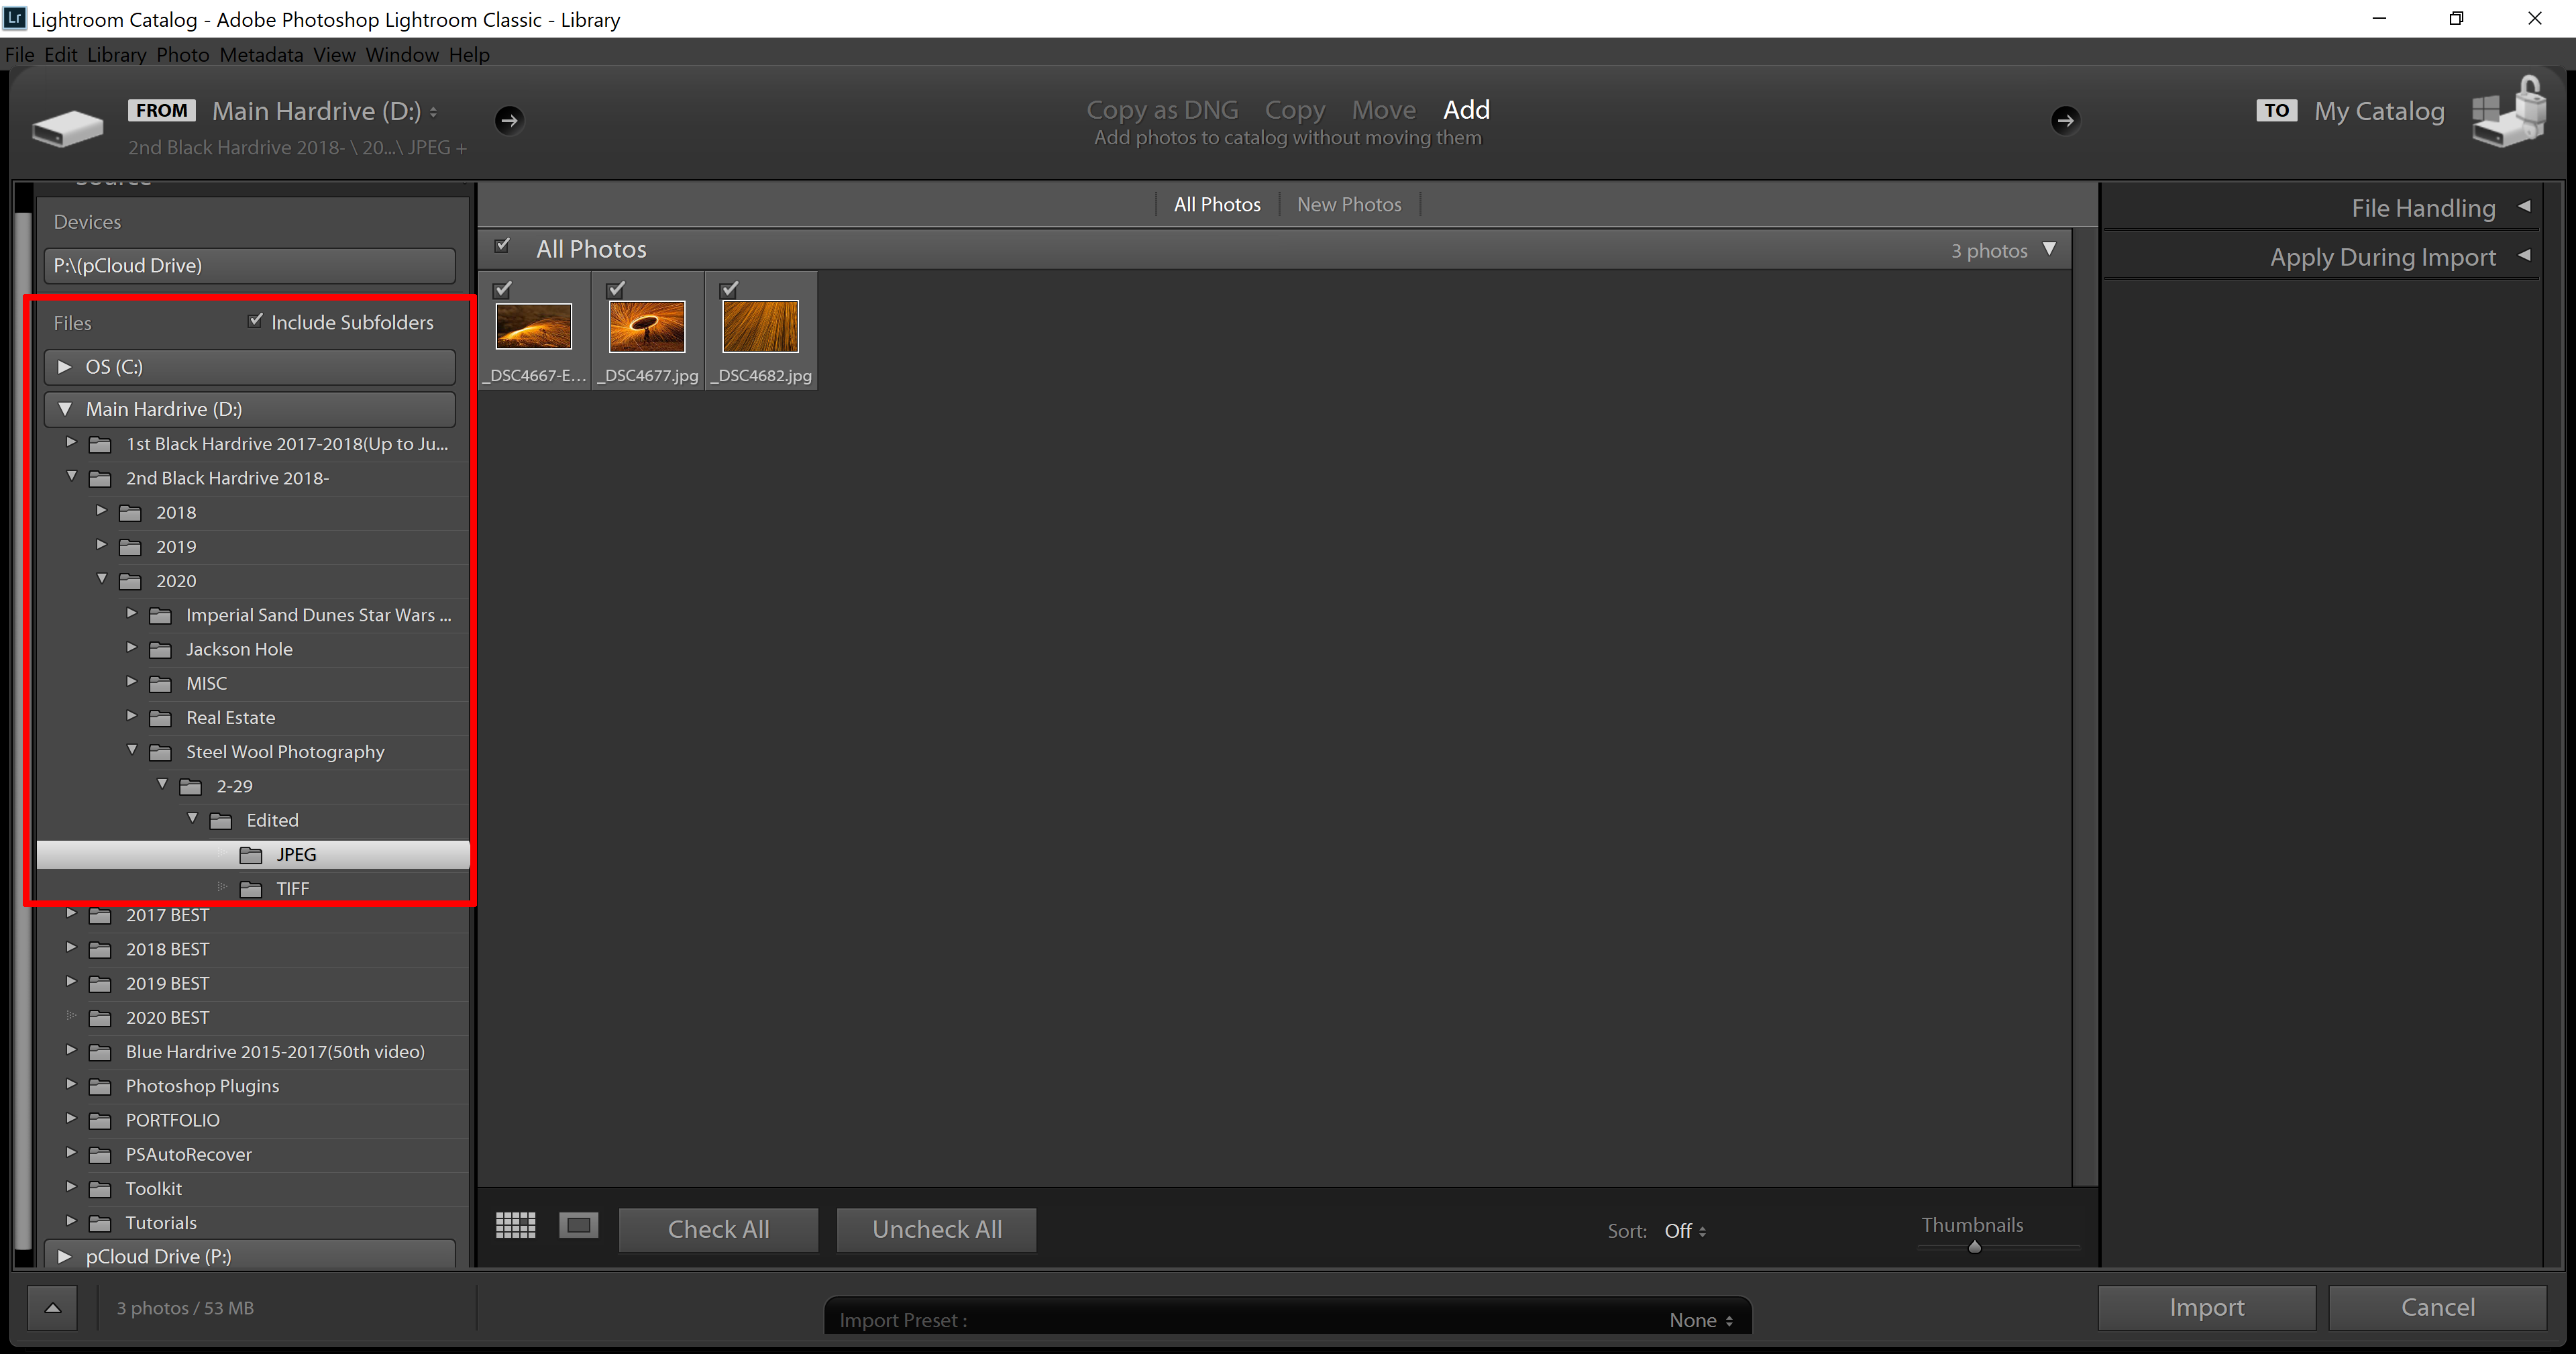
Open Lightroom and choose images from your computer
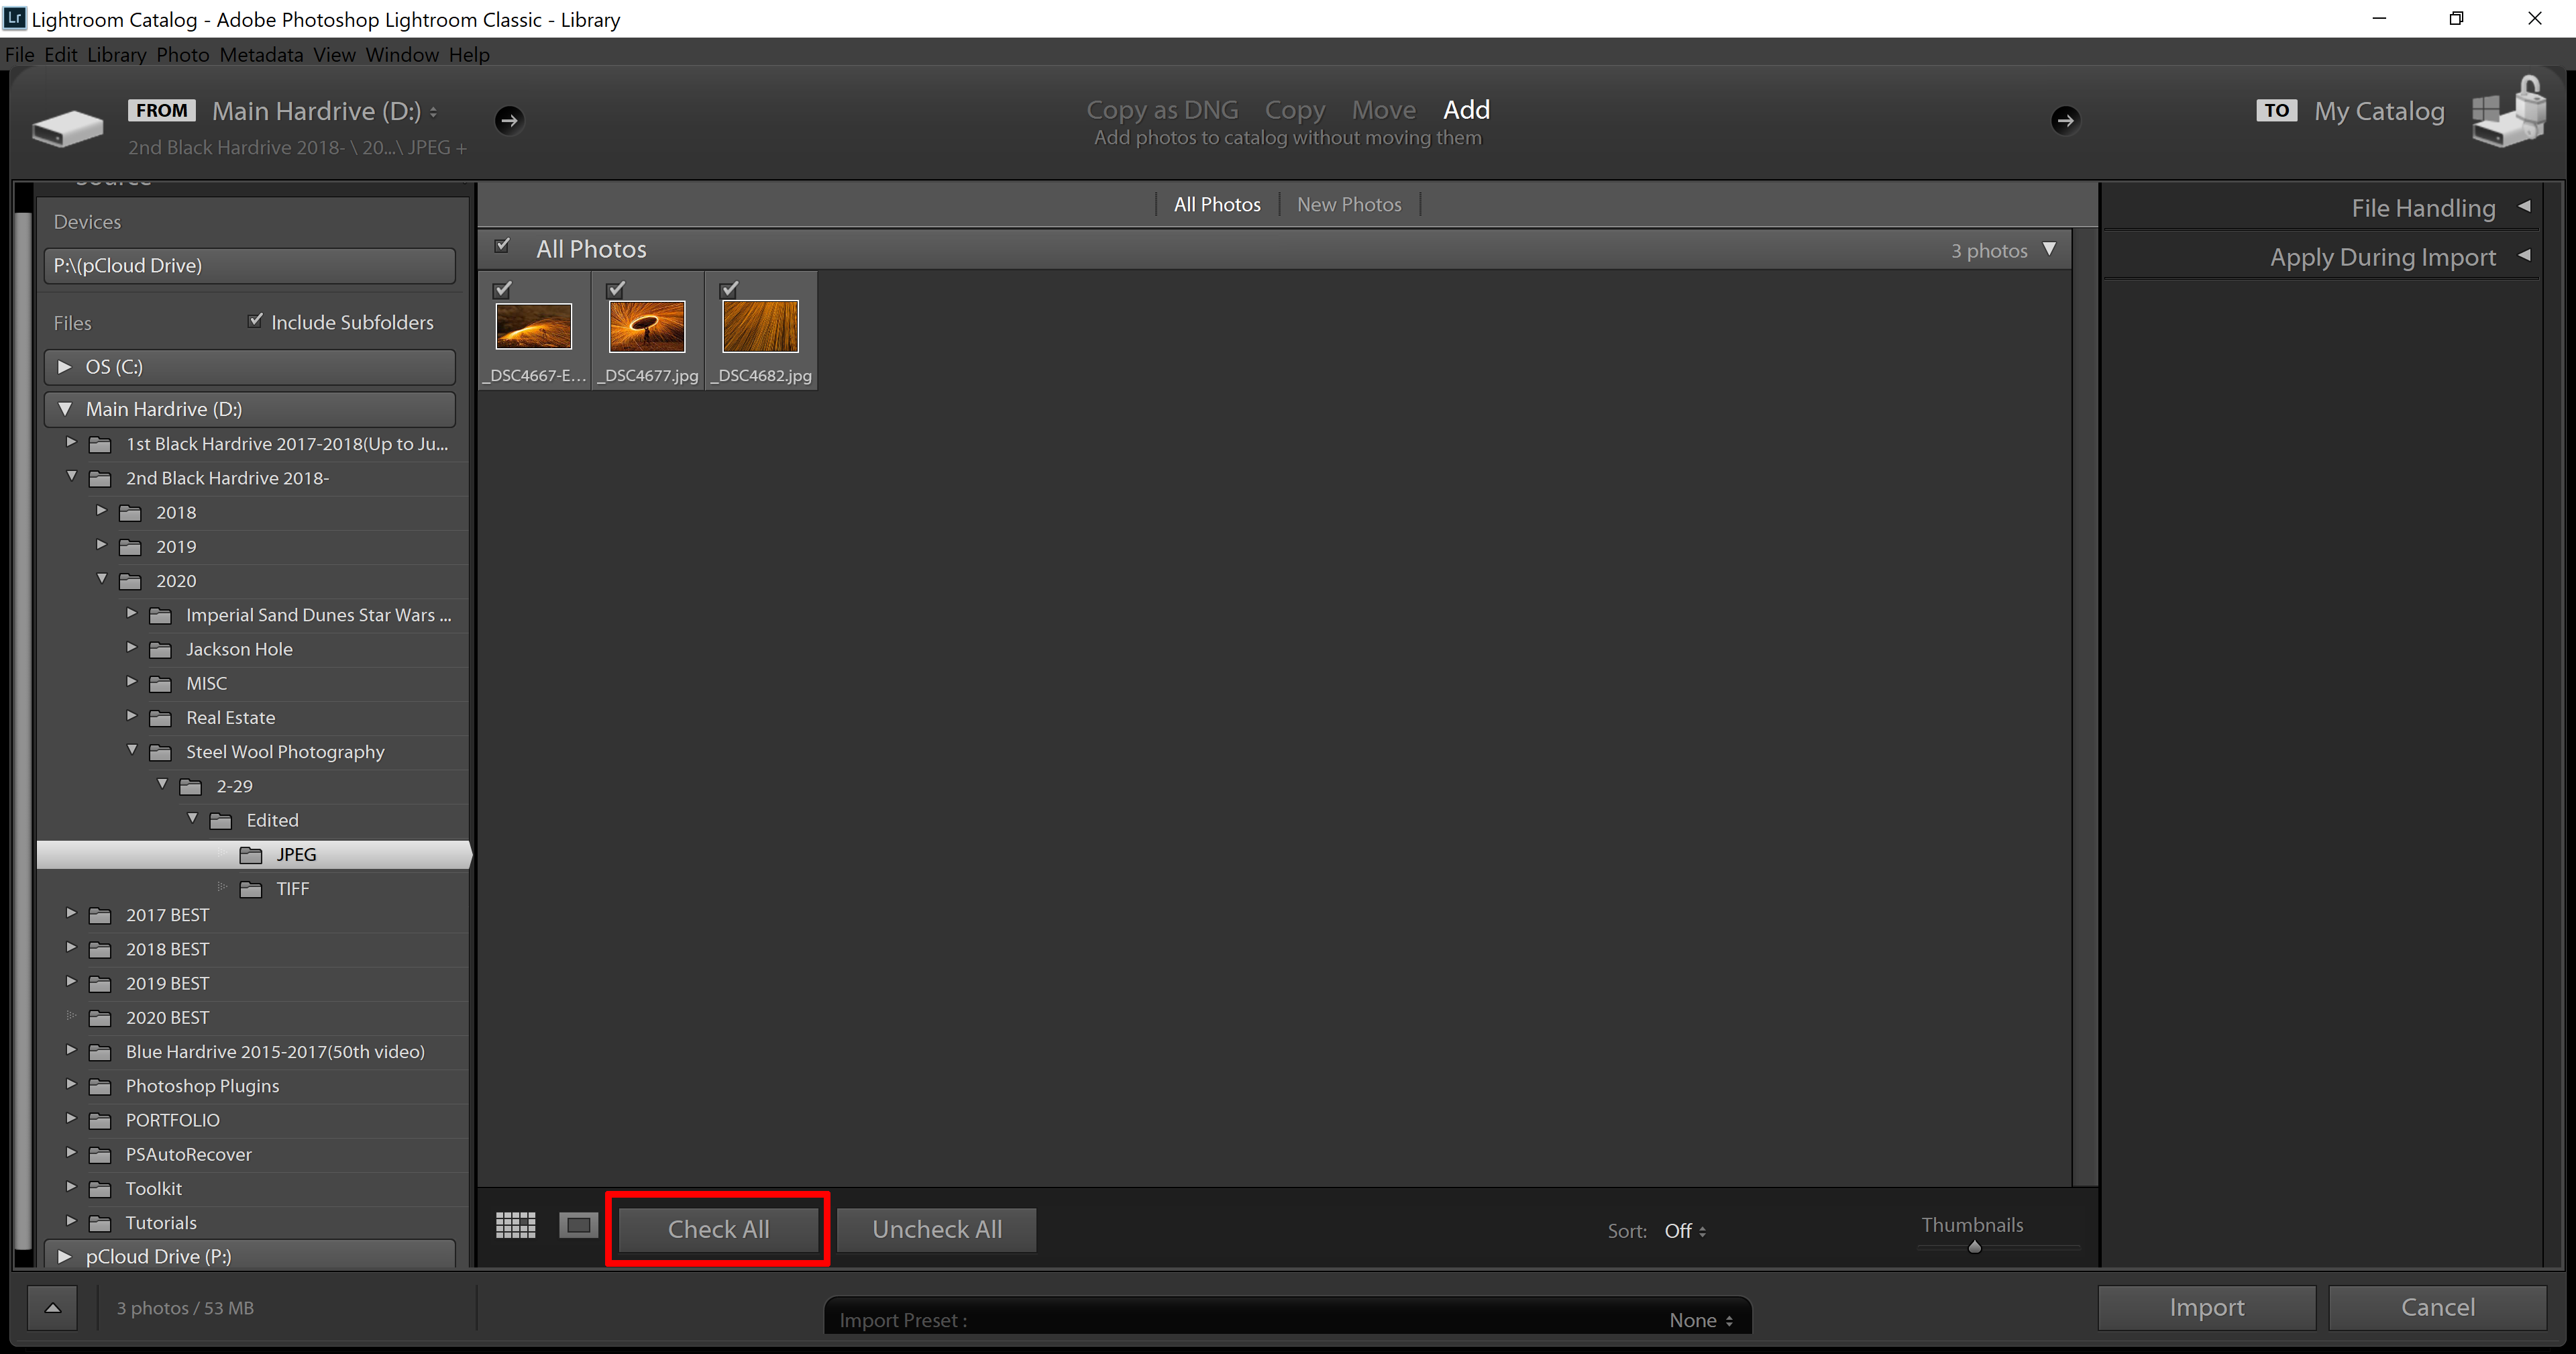
Click “Check All” to select all of the images to be imported
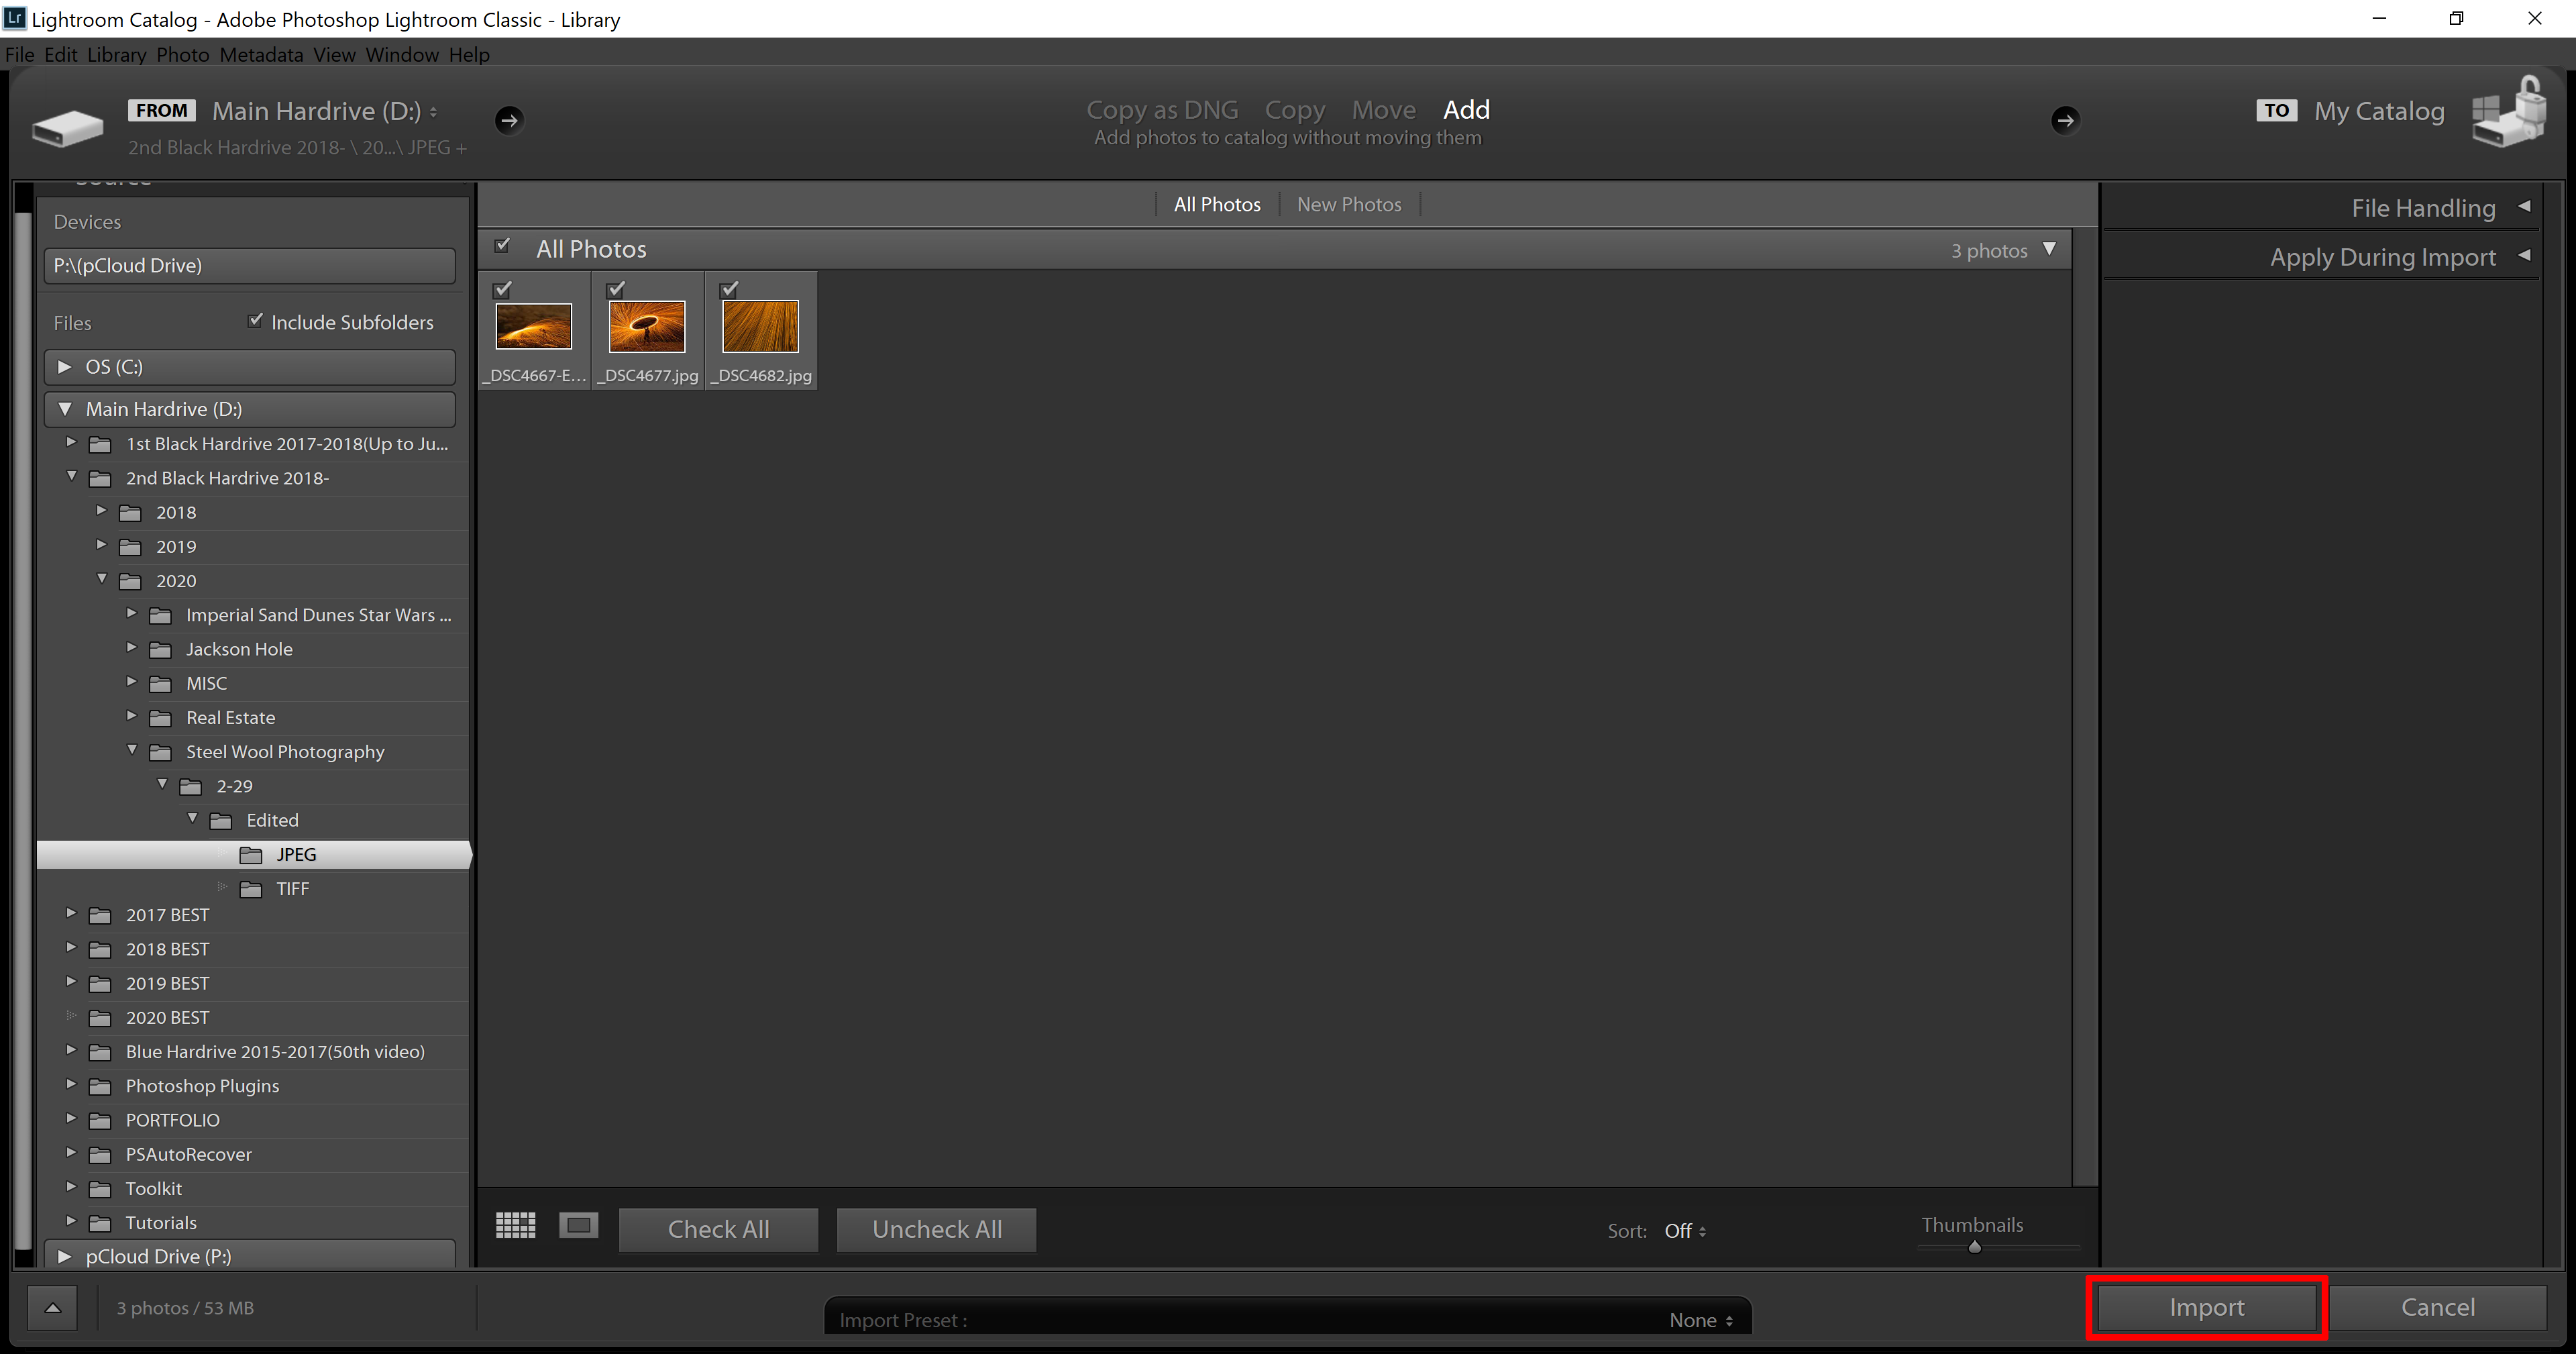
Click the “Import” button
These are the two places where the images will be shown inside Lightroom
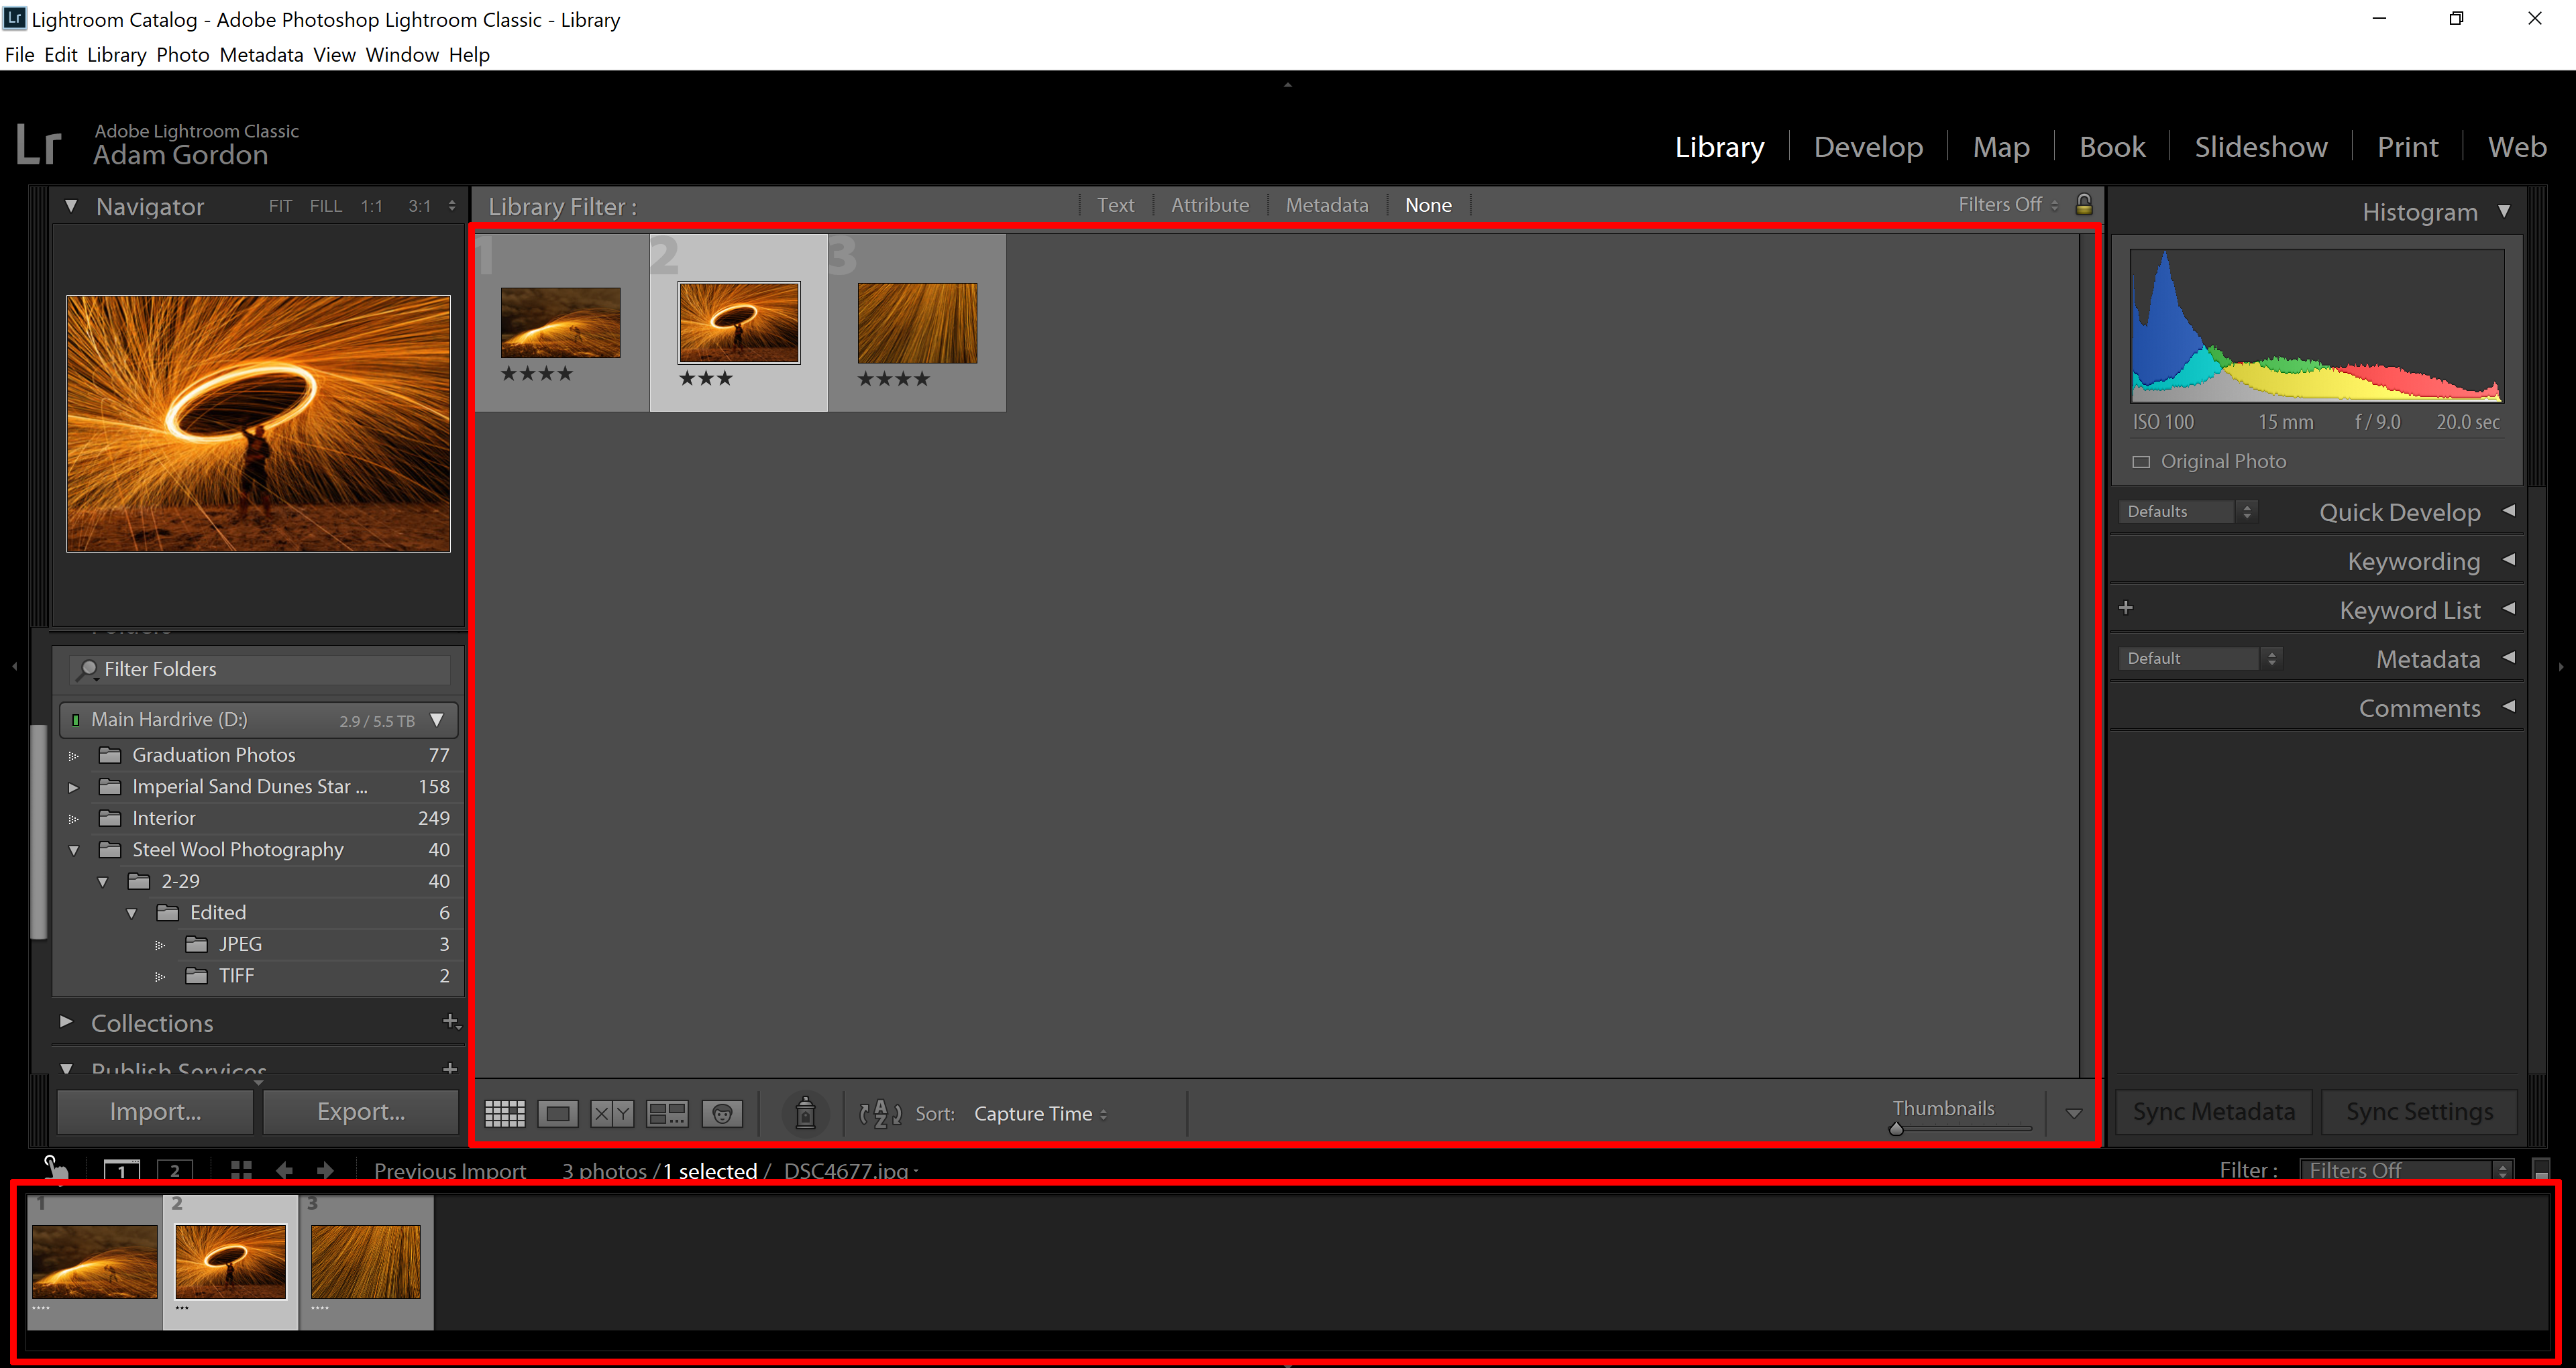
This is where you can find your imported photos in Lightroom

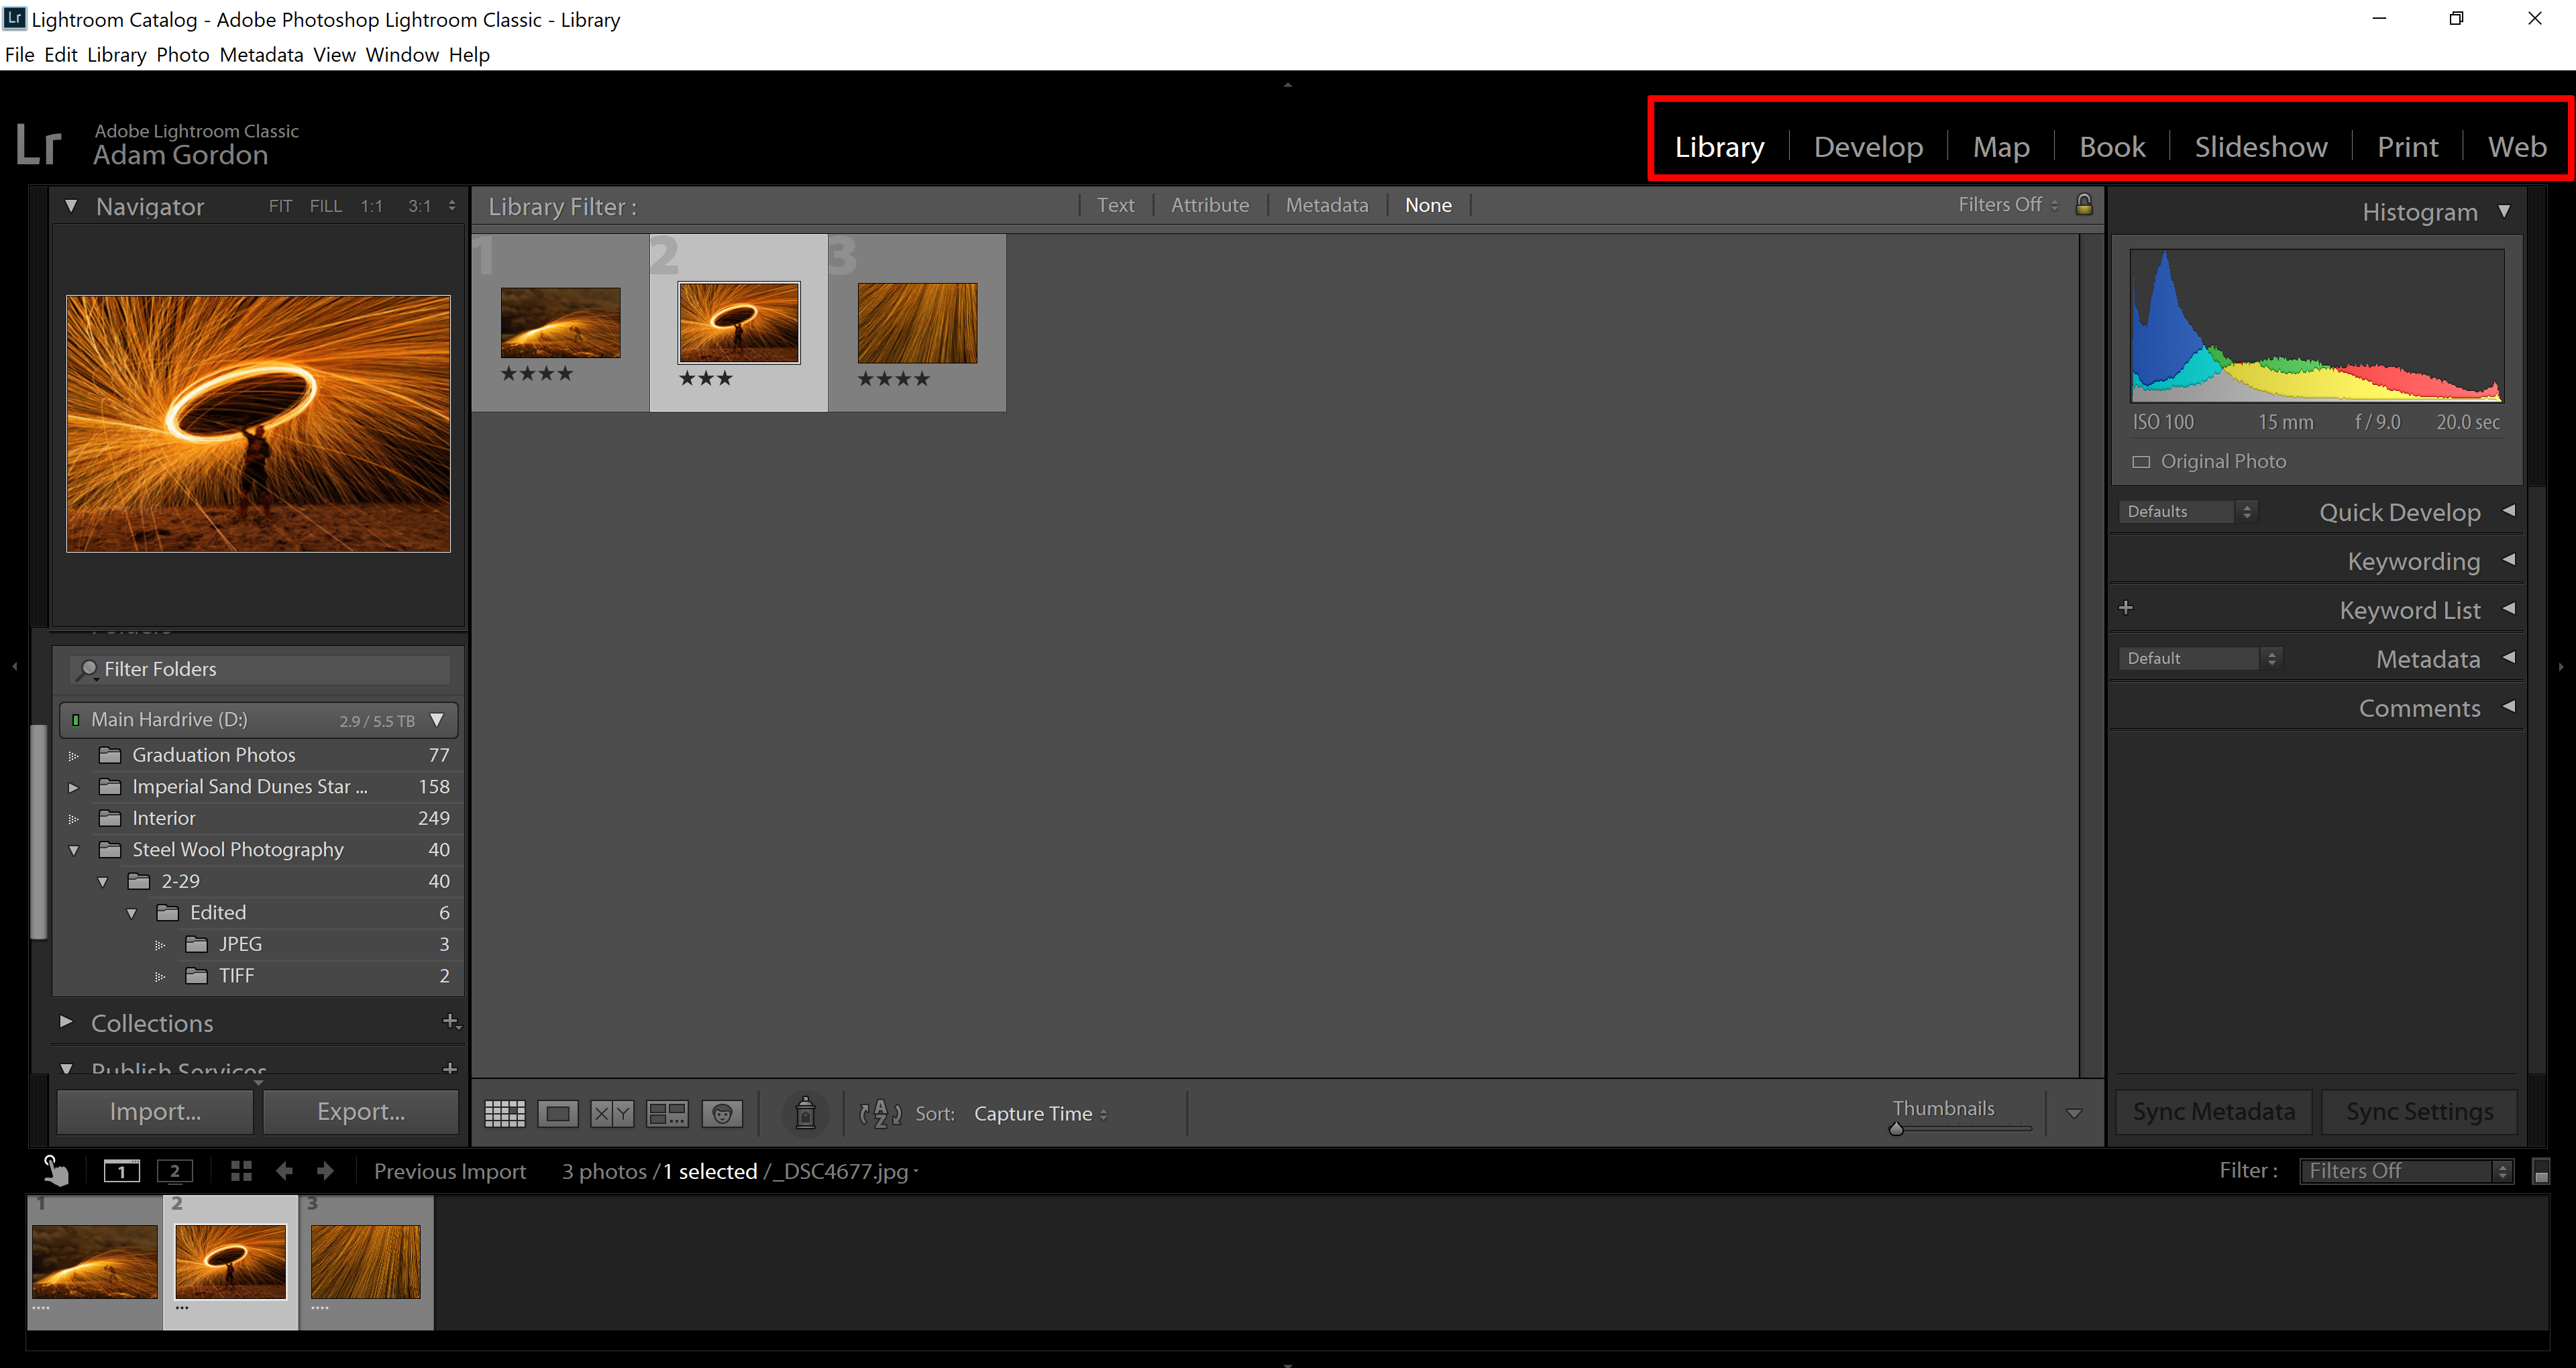
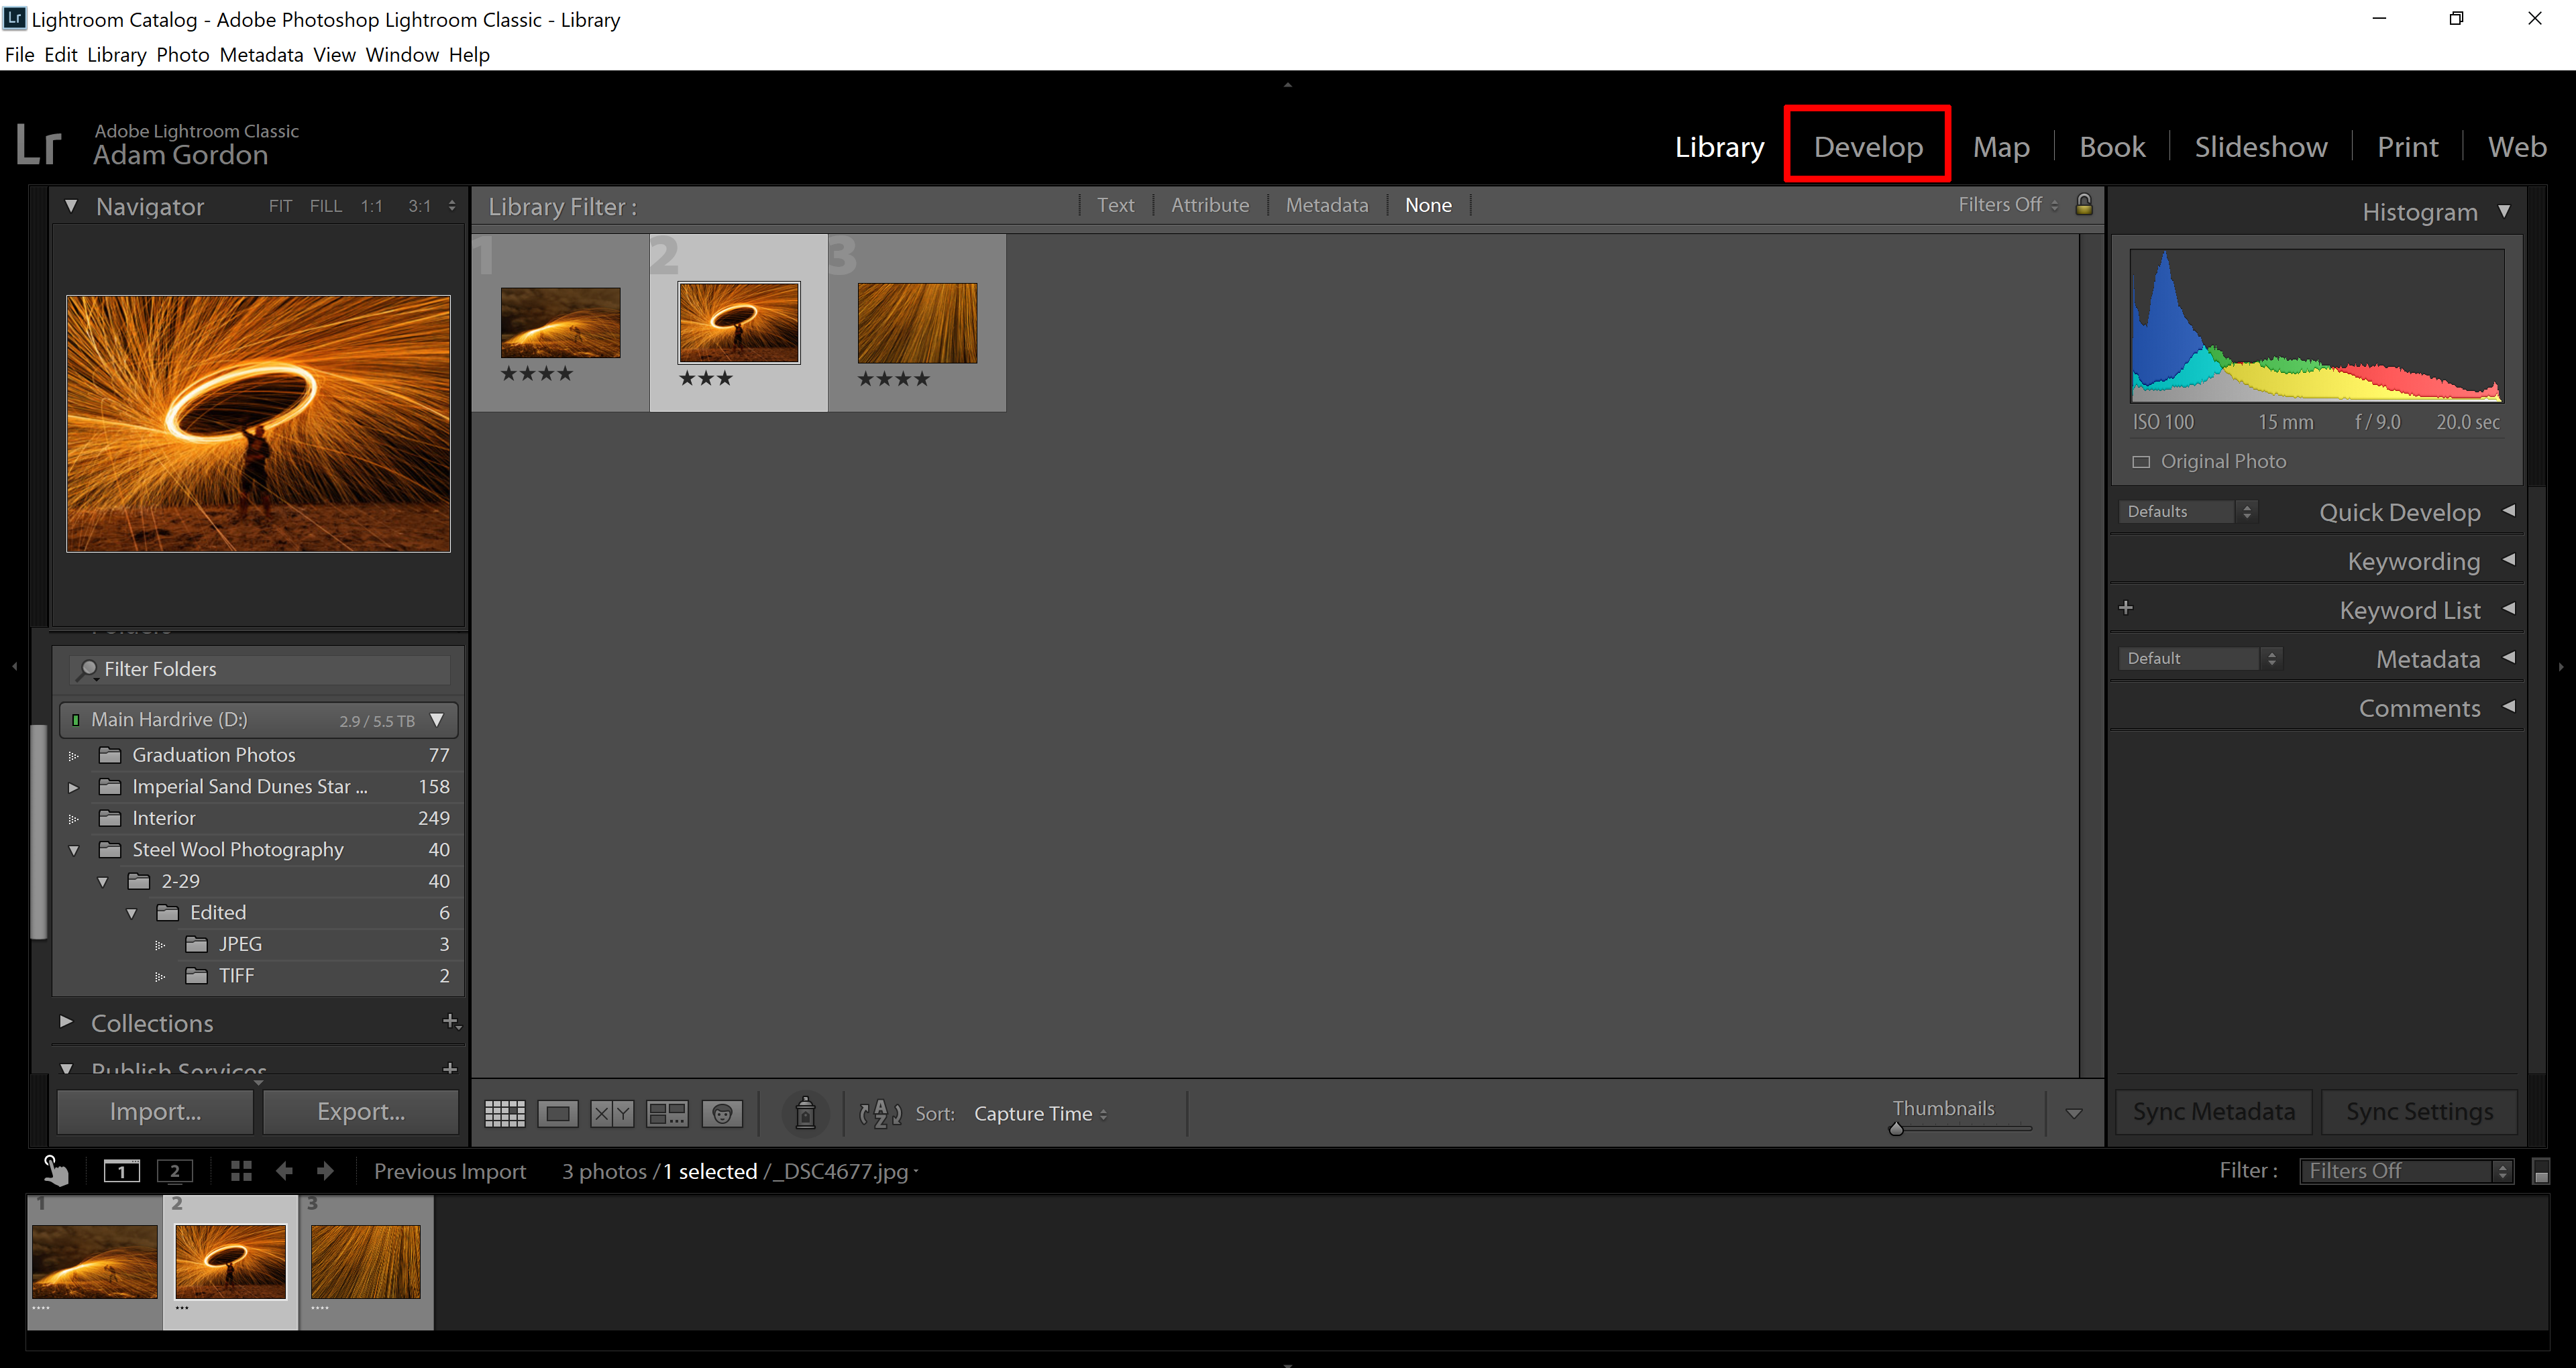
The main modules of Lightroom. I only use the Library and Develop Module.
The Global Adjustments (Basic Settings)
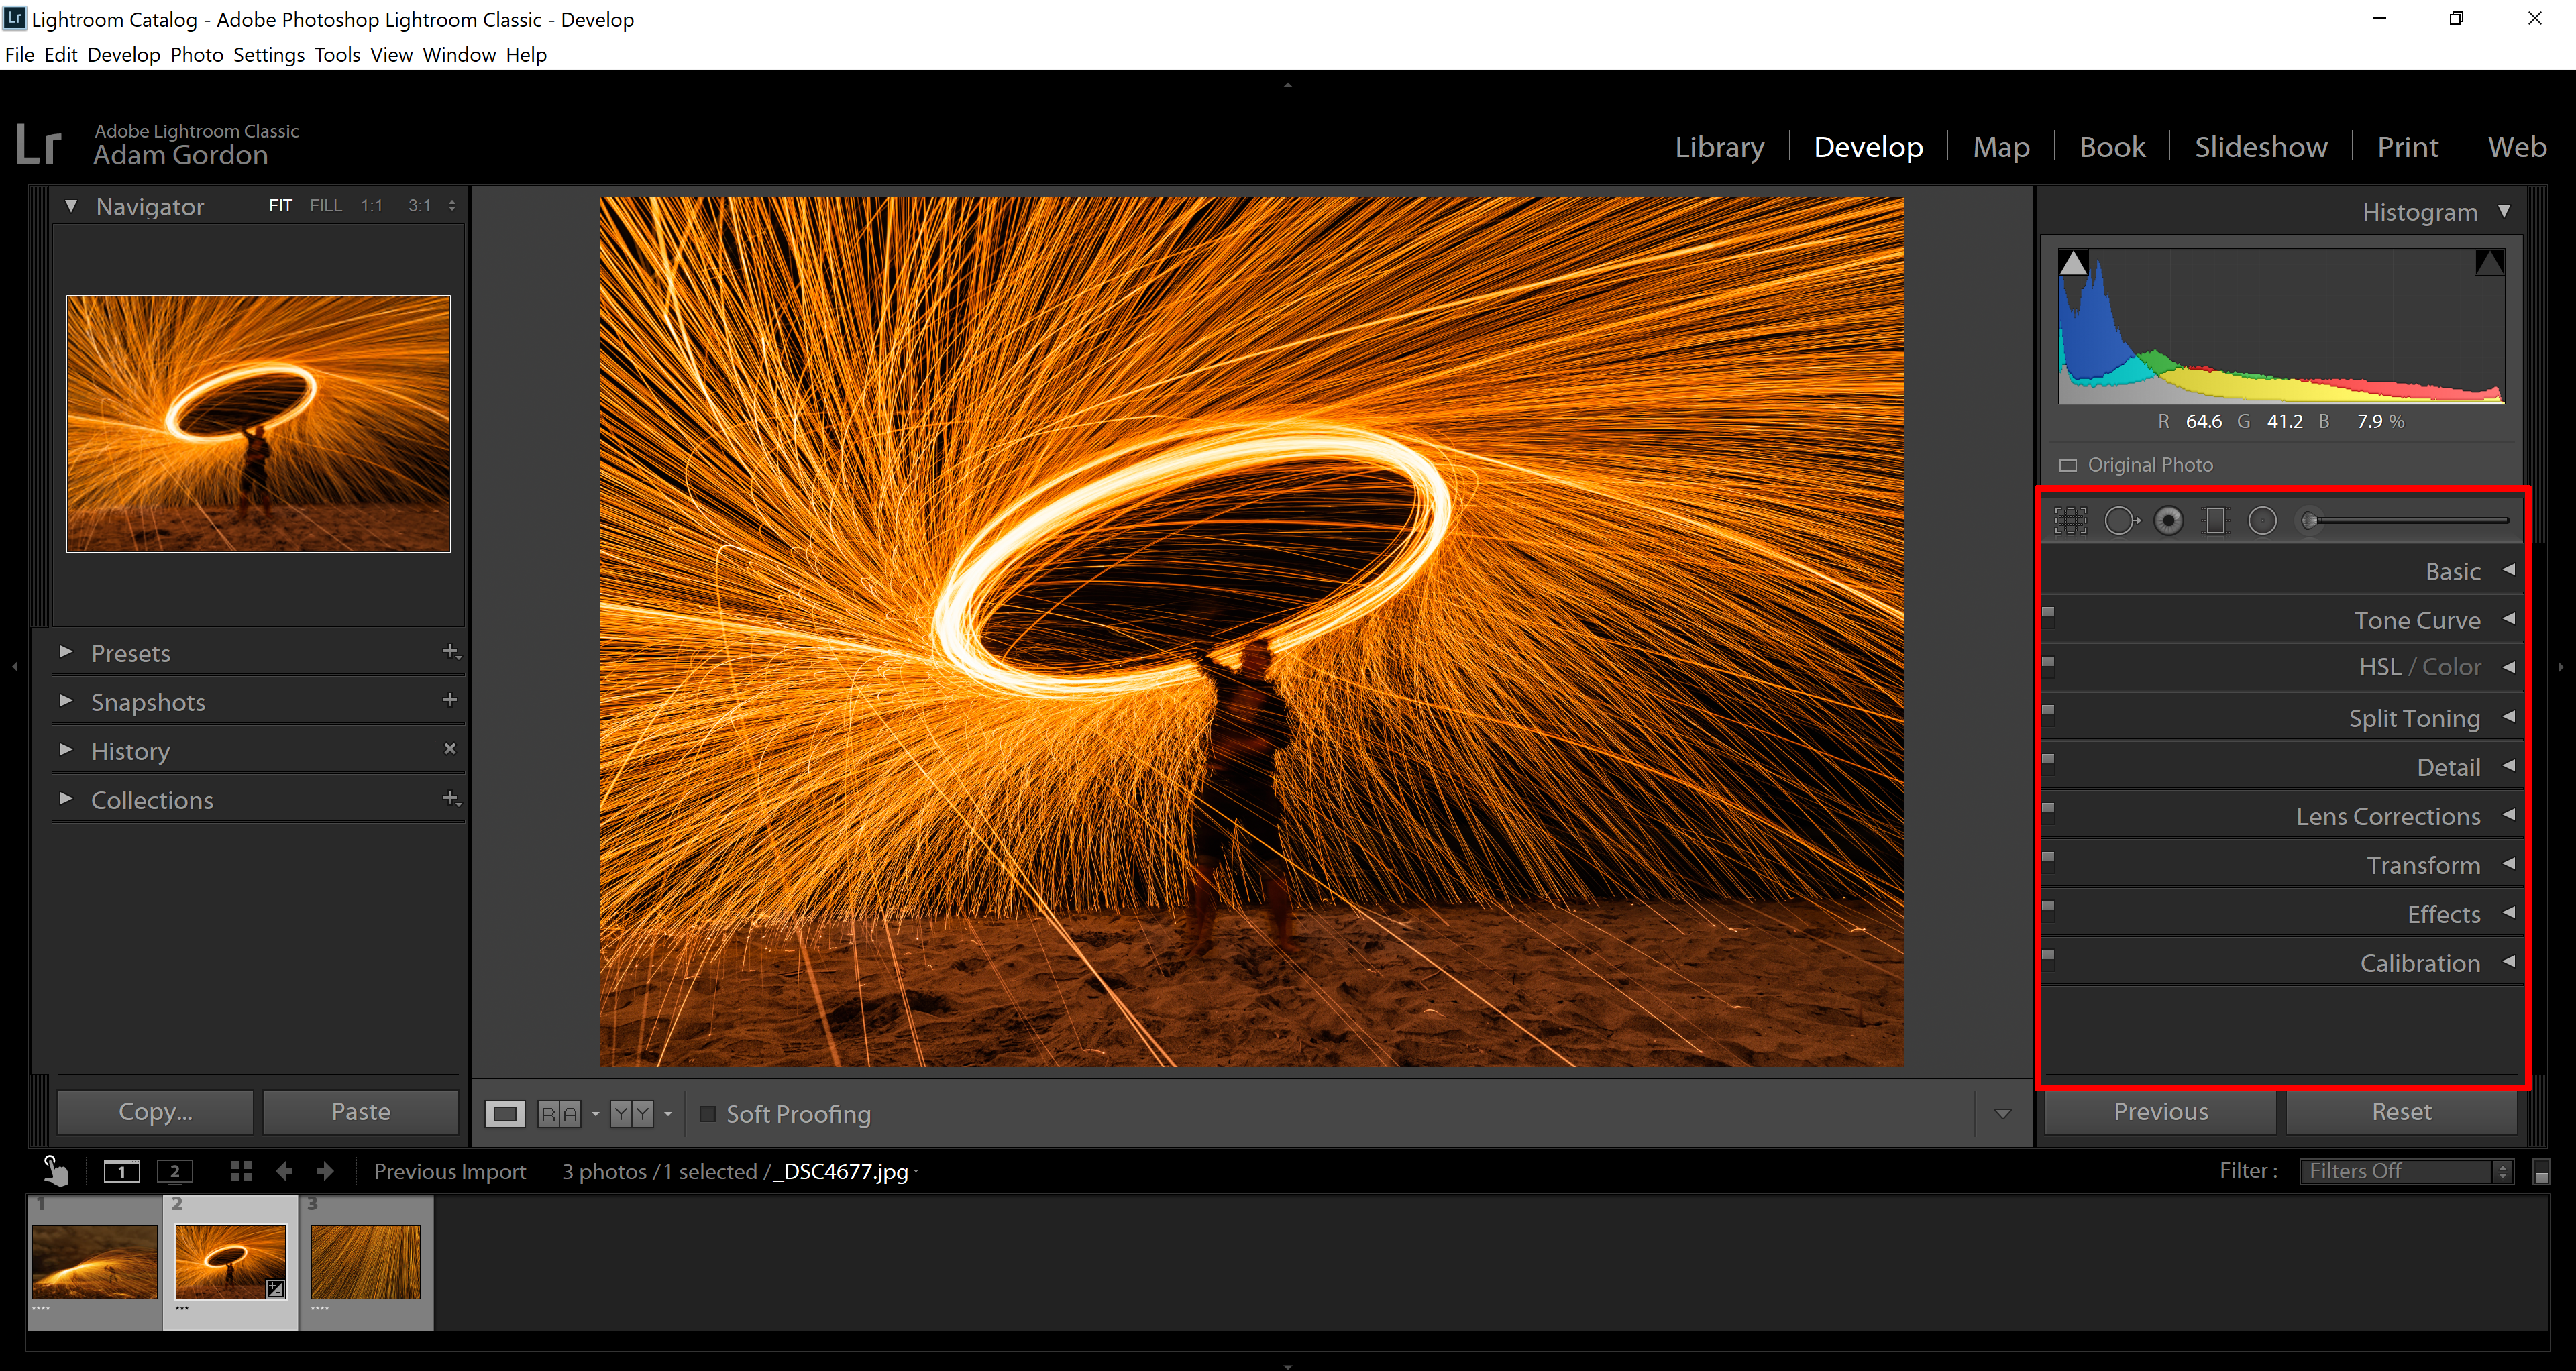
Editing is done in the Develop Module
These are the different types of settings you can use to edit the image
These are the global adjustments explained in more detail below (located in the Basic tab)
Temperature: Makes the image warmer (more orange) or cooler (more blue)
Tint: Increases the green tint or purple tint in the image
Exposure: Changes the brightness of the image
Contrast: Adds a “punchy” look to the image
Highlights: Decreases or increases the highlights in the image
Shadows: Decreases or increases the shadows in the image
Whites: Targets the whites of the image
Blacks: Targets the blacks of the image
Clarity: Enhances the mid-tones of the image and brings detail and texture to the photo
Vibrance: Increases saturation of the more muted colors
Saturation: Increases or decreases the colors in the photo
Tone Curve
The tone curve adjusts all of the tones in the image and affects the brightness, contrast, highlights, and shadows.
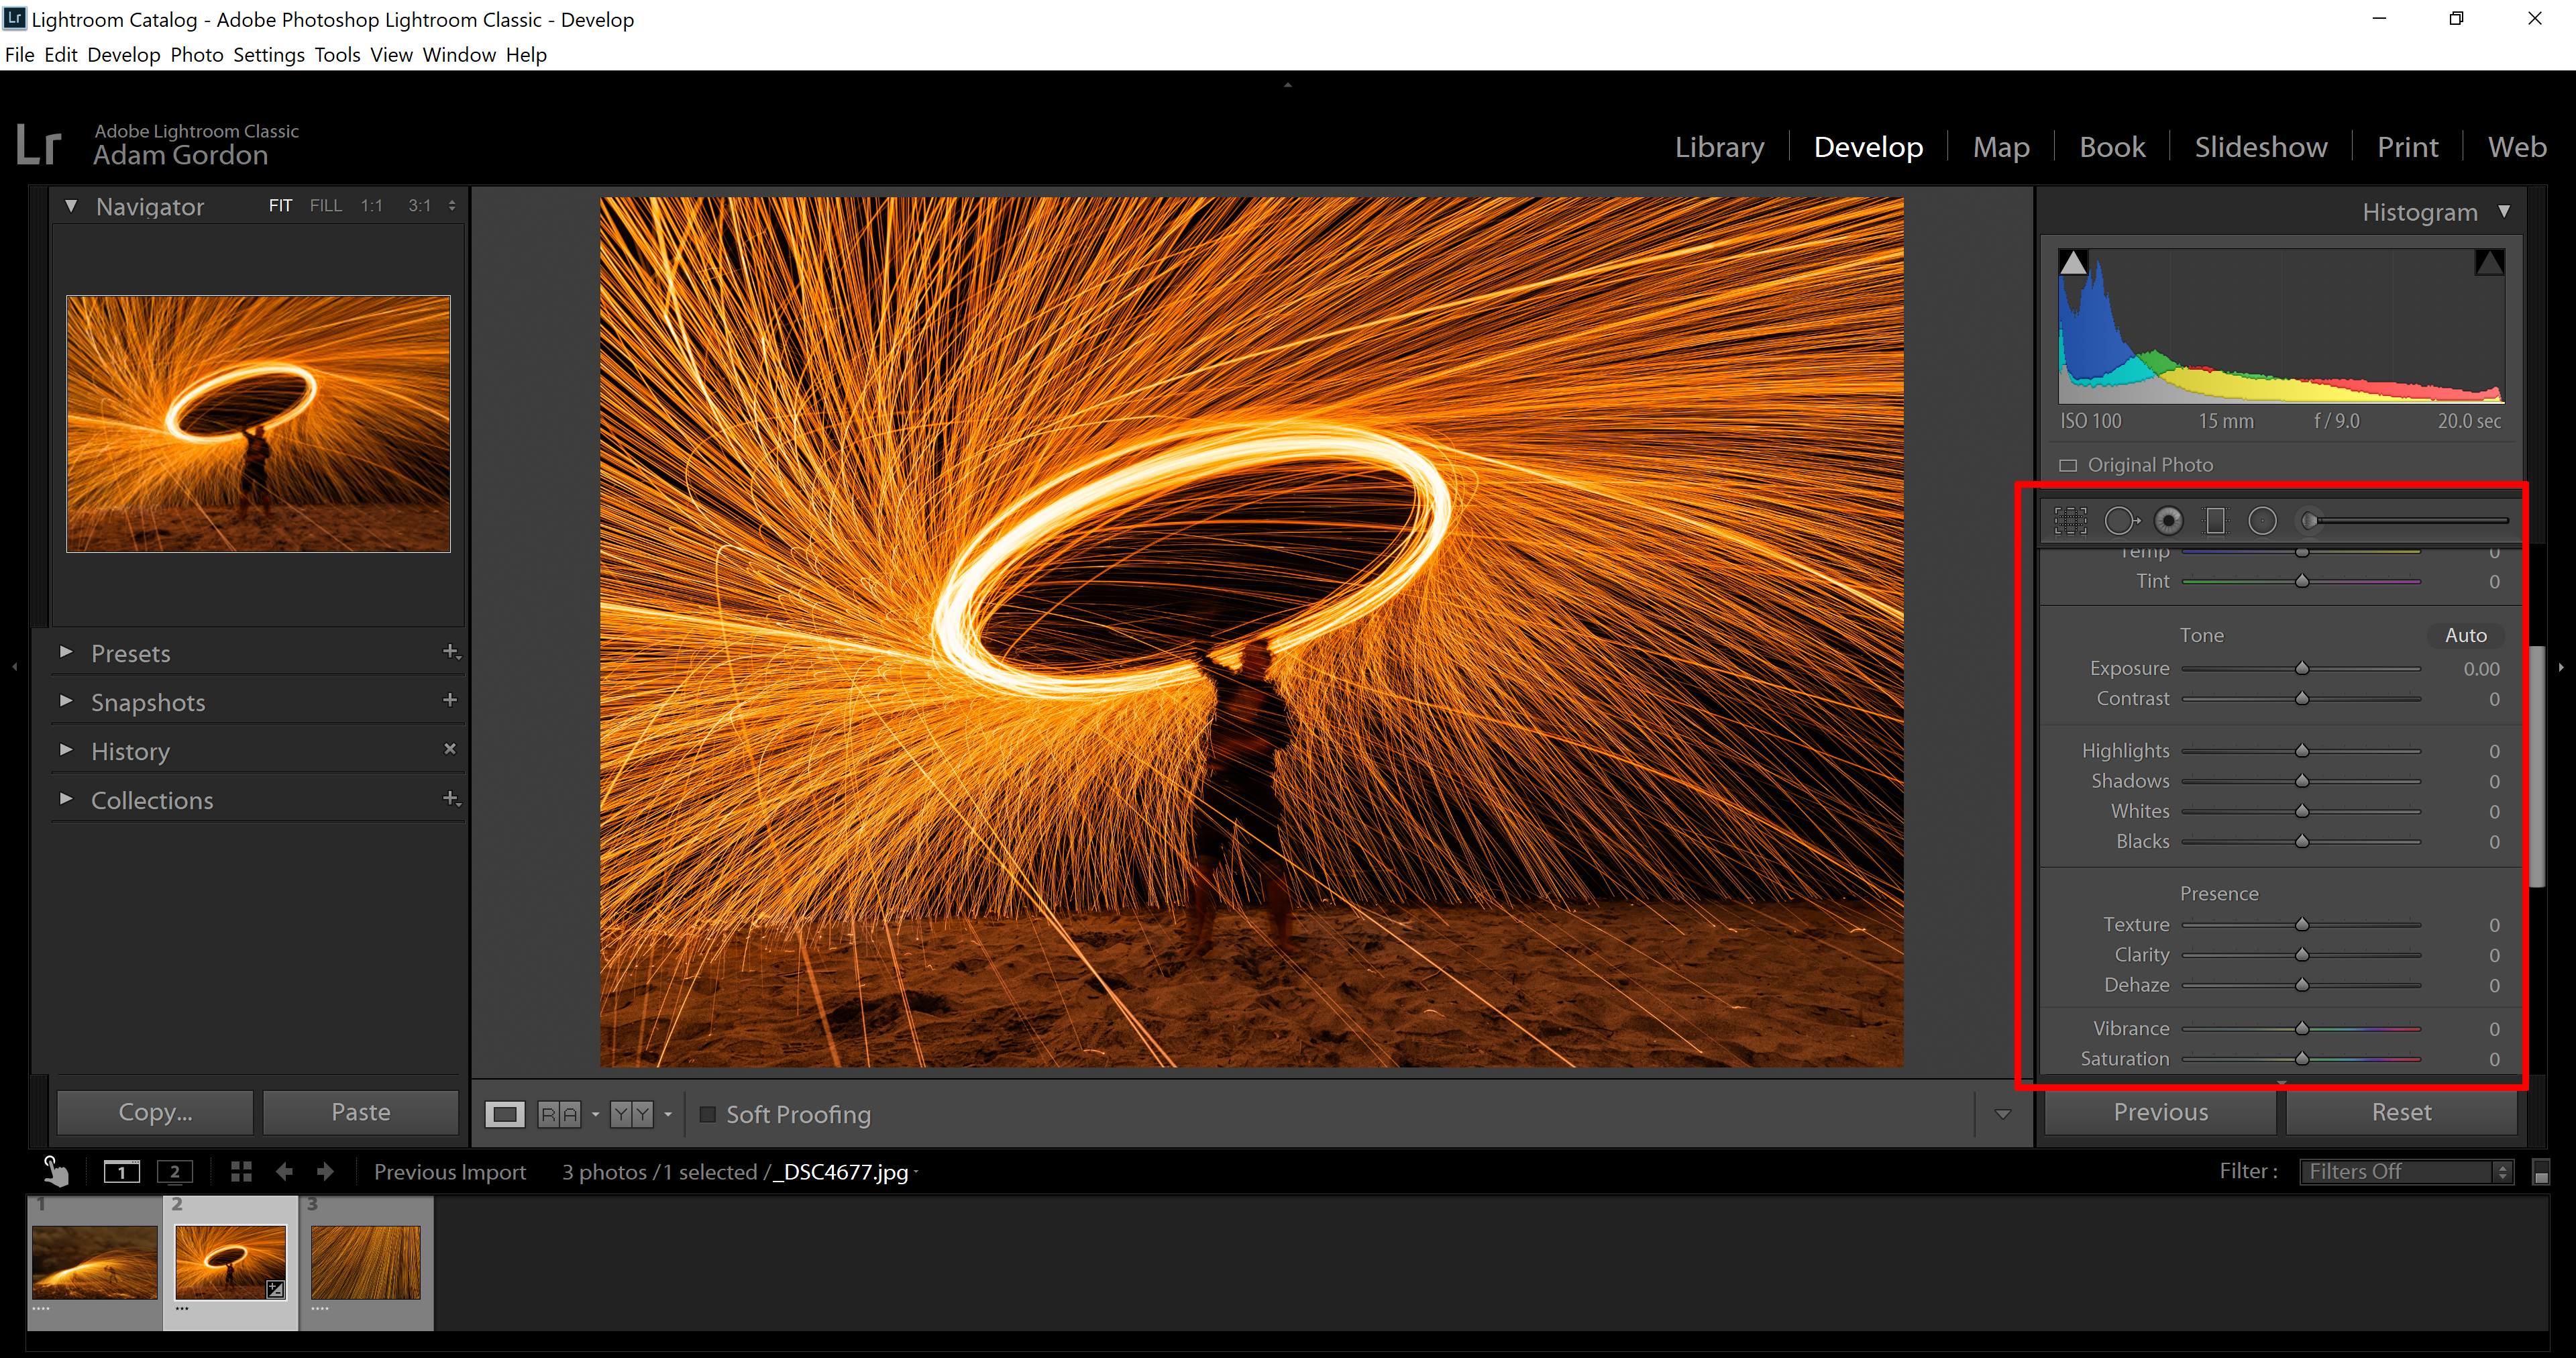
The Local Adjustments (More Complex Settings)
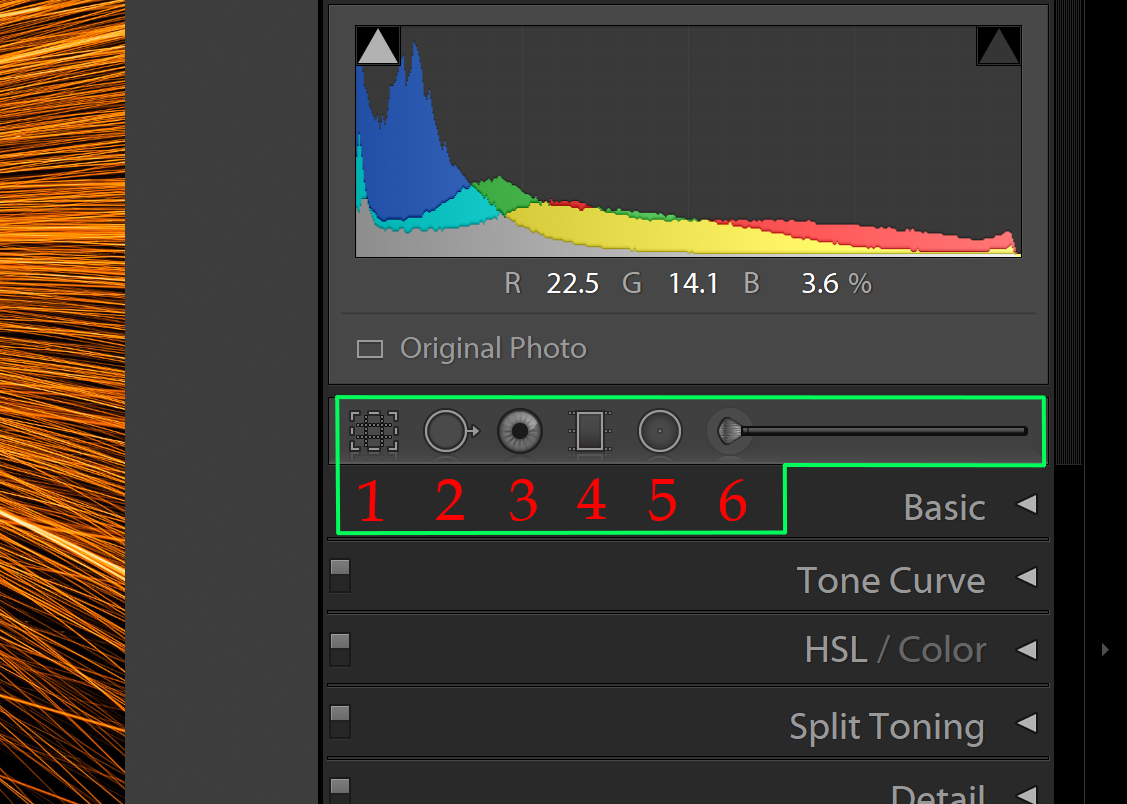
1. Crop Tool: Starting on the left, we have the crop tool. Just like any other crop tool, you can crop the image to any dimensions you want or set locked dimensions.
2. Spot Removal: With this tool, you can click on an object or person you want to remove and then source the replacement pixels from a different part of the photo. This is very helpful if you have some birds in frame or censor spots that you want to quickly remove.
3. Red Eye Correction: As the name states, this tool is helpful for those photos where the red eyes turn the almost perfect portrait into a scary demon picture. Luckily with this tool, you can easily remove those red dots and fix the image!
4. Gradient Filter: This tool is great to apply certain settings such as contrast or highlights to select parts of the image.
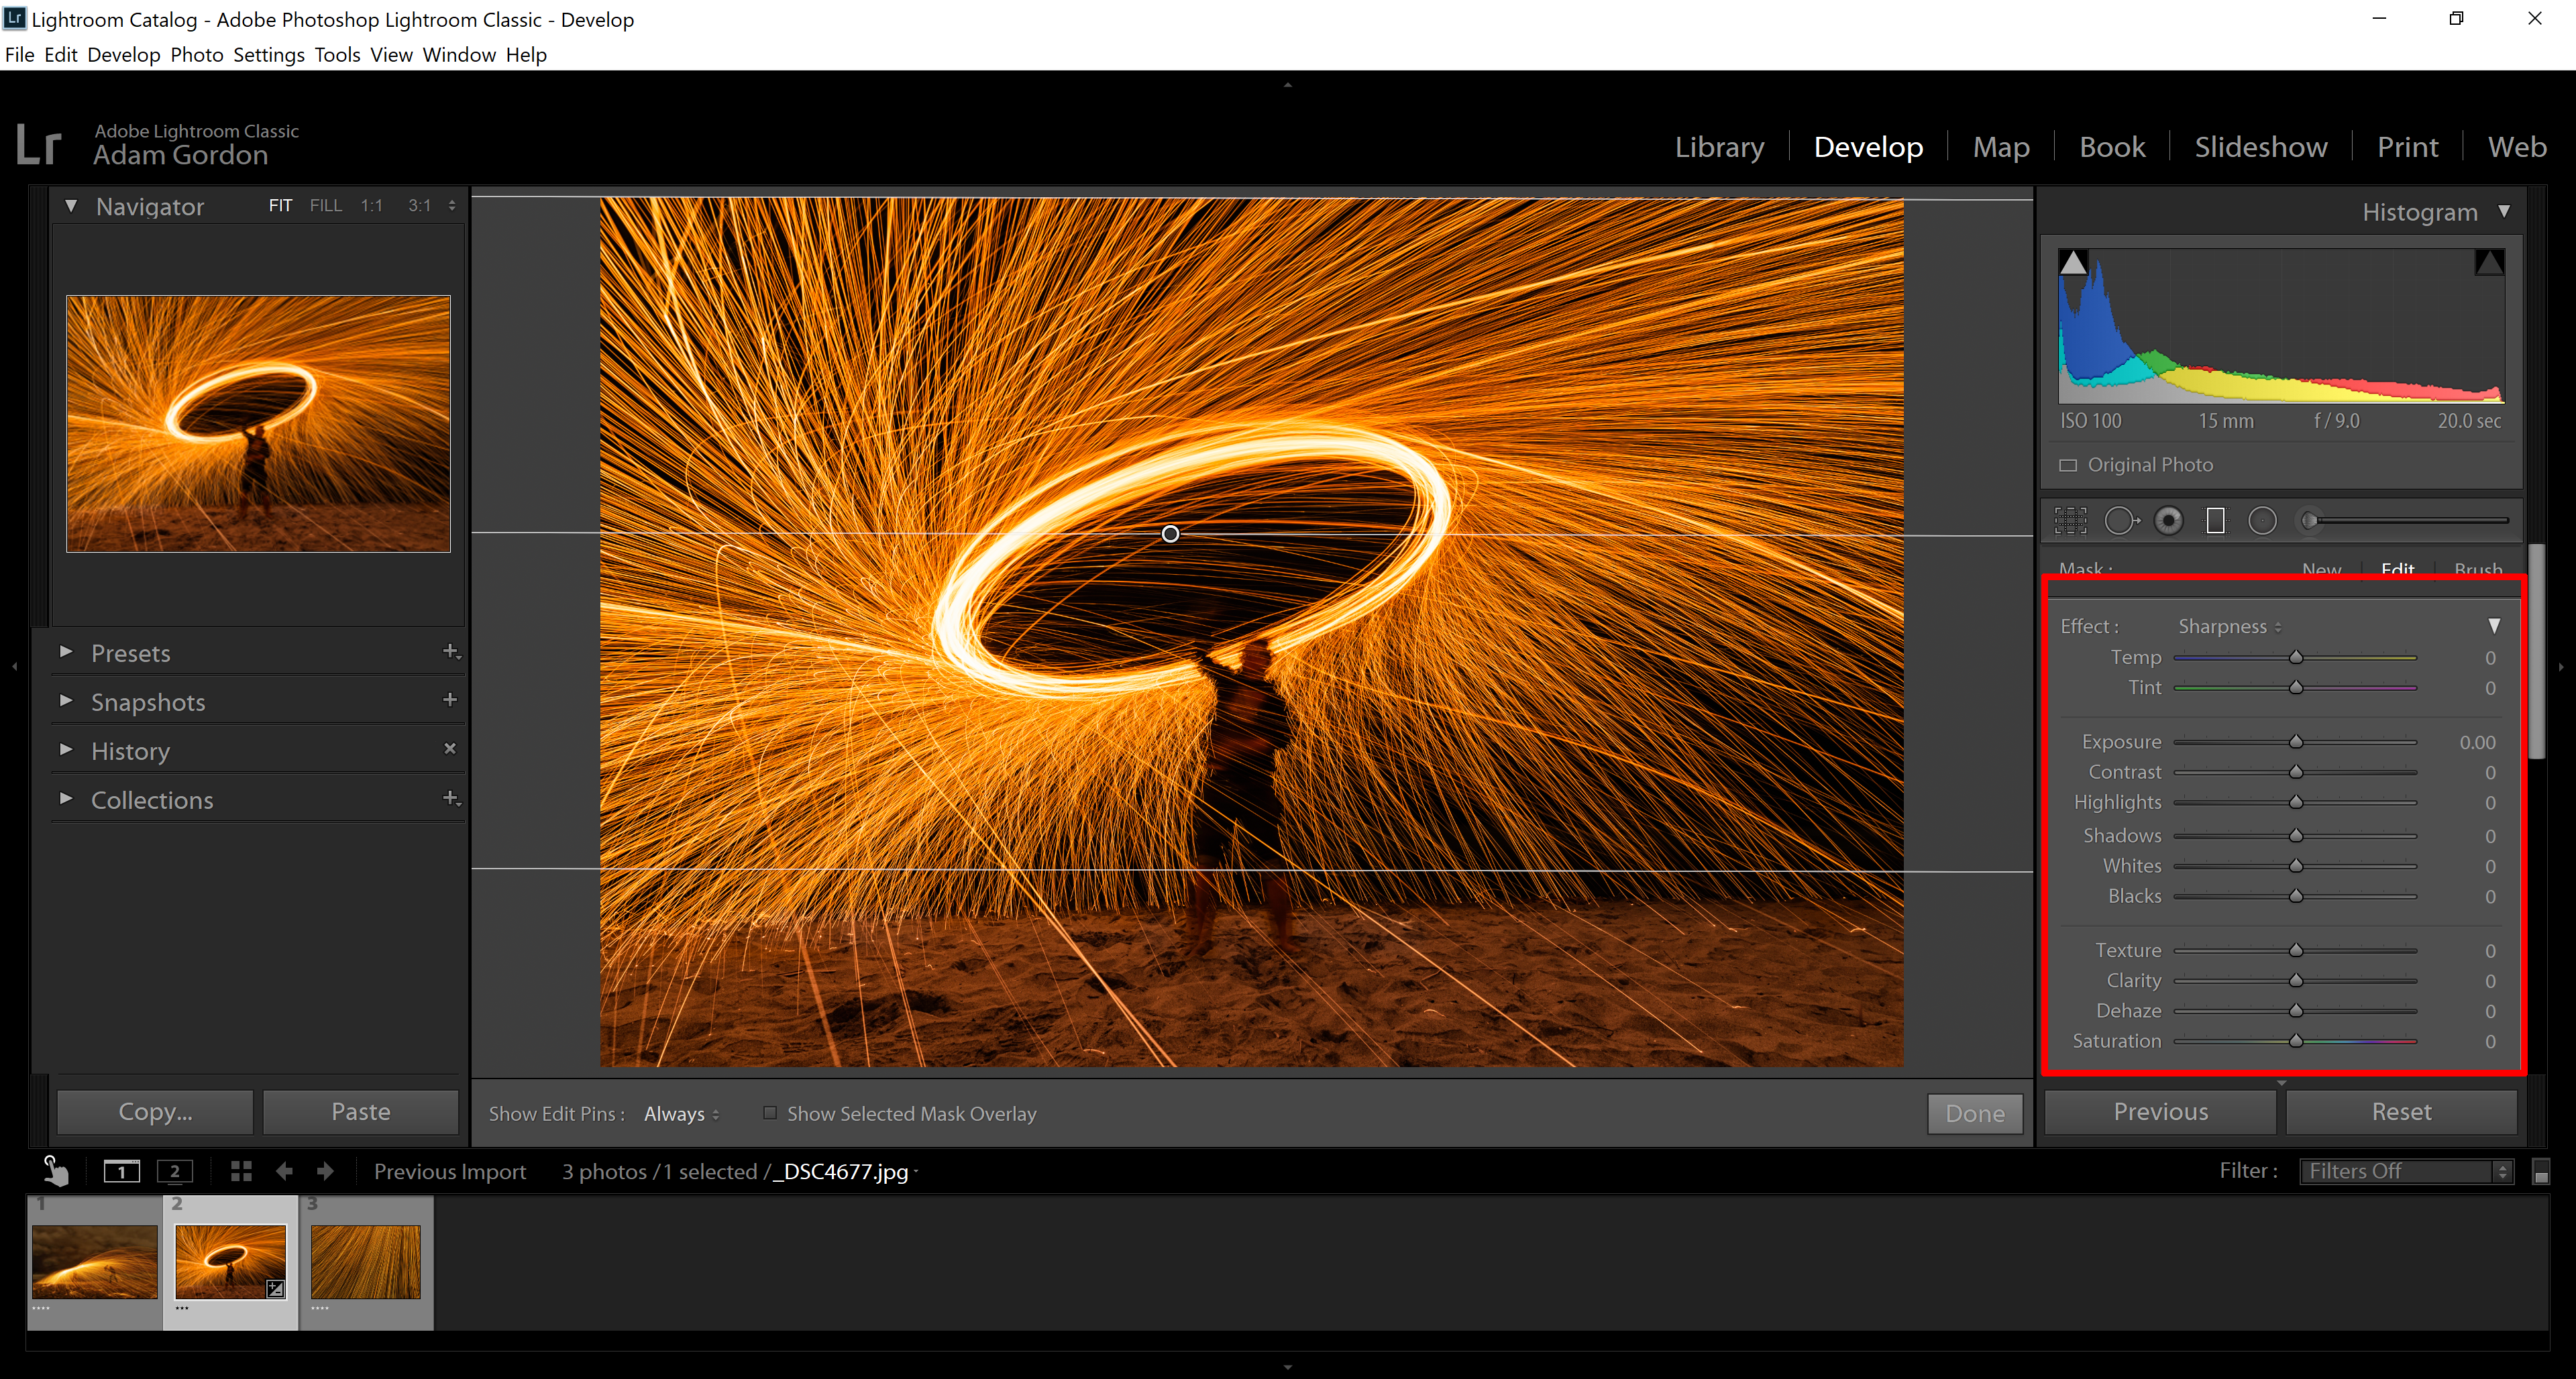
Once I select the Gradient Filter tool, I can click and drag to see which part of the image I want to target. The settings outlined are the only settings you are allowed to use when using the gradient and radial filter tool, as well as the brush tool.
Since I boosted the exposure, just the top of the image is being affected.
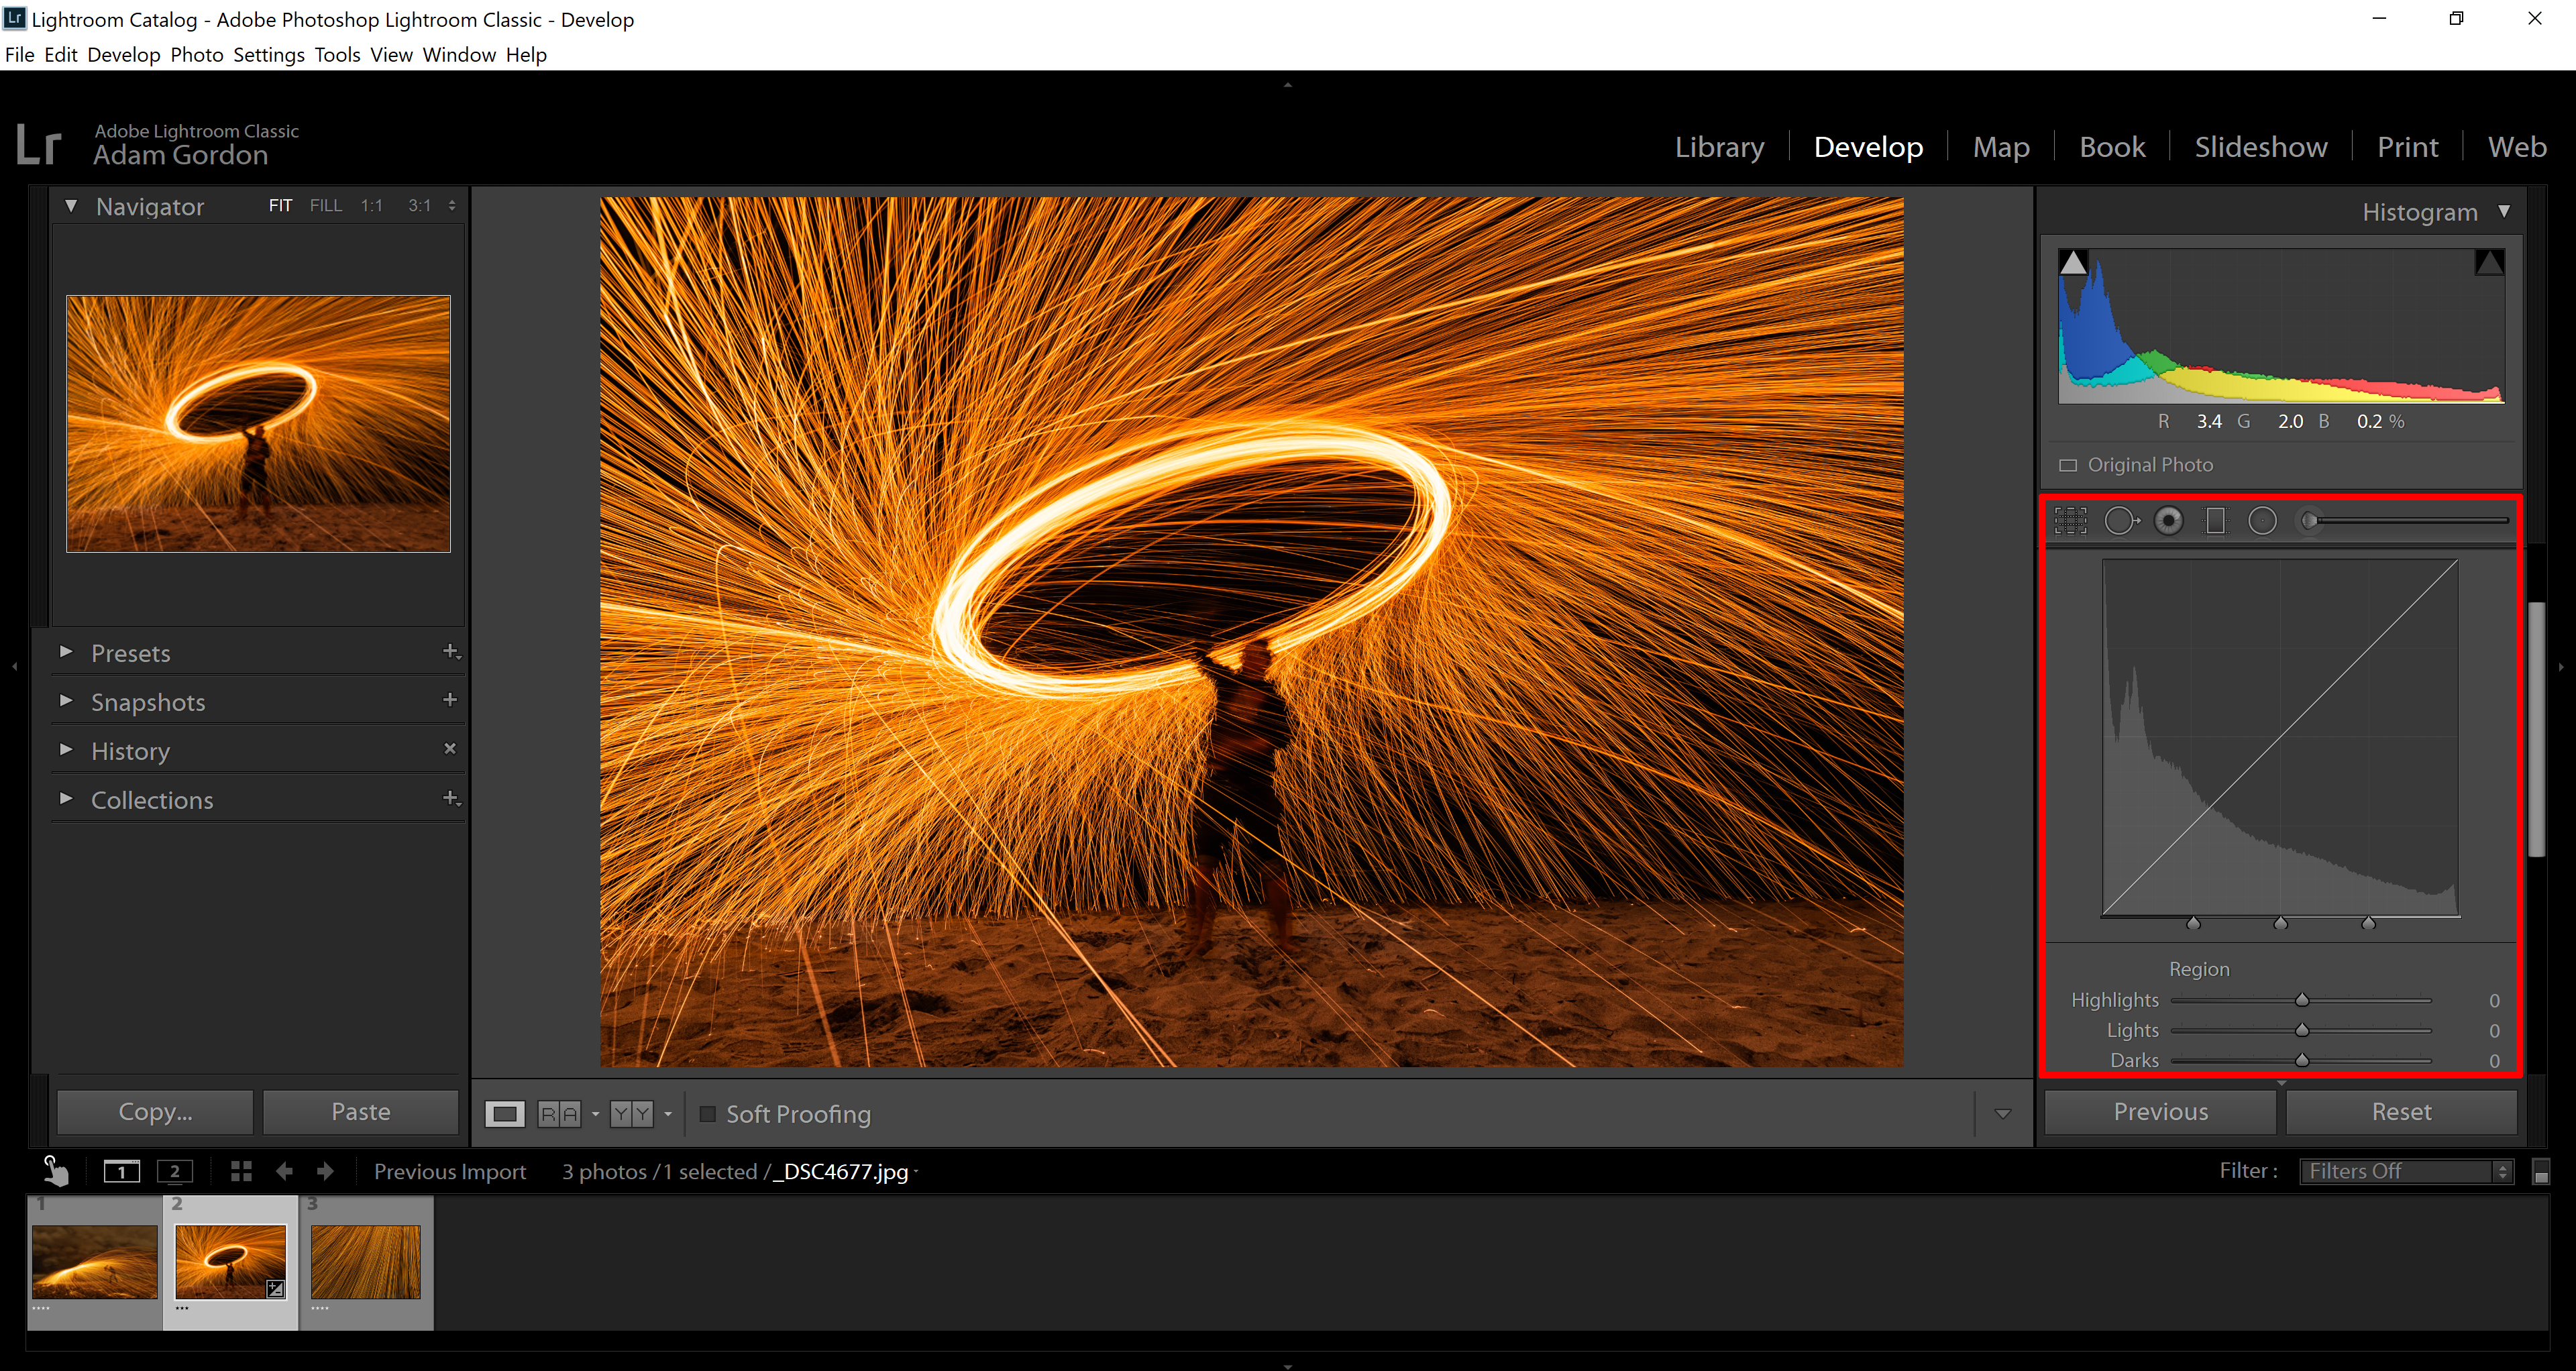
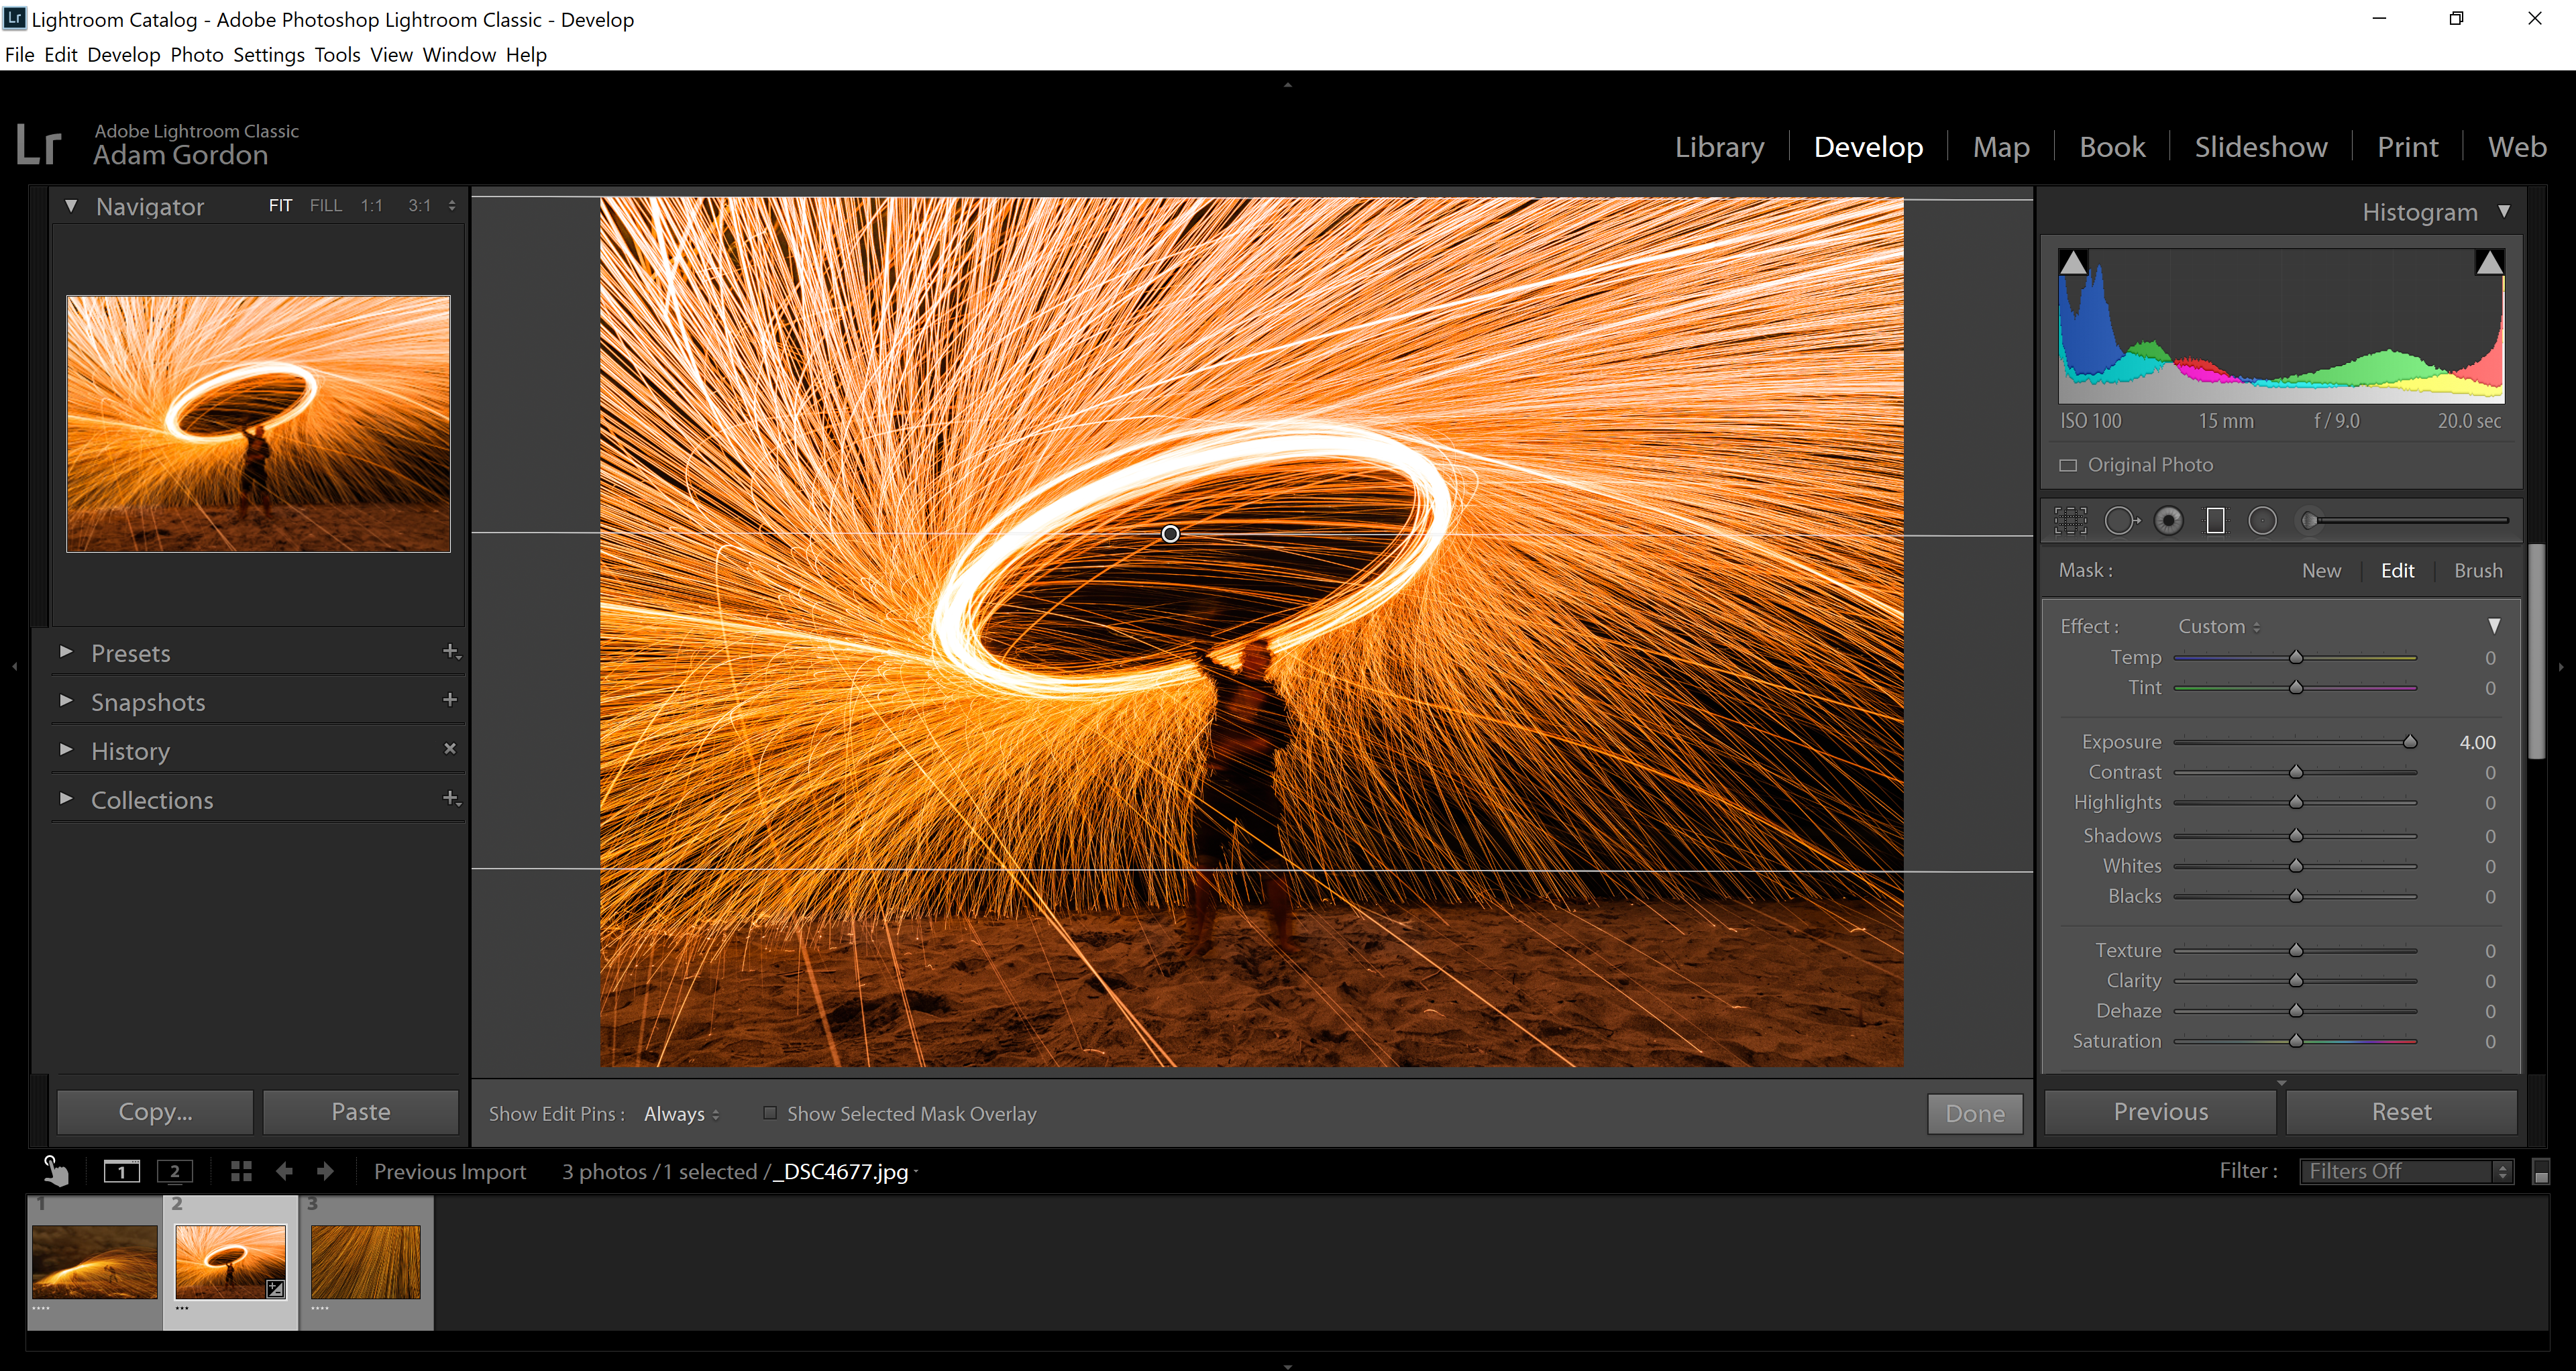
5. Radial Filter: This tool allows you to do the exact same thing as the gradient filter, but with a twist (or a circle in this case). You can click and drag a circle over a section of the image and then change the settings accordingly. With this tool, you are also given the option to affect what’s only inside the circle or what’s outside of the circle.
Once you select the radial filter and draw your circle/oval, the setting you change (in this case the exposure) will affect the outside of your shape (without the “Invert” box checked).
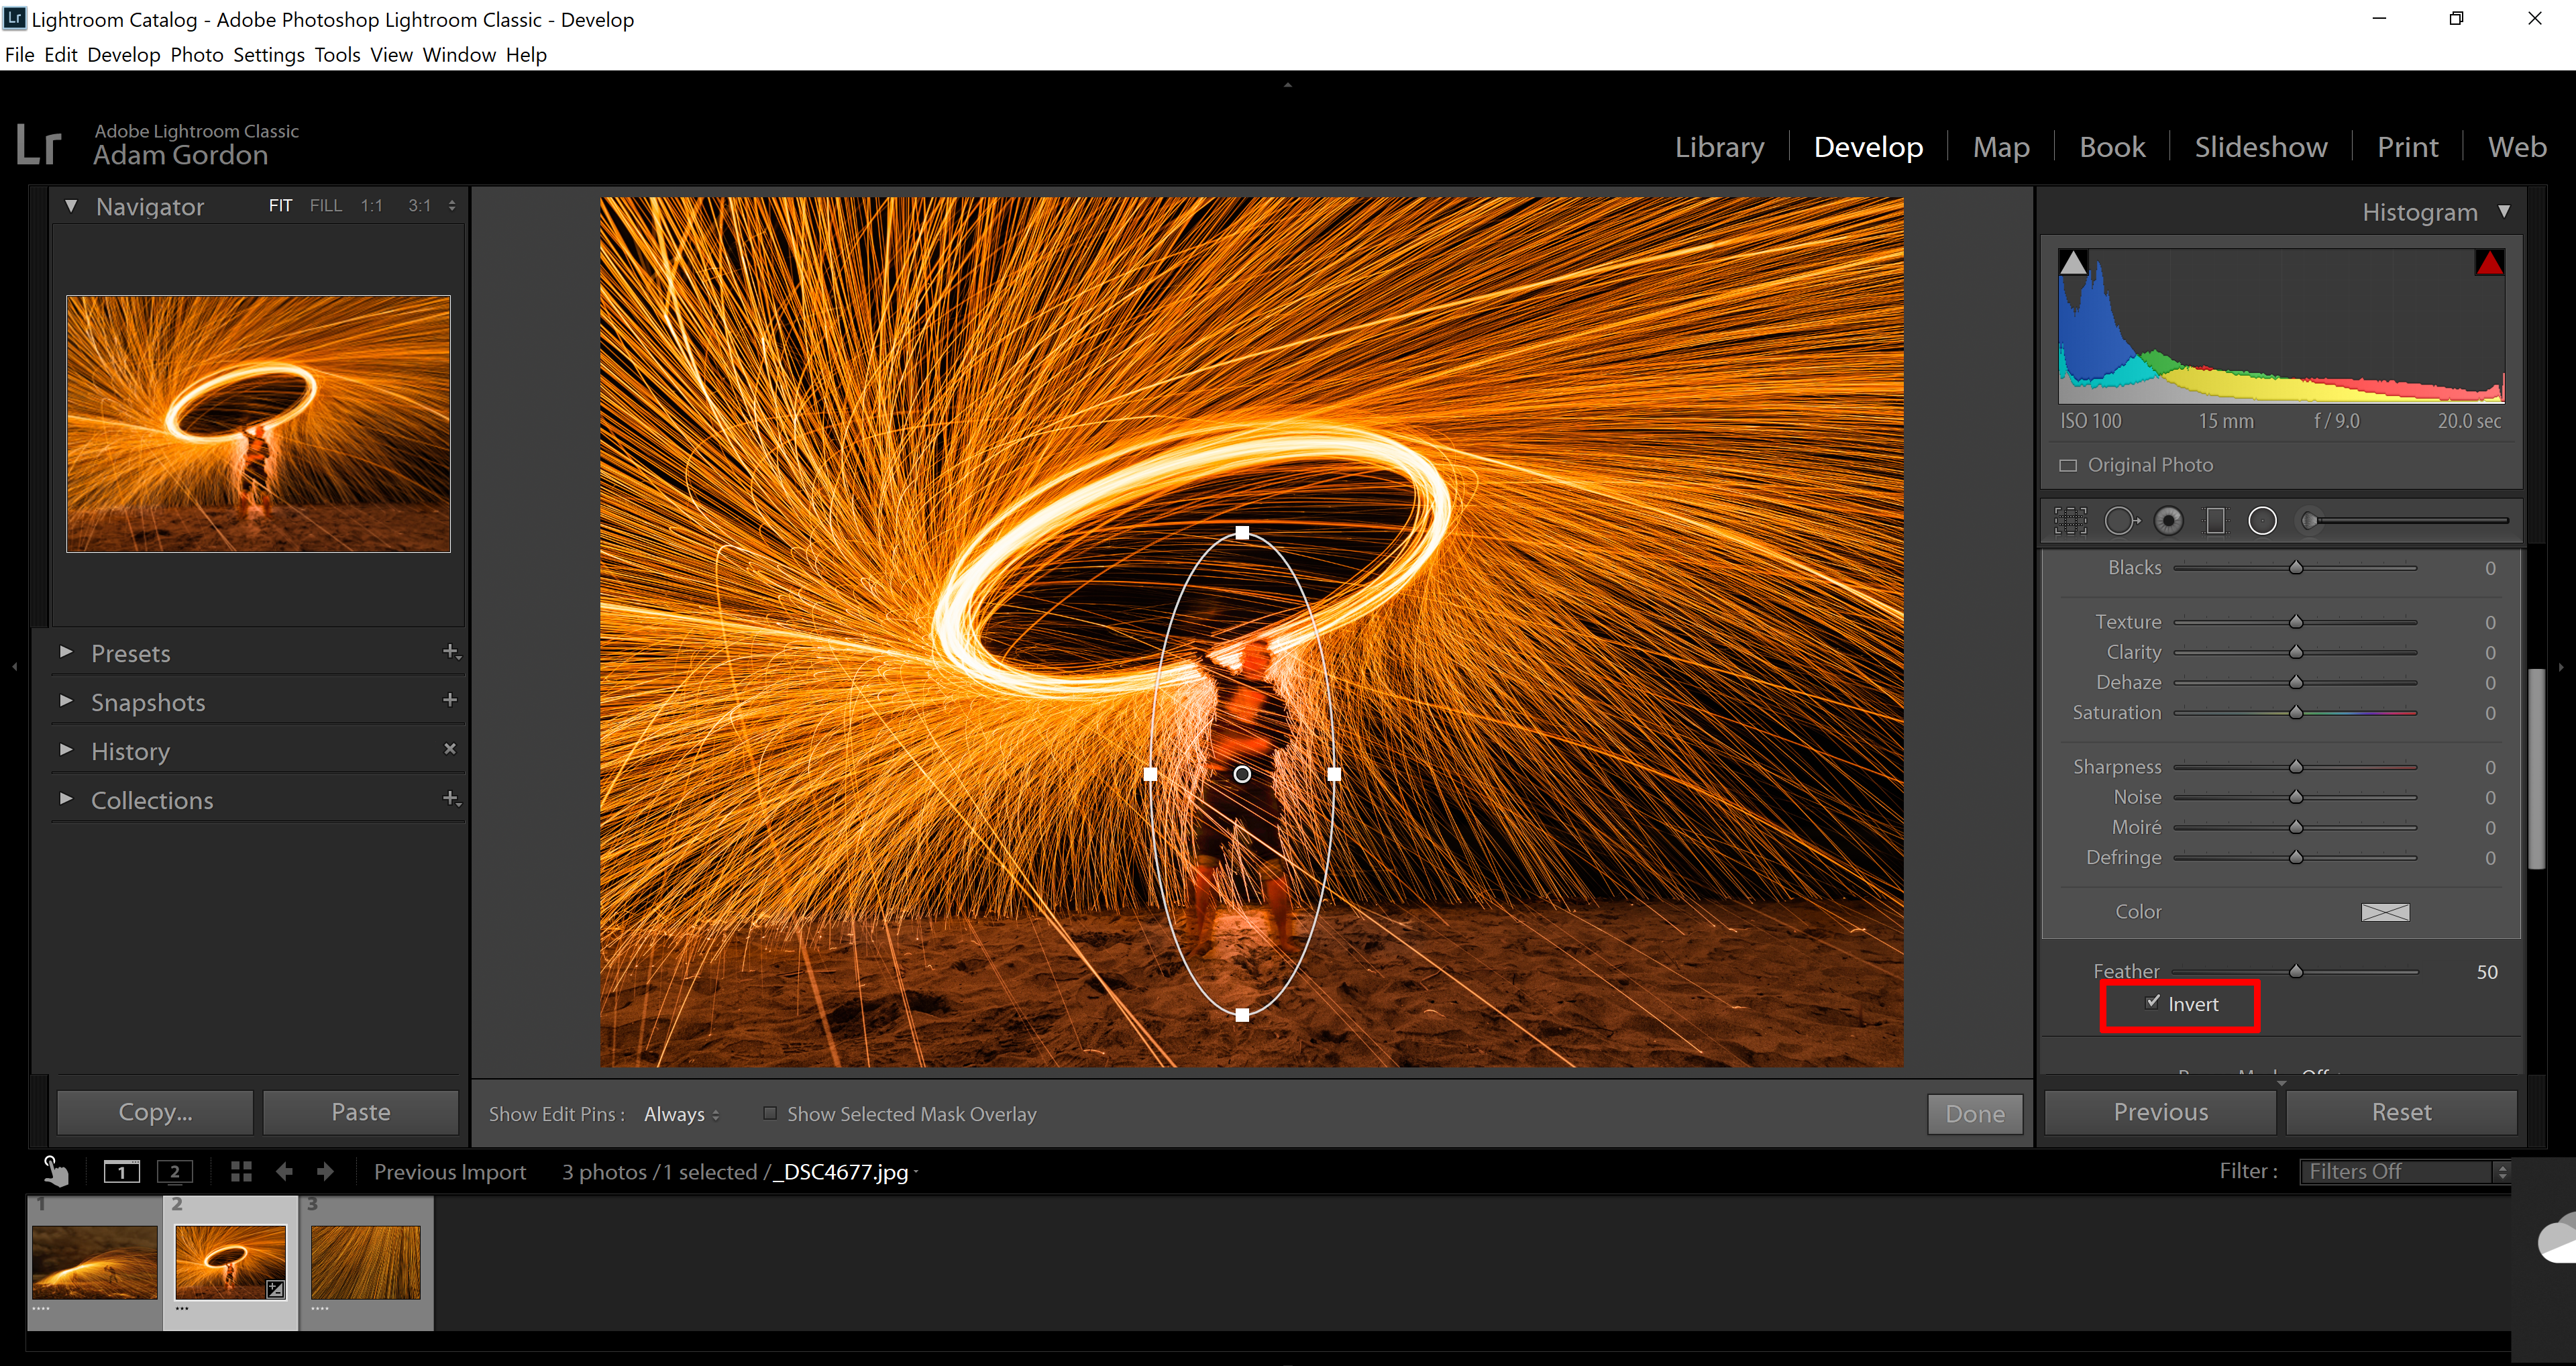
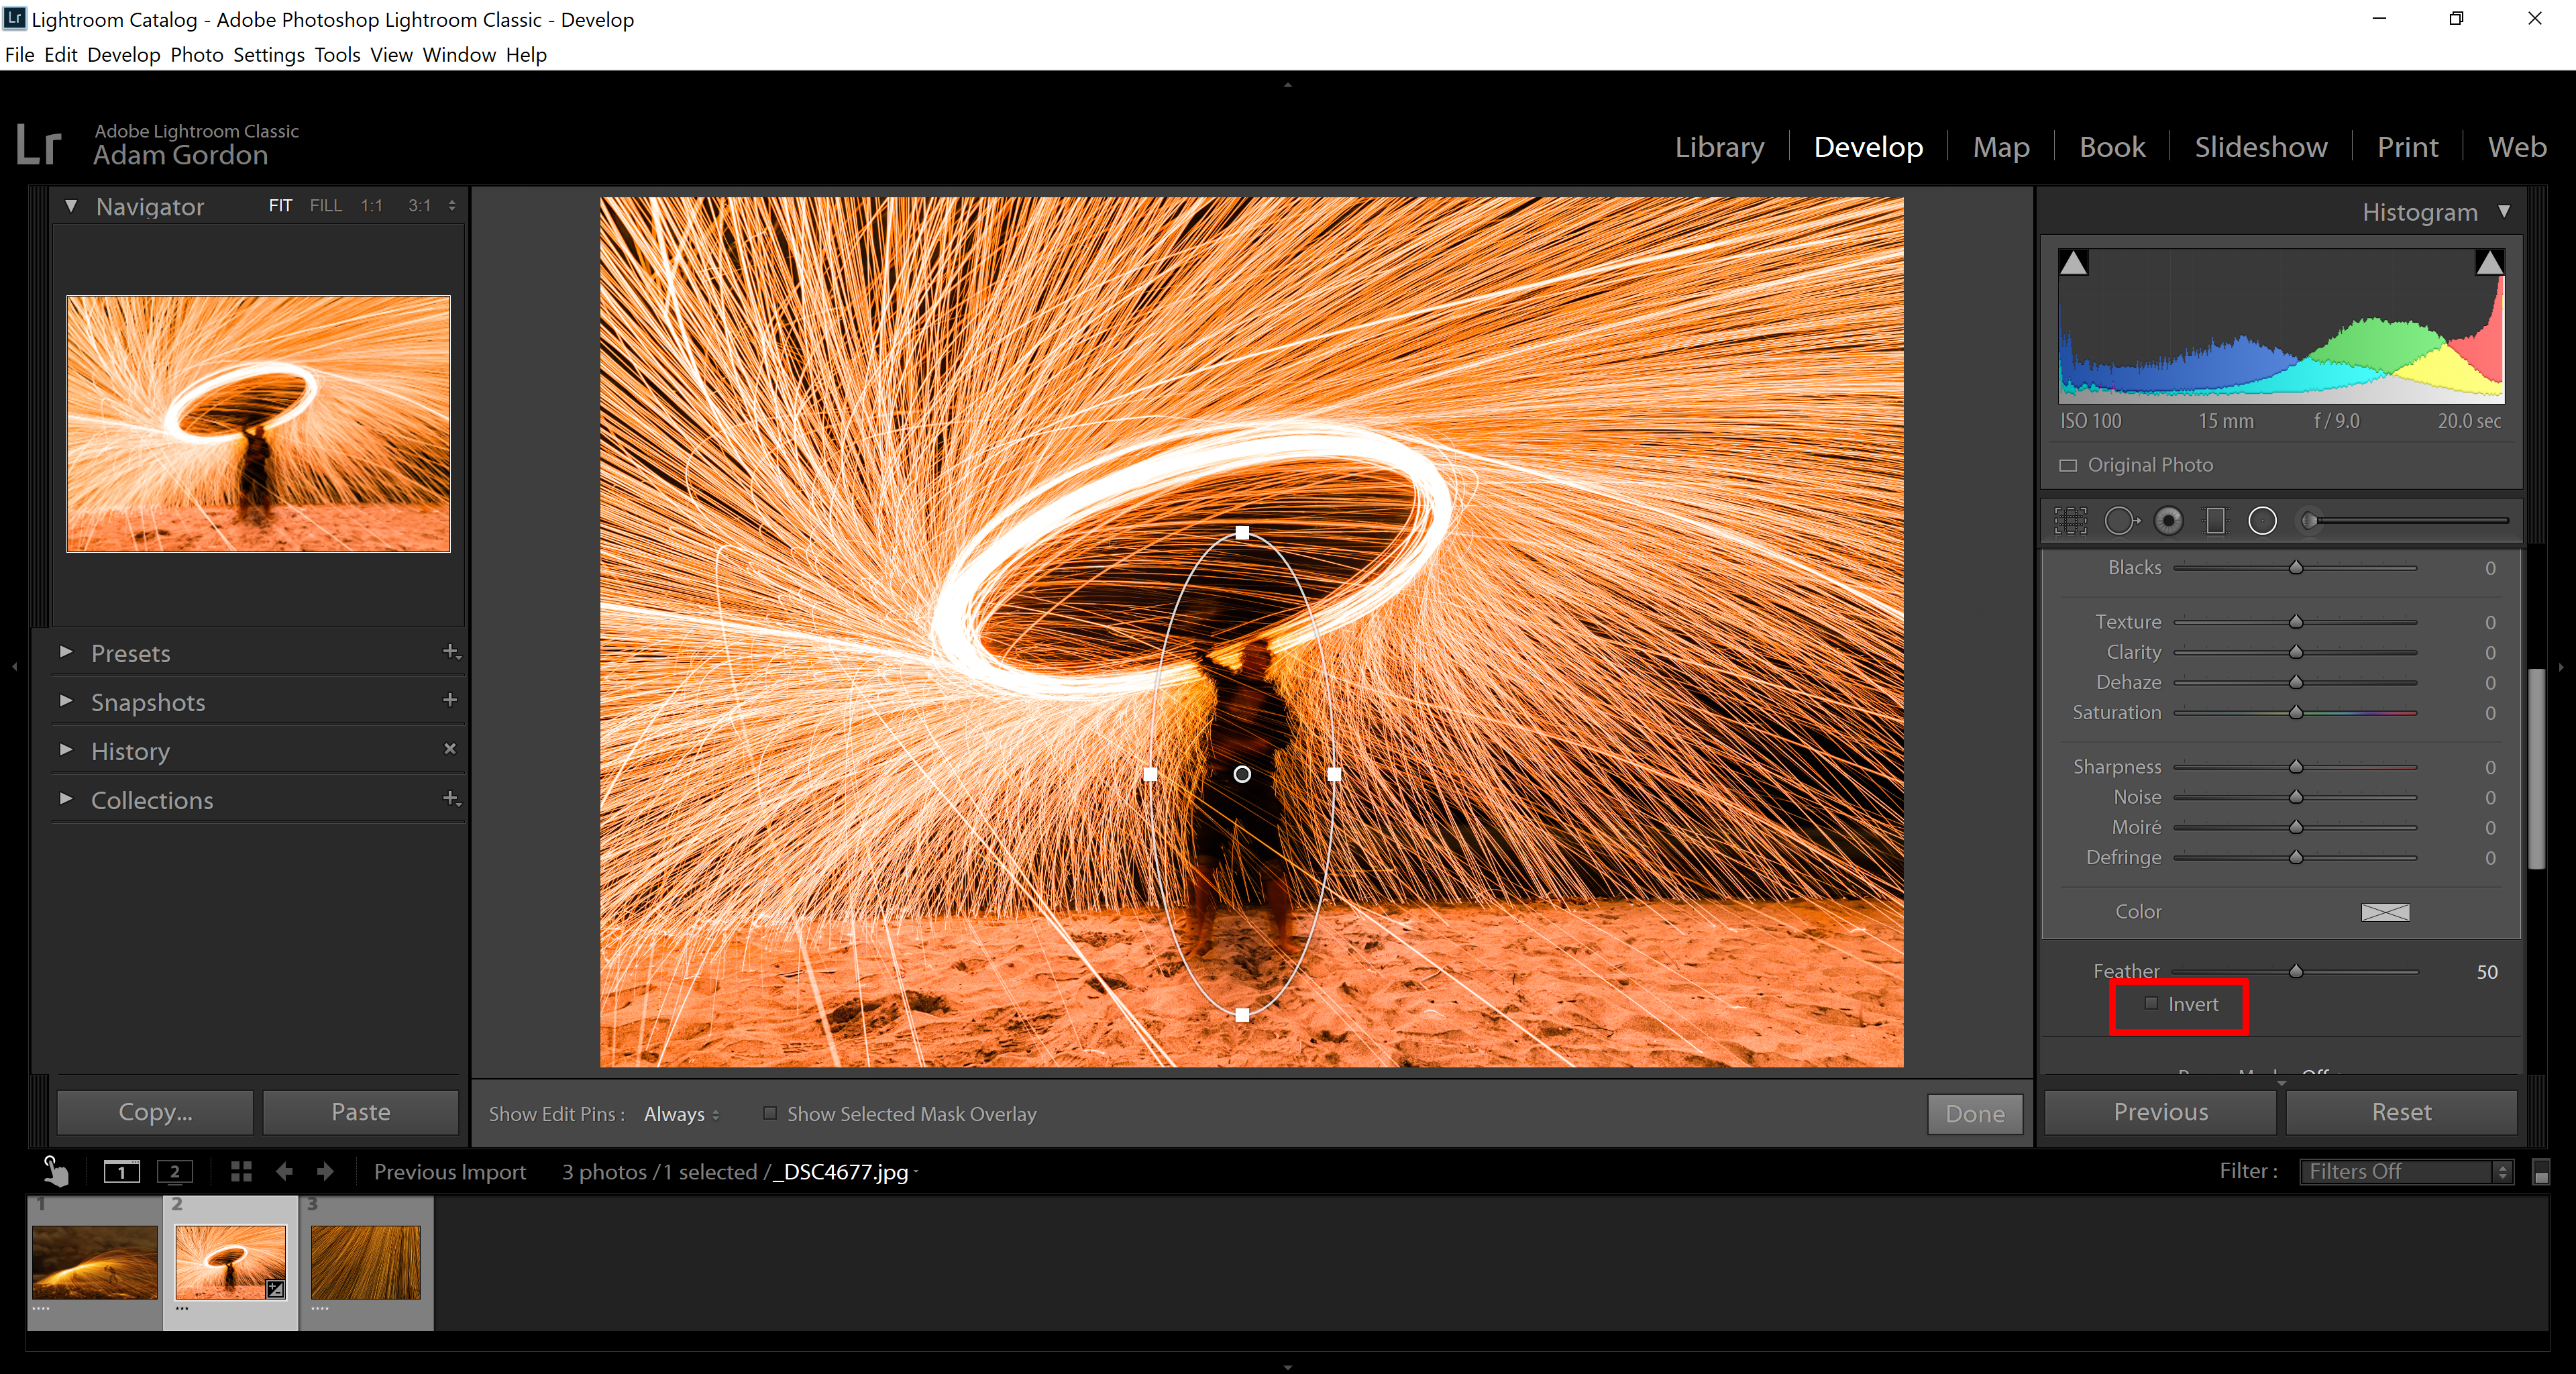
If you check the “Invert Box,” all of your changes will be applied to the inside of your shape as shown.
6. Brush Tool: The brush tool allows you to change one of the basic tab settings and then paint over the specific areas you want it applied to the image, similar to a paintbrush. You can change the size and feather (fuzziness) of the brush as well. I recommend setting the feather to 100 as this will be the easiest to blend different settings (contrast, exposure, highlights) in the image.
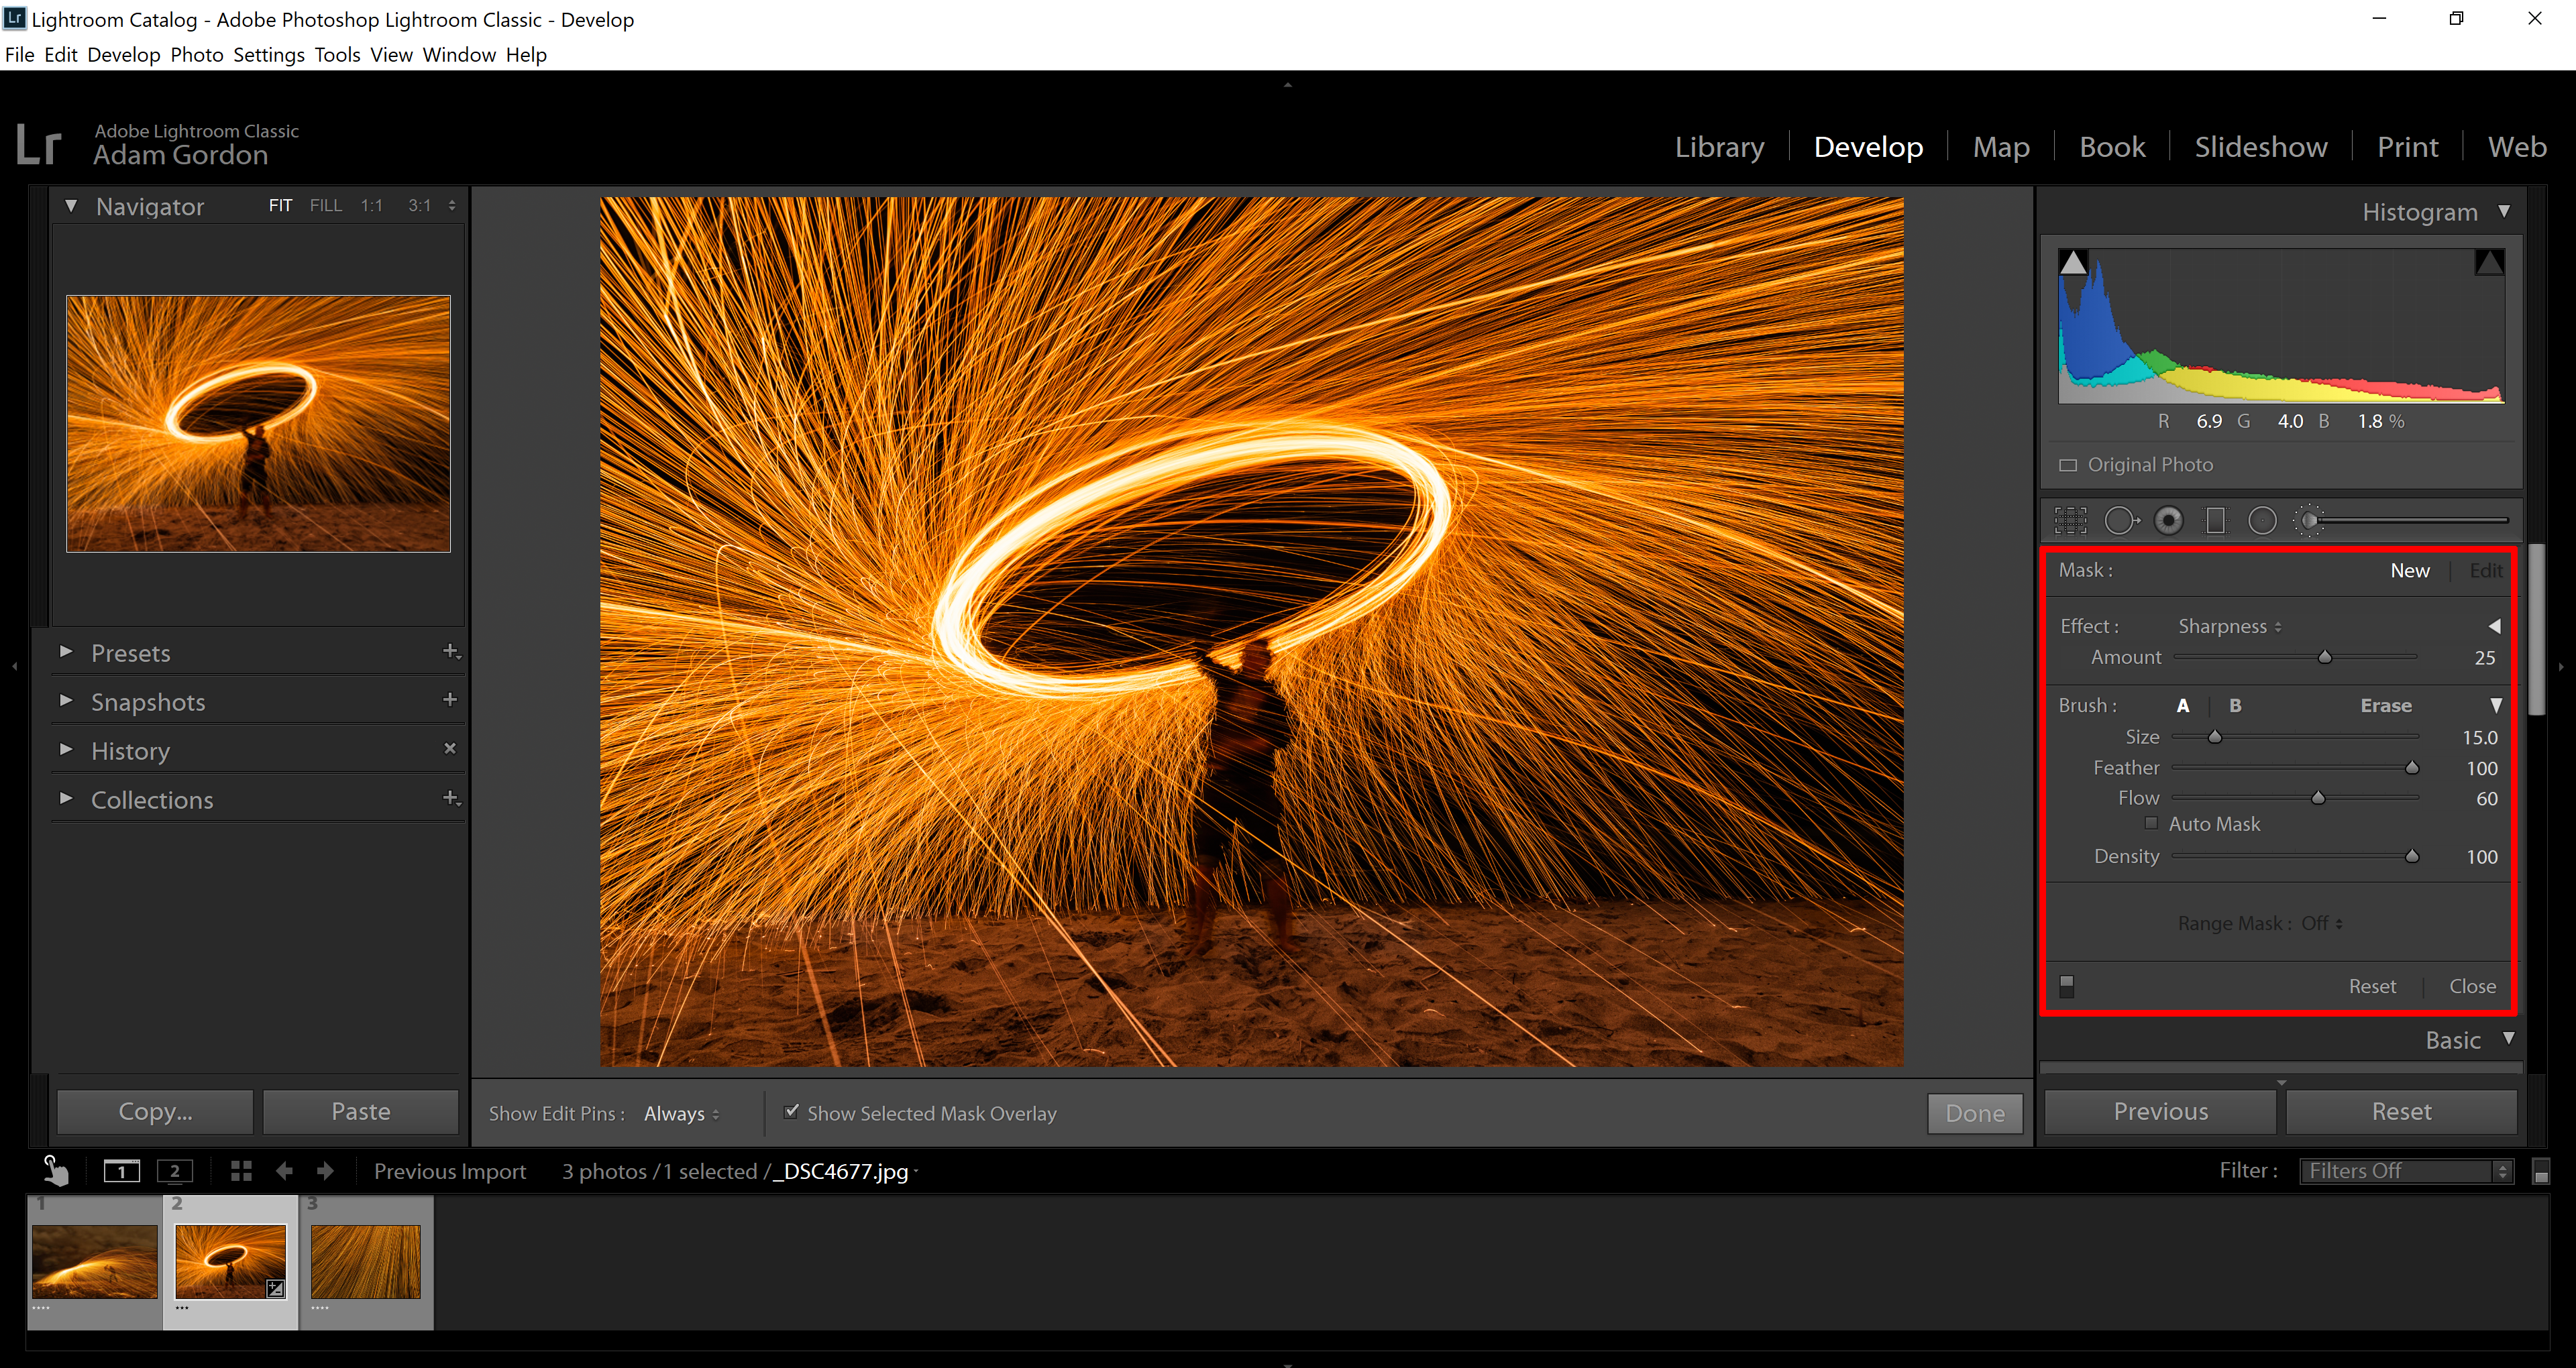
Outlined here are the brush settings, allowing you to change the size, feather, and flow of the brush.
How to Sync Settings with Multiple Images
If you have a few photos that you think you are going to edit similarly, there is a way to copy settings from one image and sync them with the others. For example, when I am out photographing the night sky, the light does not change drastically from image to image. Instead of going through and editing each photo the same way, I can edit one of the photos and then copy the settings over.
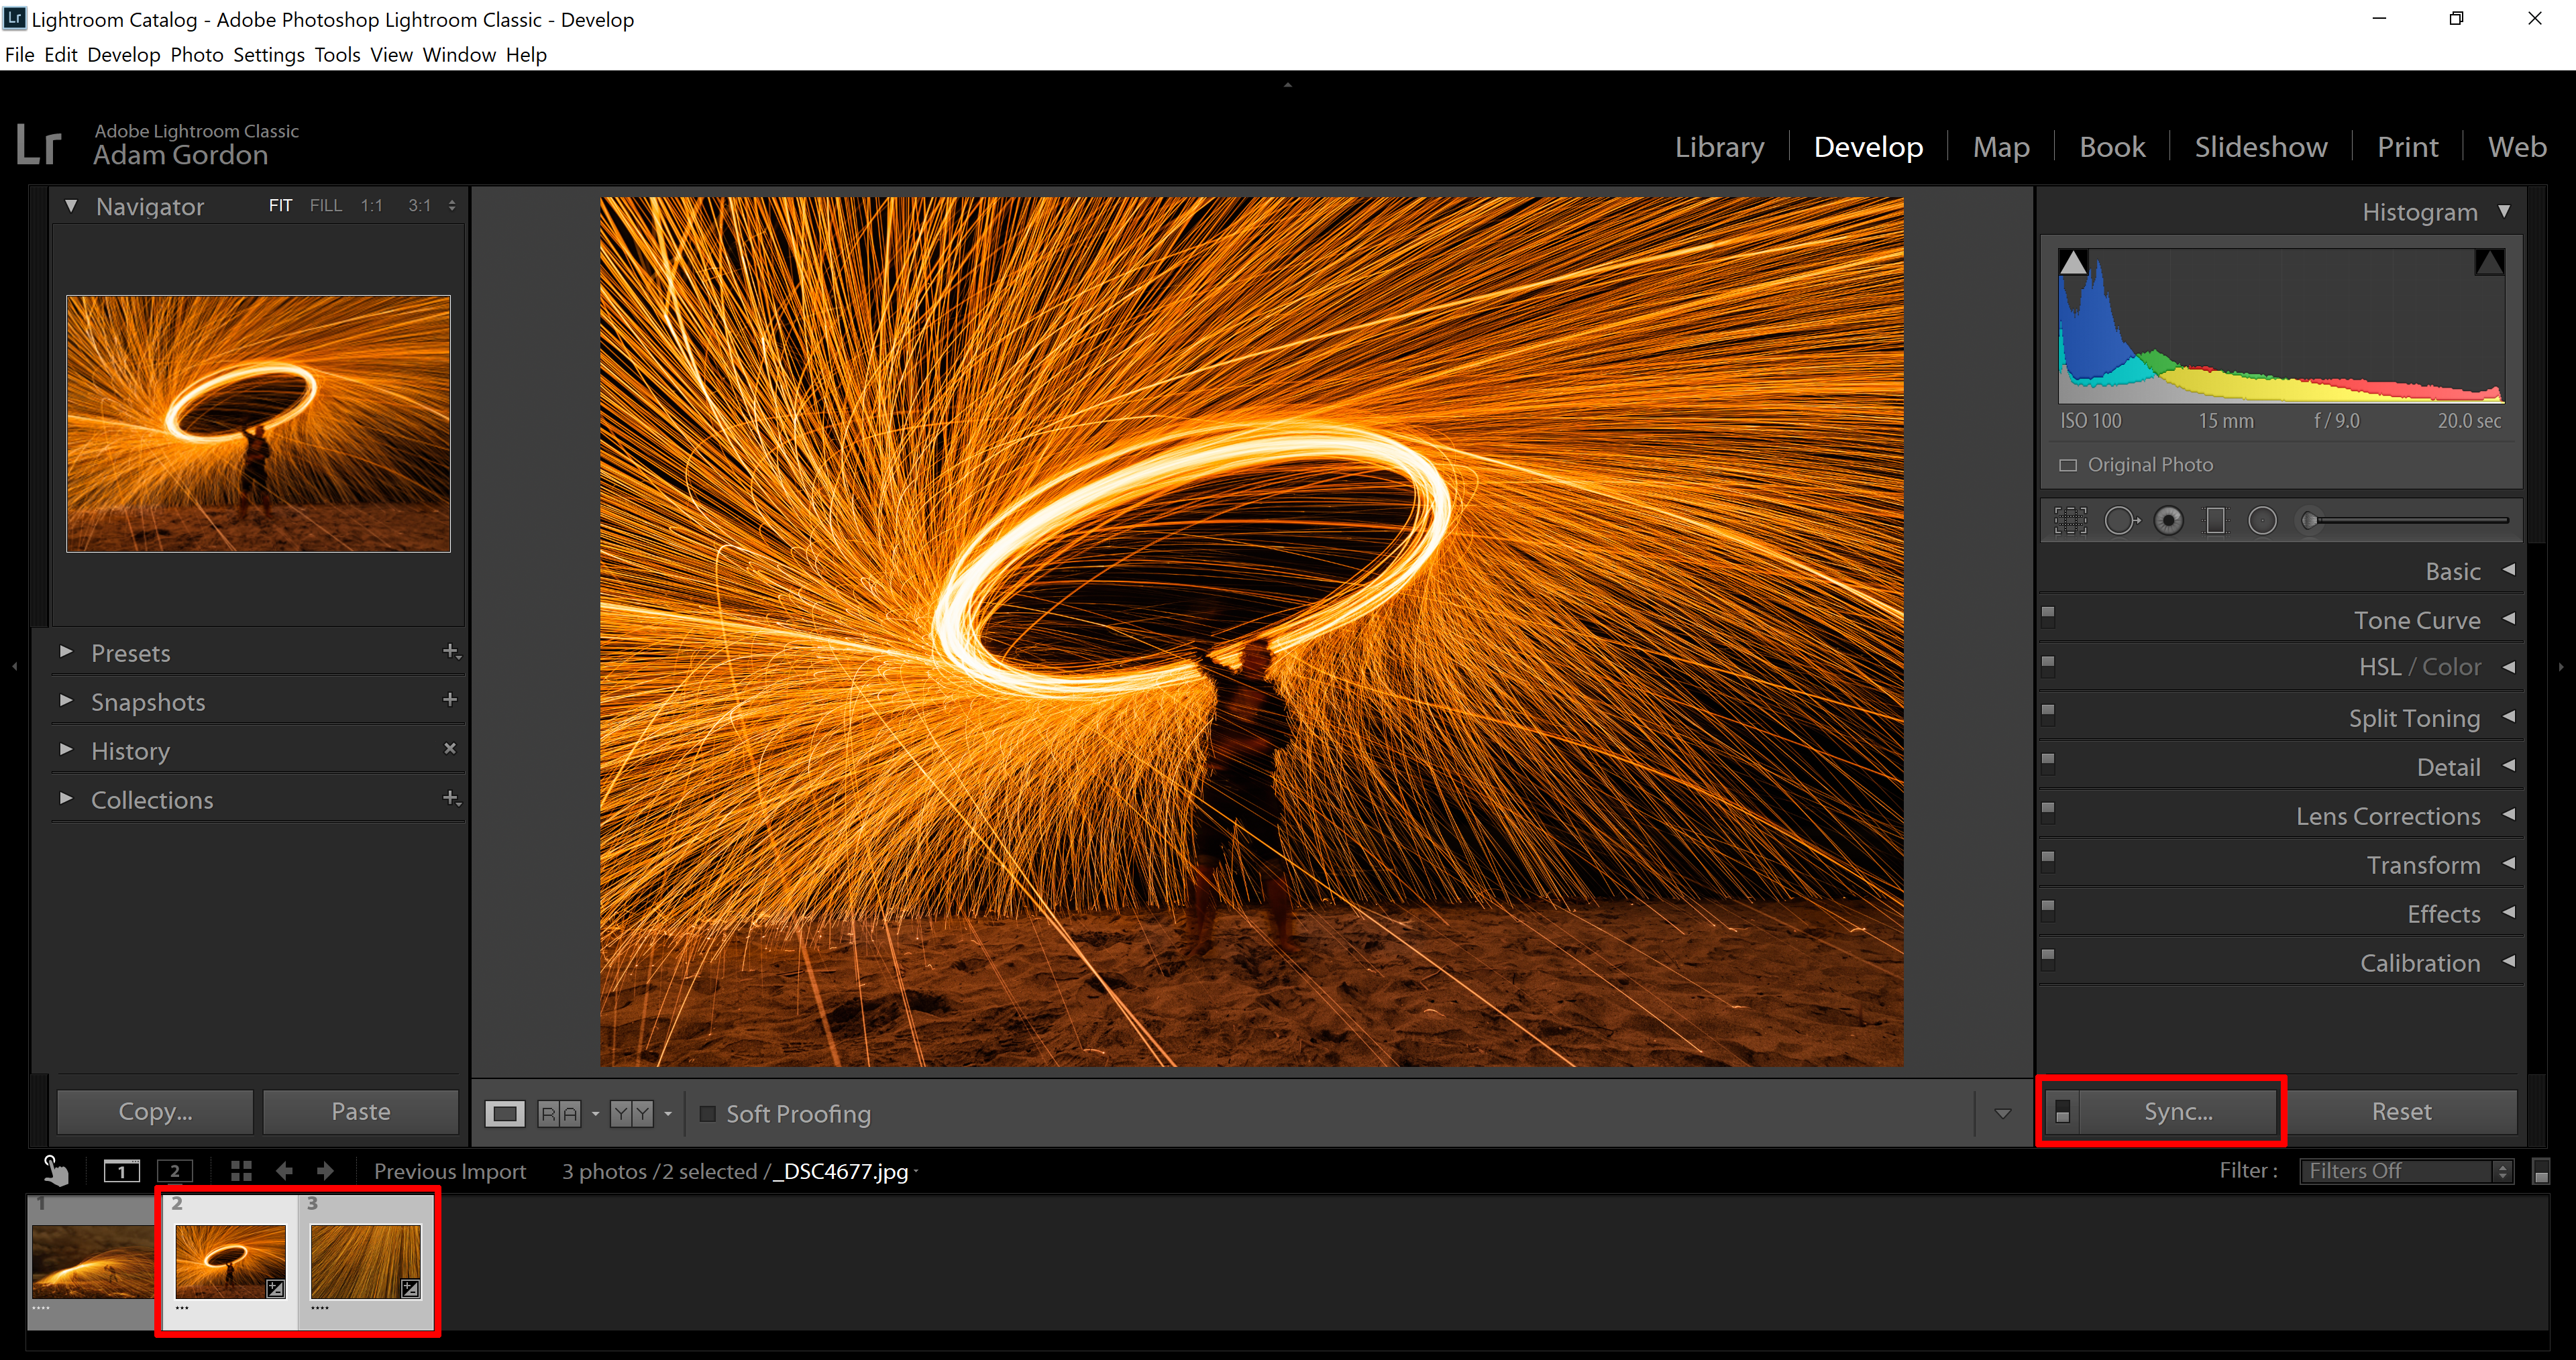
Select the images by either using Ctrl + A or Shift-Click them, and then click the “Sync” button
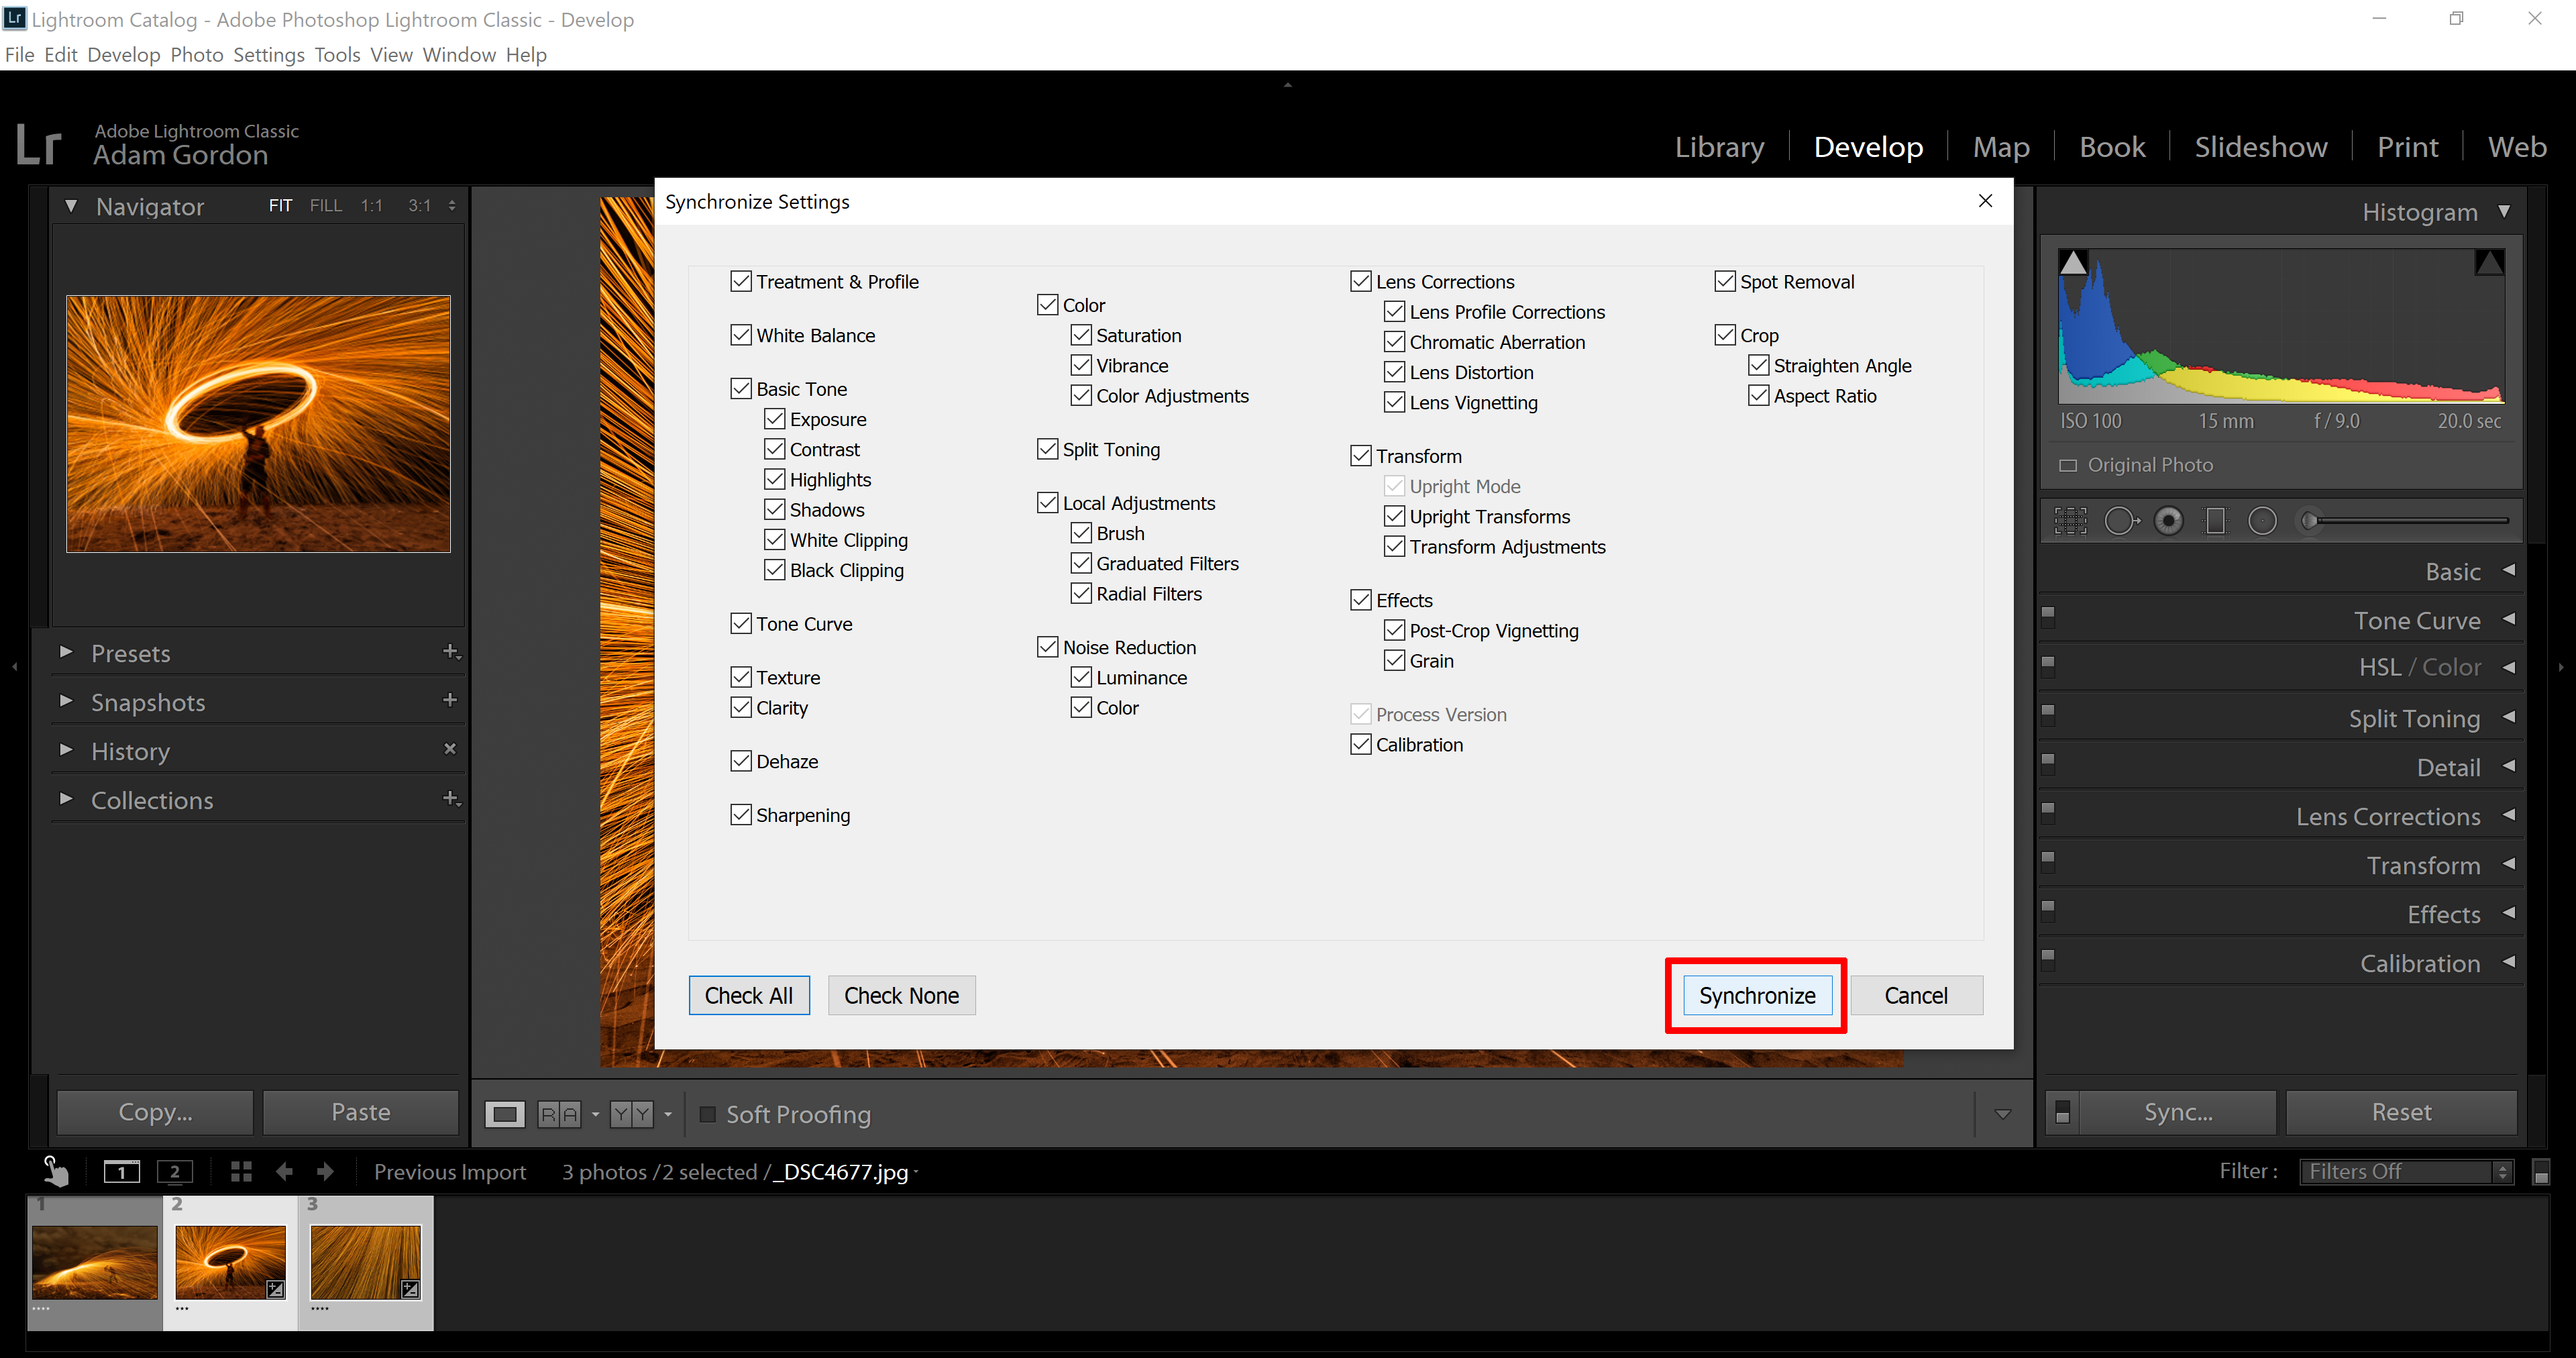
Once you determine which settings you want synced, click “Synchronize”
How to Export Images
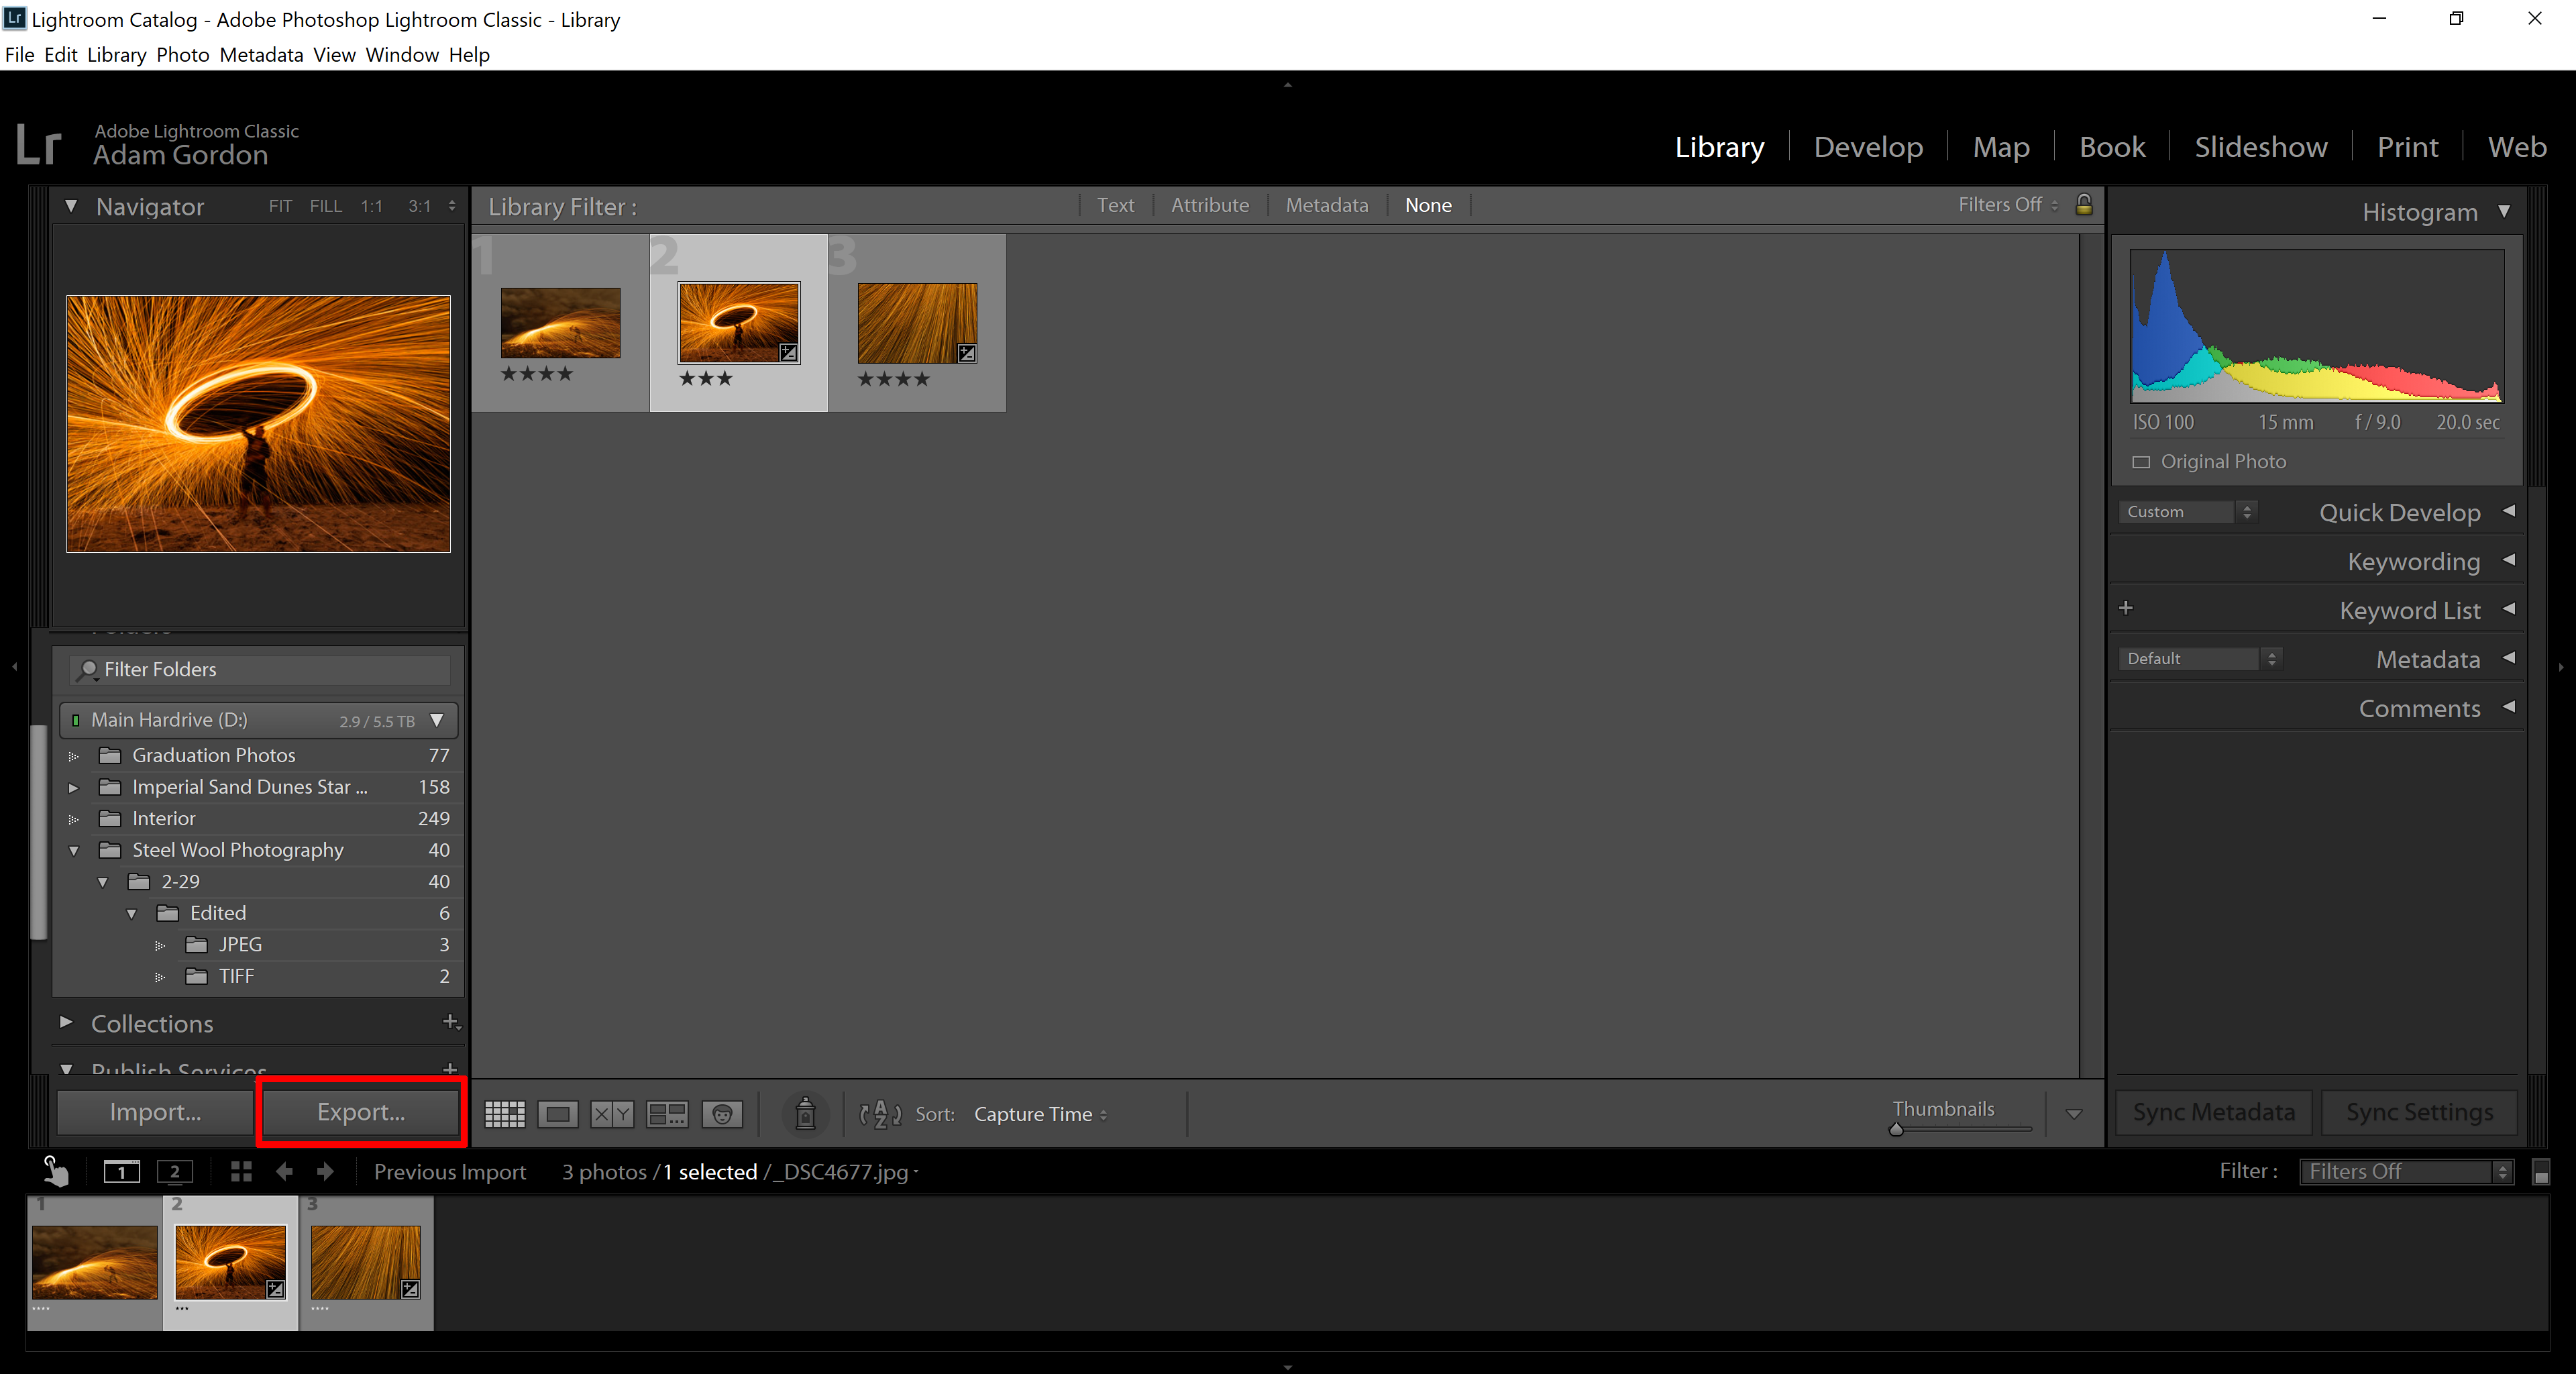
Once you’re finished editing, click the “Export” Button
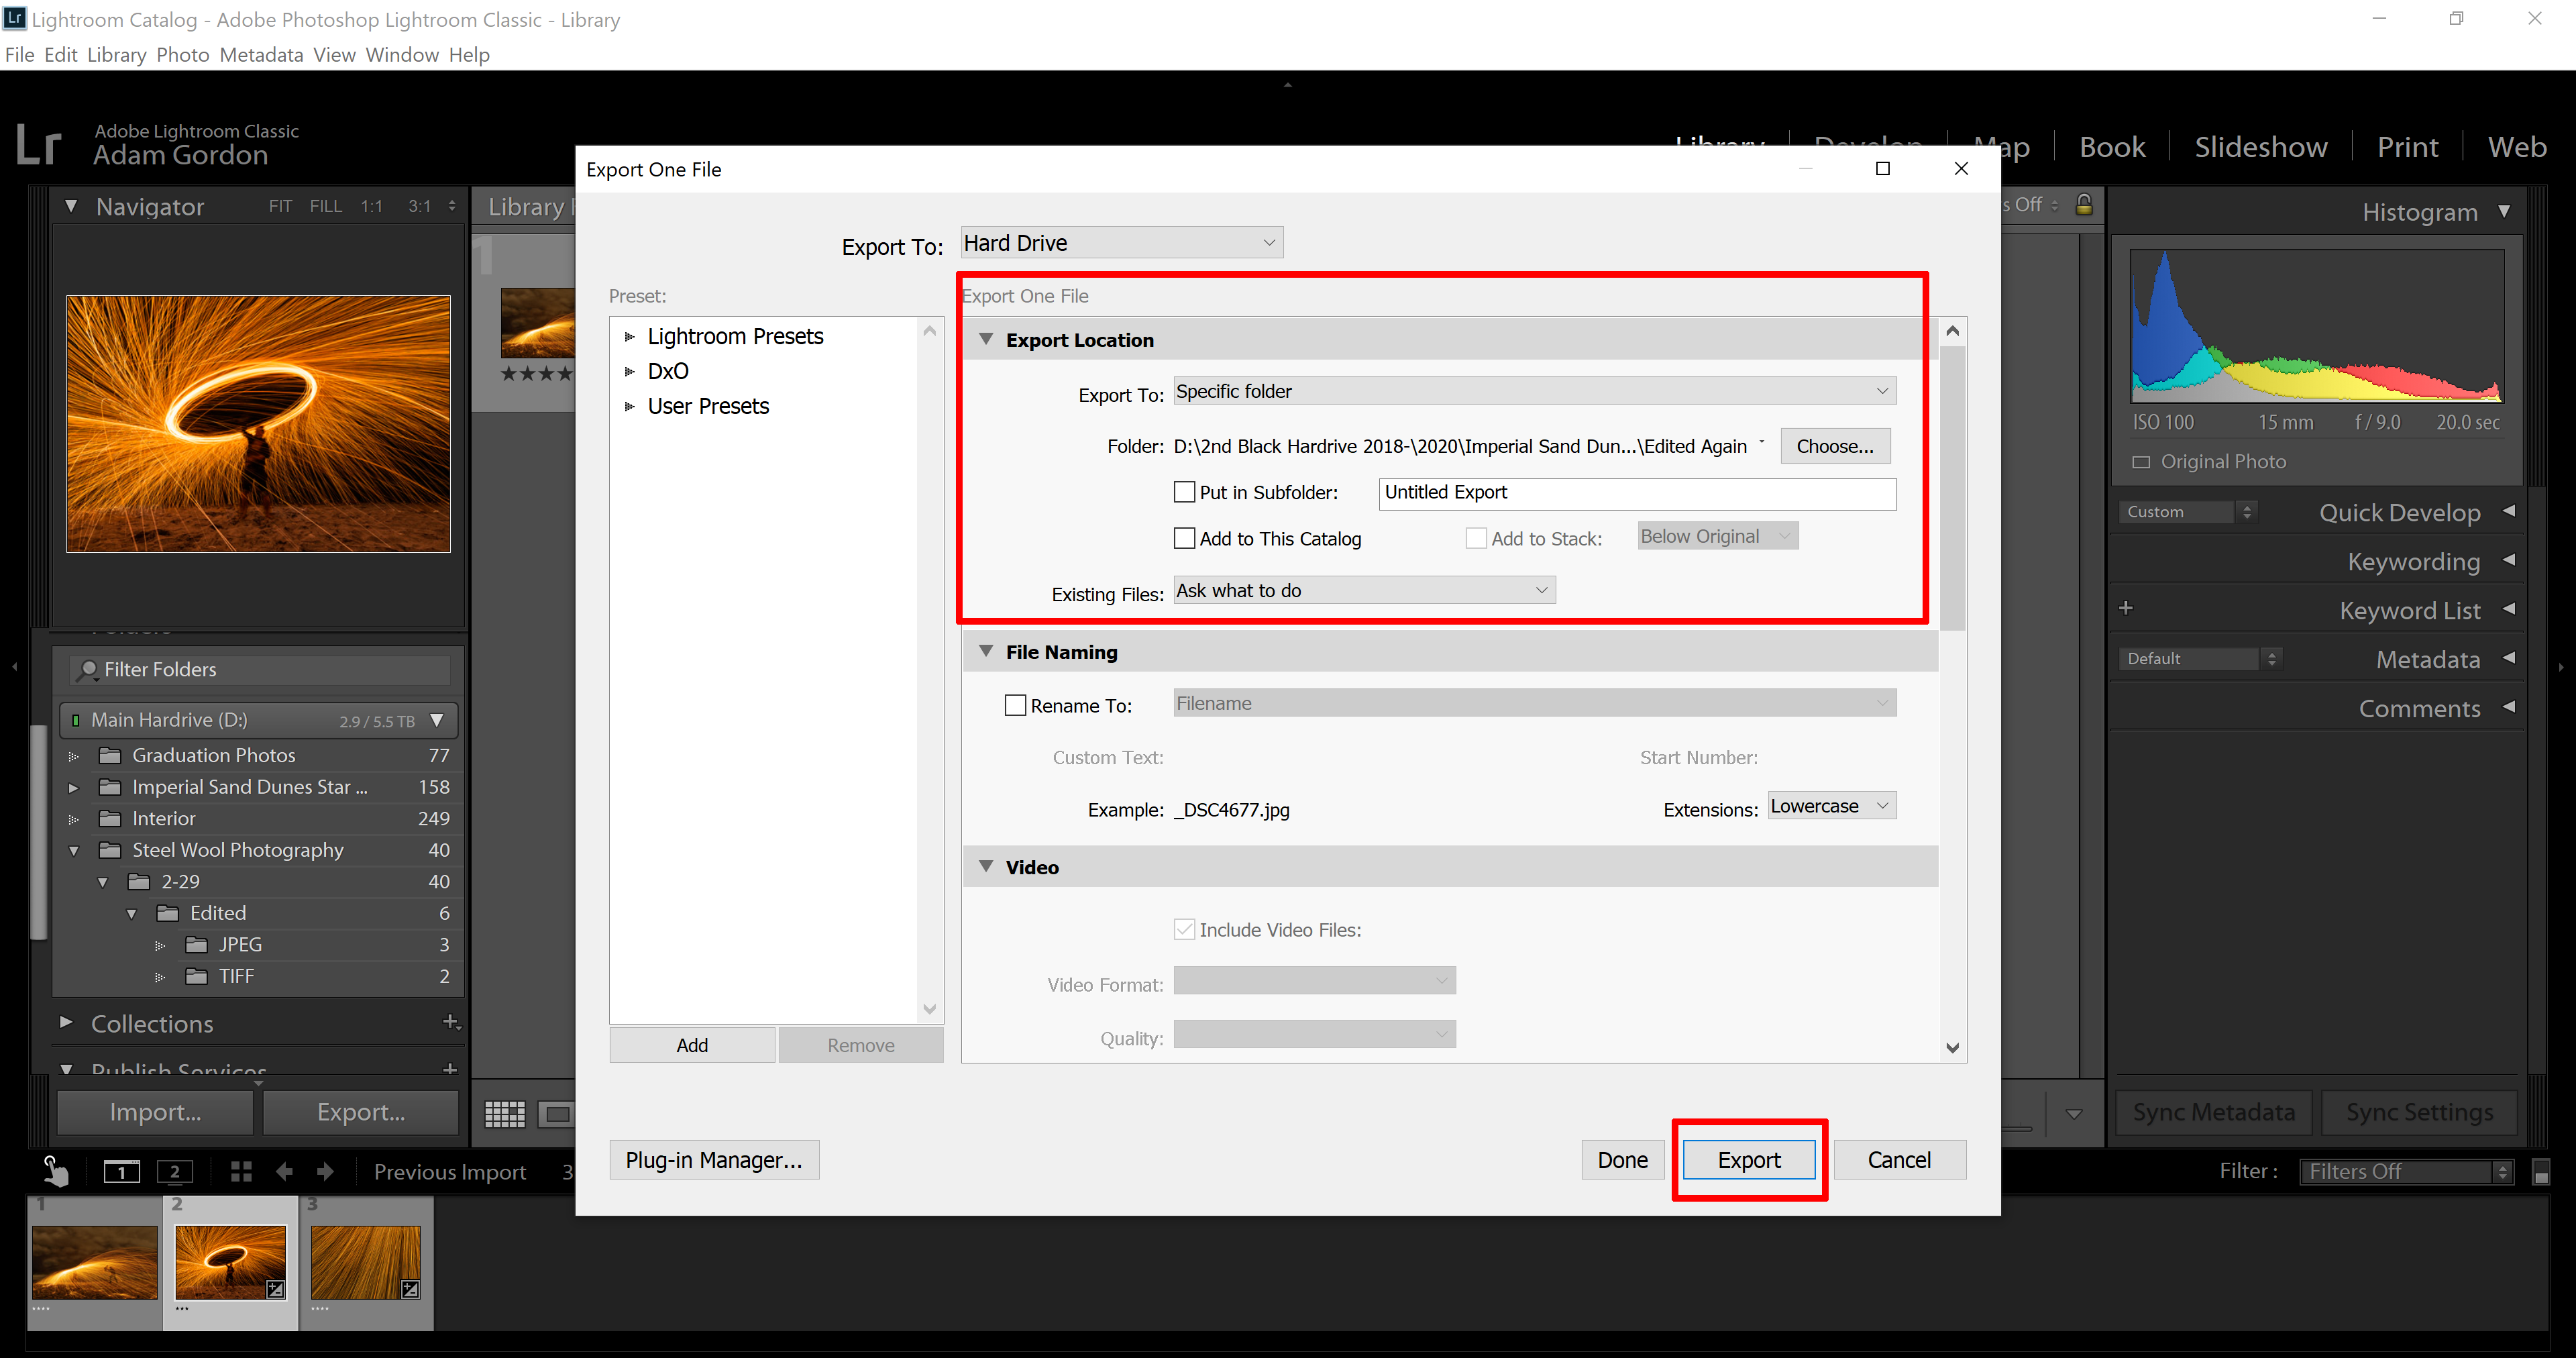
Choose which folder you want to save the image in and click “Export”
Congratulations! You have officially learned how to import, edit, and export an image from Lightroom!
Once you spend a few hours editing images in Lightroom you will know the software like the back of your hand!