So you figured out how to take pictures with your camera and you start going outside to photograph. But after some time, all of your photos start to look the same. Same angle. Same light. They start to look like regular images. But you know you can create better. You’ve seen the images online and know that you can take those types of photos and create even better ones! And I fully believe you can. There are some tips however I want to share with you to take you to that next level.
What are Compositions?
Composition is just a fancy word for what is in your image. You might be out shooting somewhere and hear the classic line “That’s a nice composition.” All that means is that the foreground and sky look nice together. Or that tree in the center of the frame next to that one rock really complements the scene.
This terminology is mainly used in landscape photography, as that area of photography usually includes the most elements in a picture. The more elements, the more you want to correctly find a way to balance the image, so it doesn’t look too crowded or distracting.
So before you go back out to shoot, here are some of the best and most popular photography compositions to try out so you’re images start looking fantastic!
1. Rule of Thirds
The rule of thirds is probably the most popular photography composition out there. It is also the most used one (especially for beginners) and for good reason! The rule of thirds basically states that if you were to split your image into thirds, the most interesting part (whether that be the foreground or sky) covers ⅔ of the image, while the remaining ⅓ covers the less interesting part.
I know that might sound really technical so I’ll explain it a little more and give some examples.
In landscape or nature photography, your image usually consists of a foreground (anything from mountains, to sand, to trees, to rocks, etc.) and a sky. One of these elements, (either the foreground or sky) is probably going to look better. Whichever one does is the one you frame to be ⅔ of the shot.
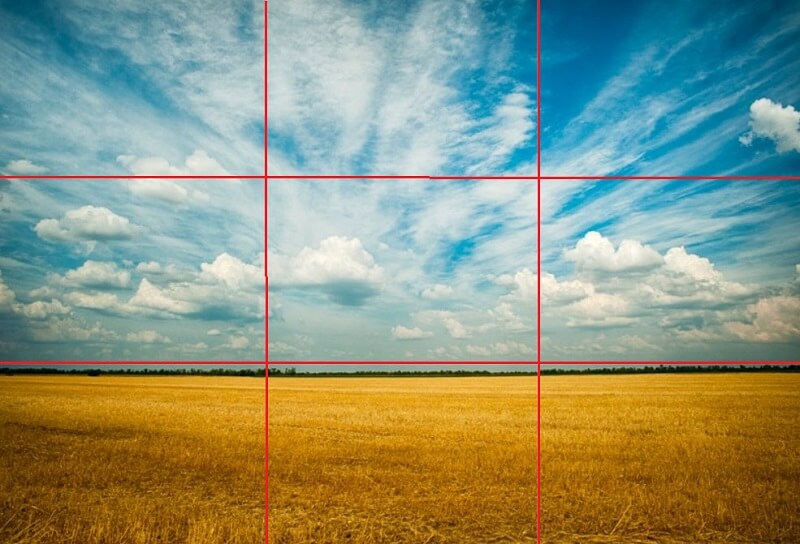
In this image, the sky is more interesting than the foreground, so It covered roughly 2/3 of the image.
For example, let’s say the foreground is really exciting but the sky is just plain clear and blue. You would probably want to focus more on the foreground but still include the sky. With the rule of thirds, you estimate to frame your shot so ⅔ of it is on the foreground, and ⅓ of the shot is on the sky.
And sometimes the scene will be the exact opposite, where the sky is full of clouds and color and the foreground is alright but not super interesting. In this situation, you would frame your shot to be more focused on the sky and less on the foreground.
You can also use rule of thirds to frame subjects off to the side.
Meaning that you put the subject(s) on either the right or left side intersecting with the vertical lines.
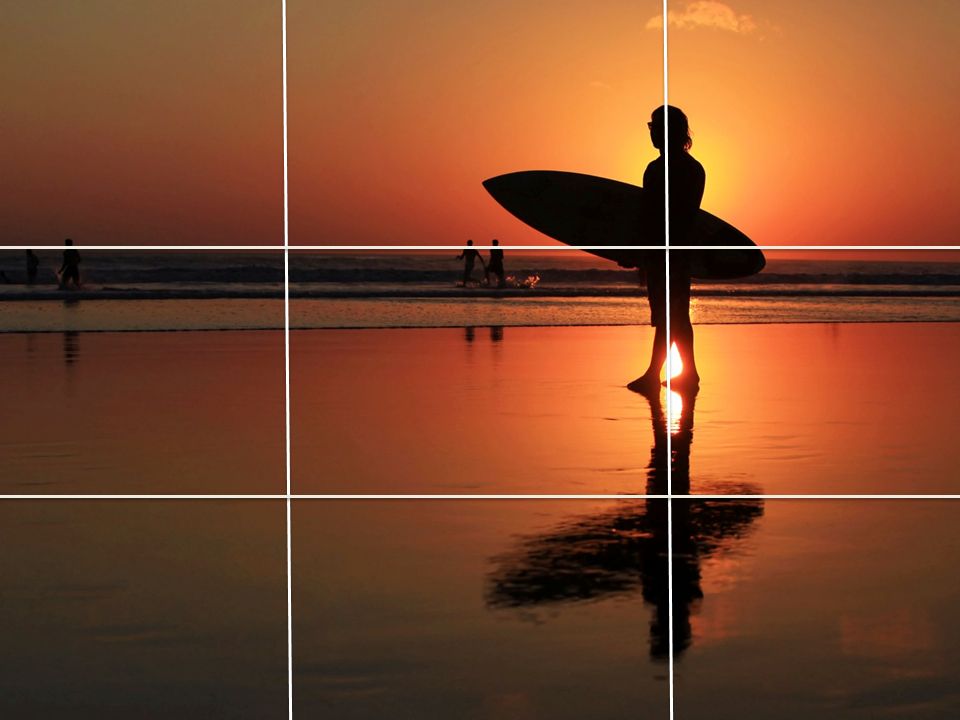
This is showing how to use rule of thirds and frame your subject off to the right or left to balance out the image.
2. Leading Lines
Leading lines is another popular and favorite composition for photographers. It is a composition in which an object (for example a road) starts at the front of the shot and travels all the way to the back, making your eye follow it the whole way through. This technique is especially popular because our eyes are drawn to follow along lines.
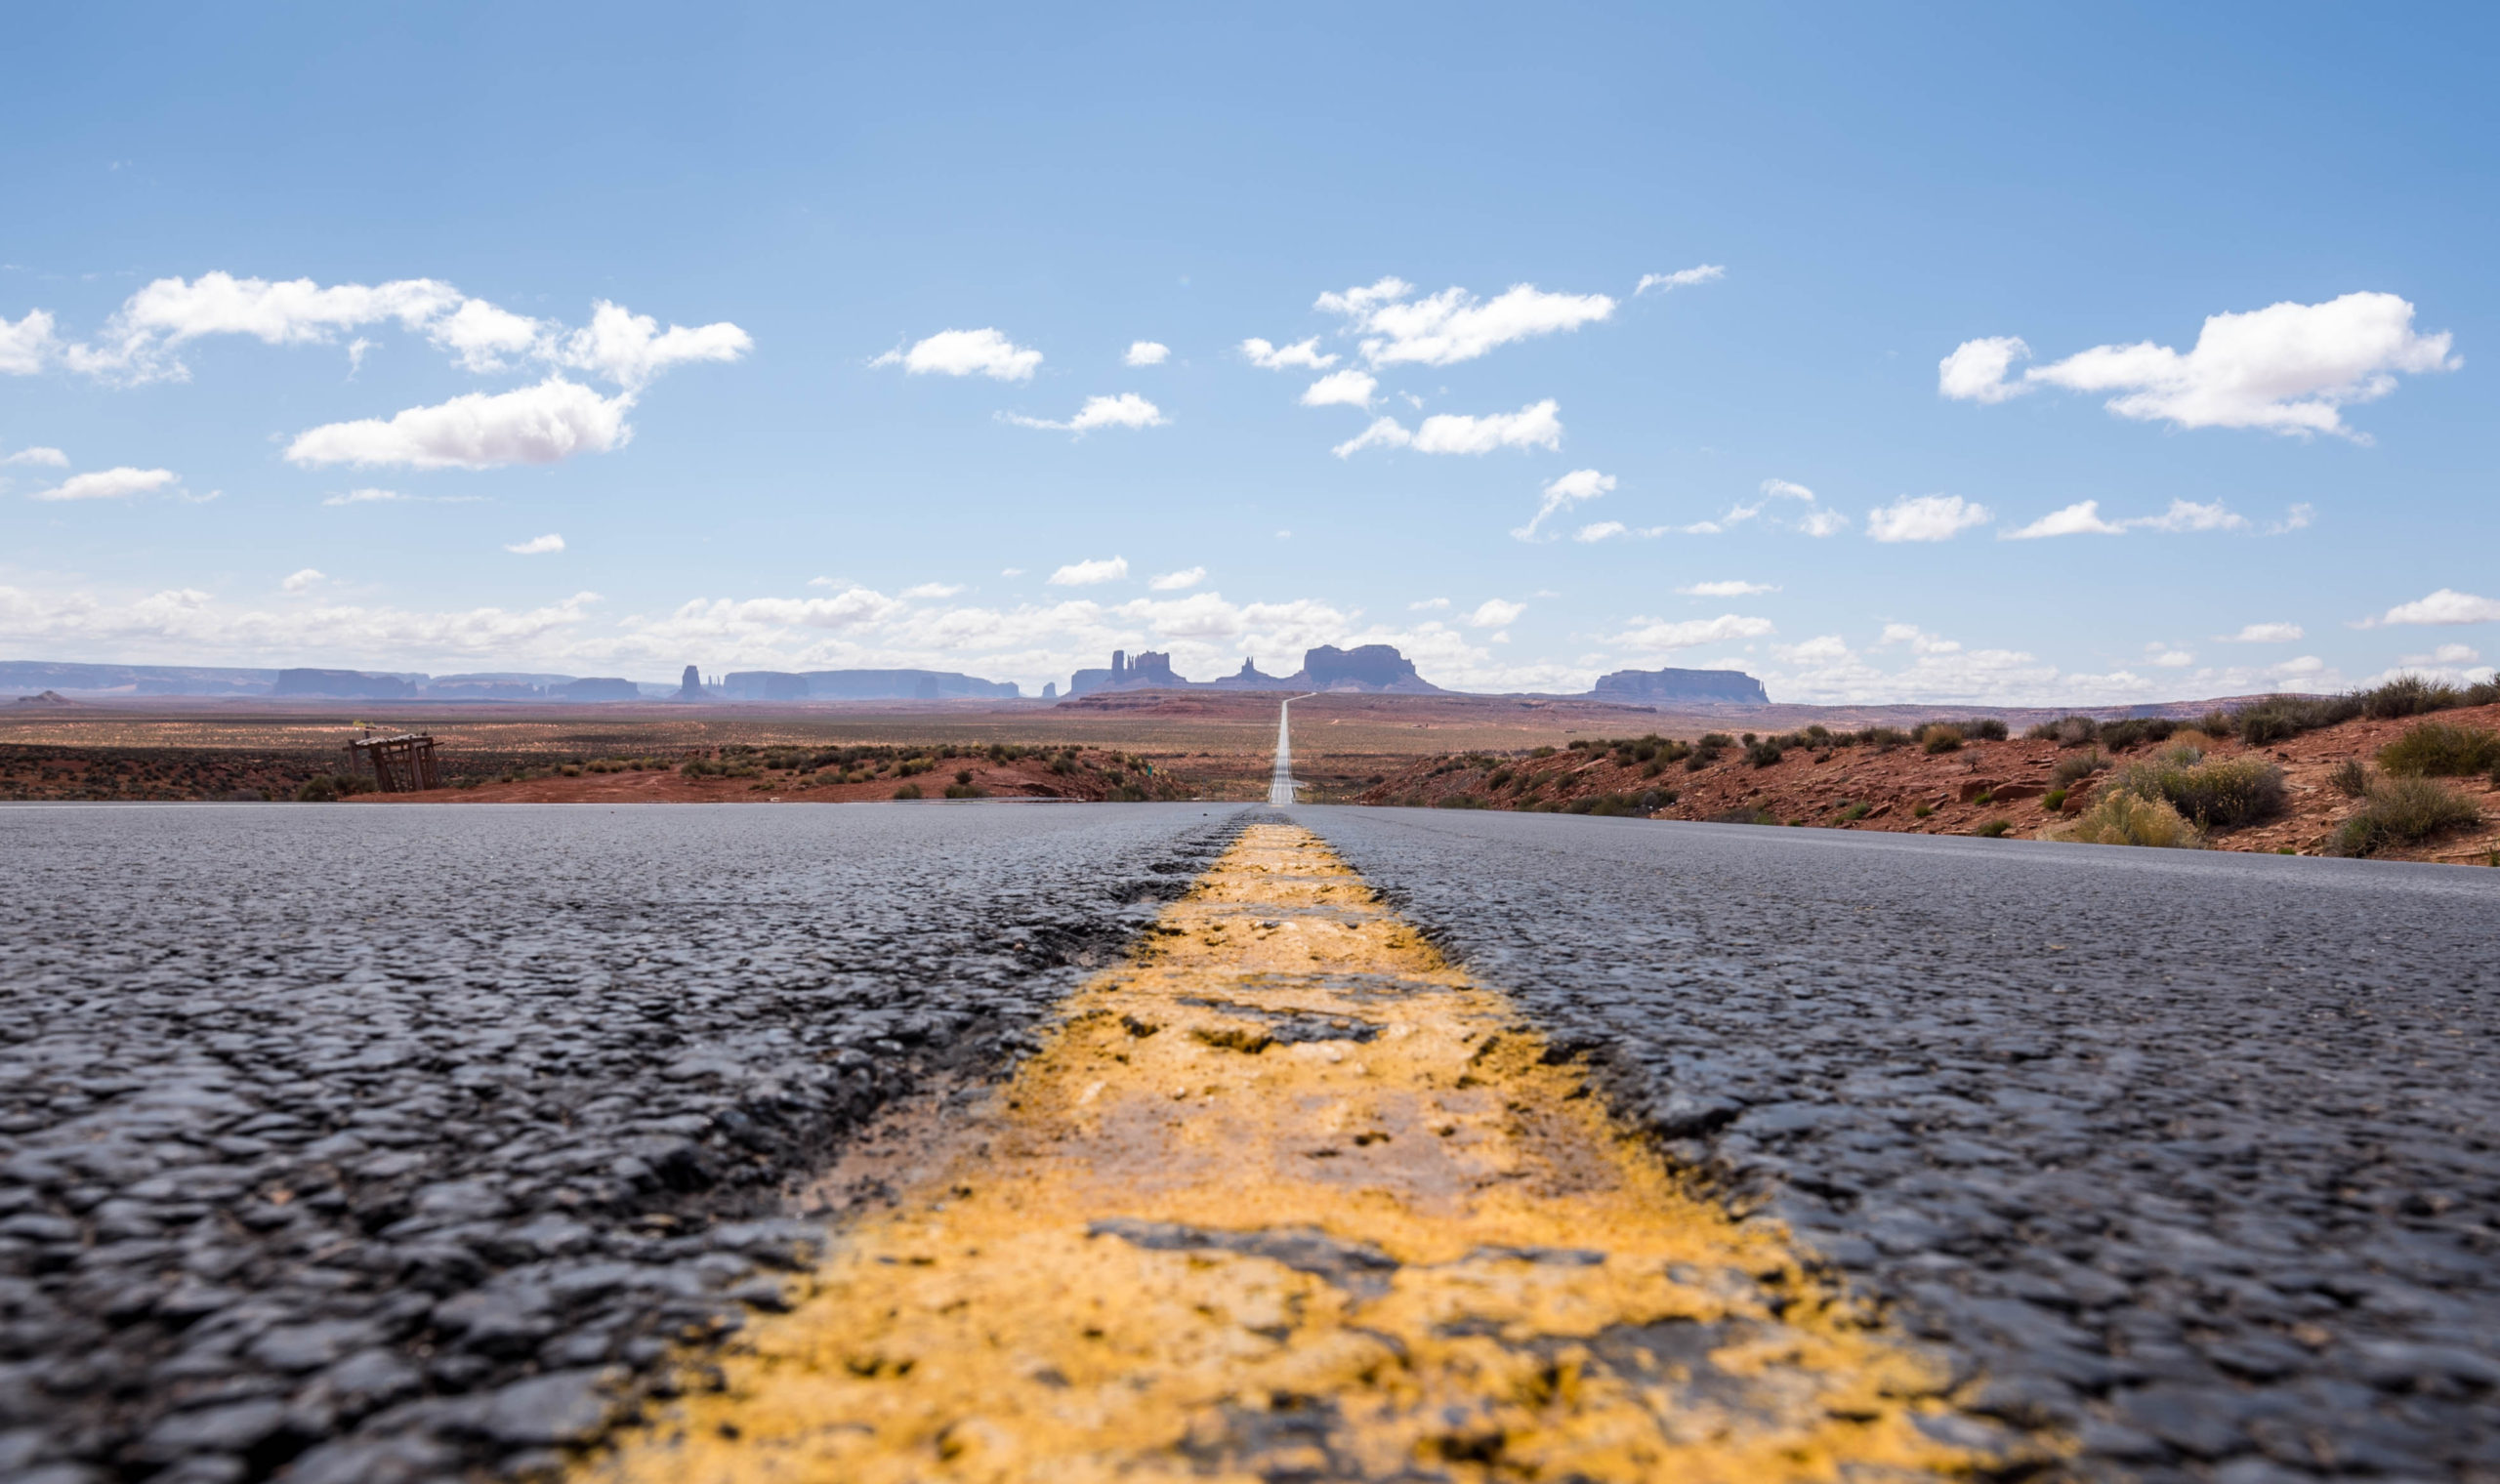
For this image, I wanted to capture the road in a way that it looked “never-ending.”
Leading lines is also very popular because you can create this type of shot with just about anything.
The most common examples using leading lines include:
- Roads
- Bridges
- Fences
- Anything in a row (like lamp posts)
- Rivers
Leading lines can be a very powerful technique because it can be used to tell a story, create a connection, and/or create a visual journey from one part of the image to the other.
3. Viewpoint
Ever see a photographer laying down on a hill or raising their camera way above their heads almost mimicking the famous Lion King scene?
That is viewpoint.
Viewpoint is one of the easiest compositions to try out because most of it just involves moving your body.
Think about it, the world is seen from the eye height level. When you start taking photos, you usually stay at that height, making everything you take a picture of seem pretty ordinary. This is especially the case if you are at a famous landmark or scene. A lot of people have seen that subject at eye height level. So why not lay down and take the same photo? The perspective is totally changed!
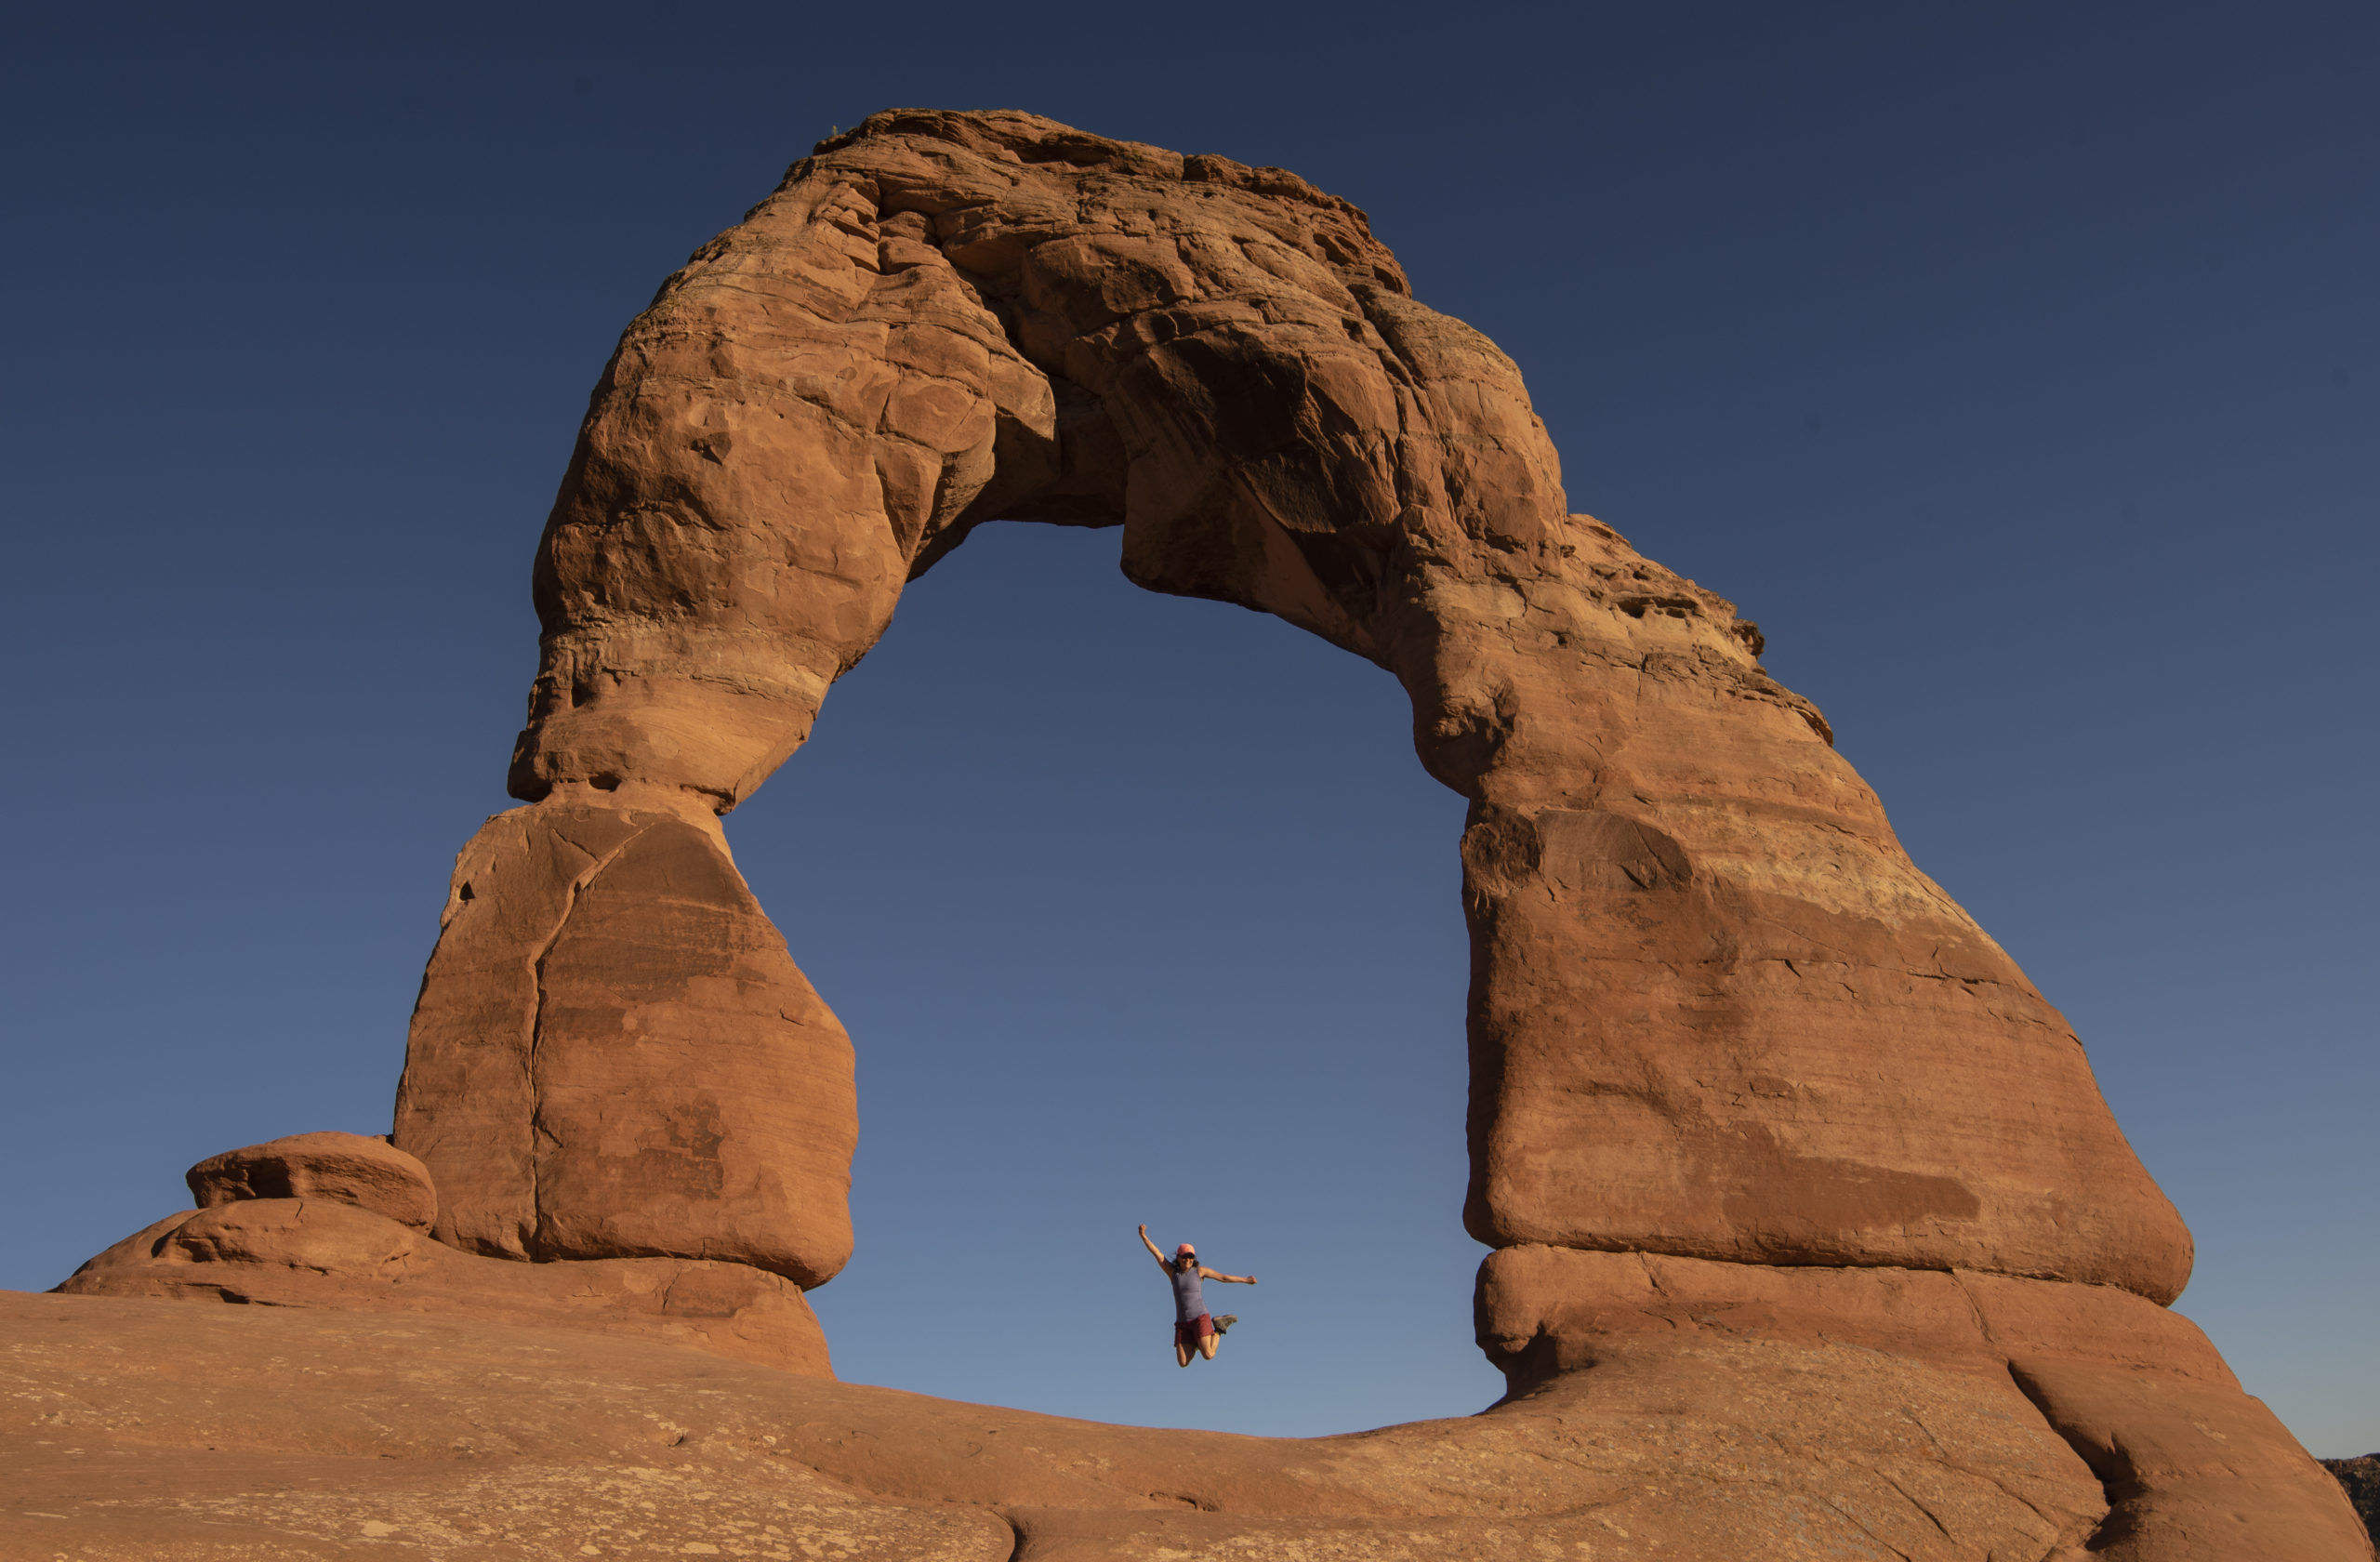
I wanted to try out a different perspective so I kneeled down and went below the arch to photograph it.
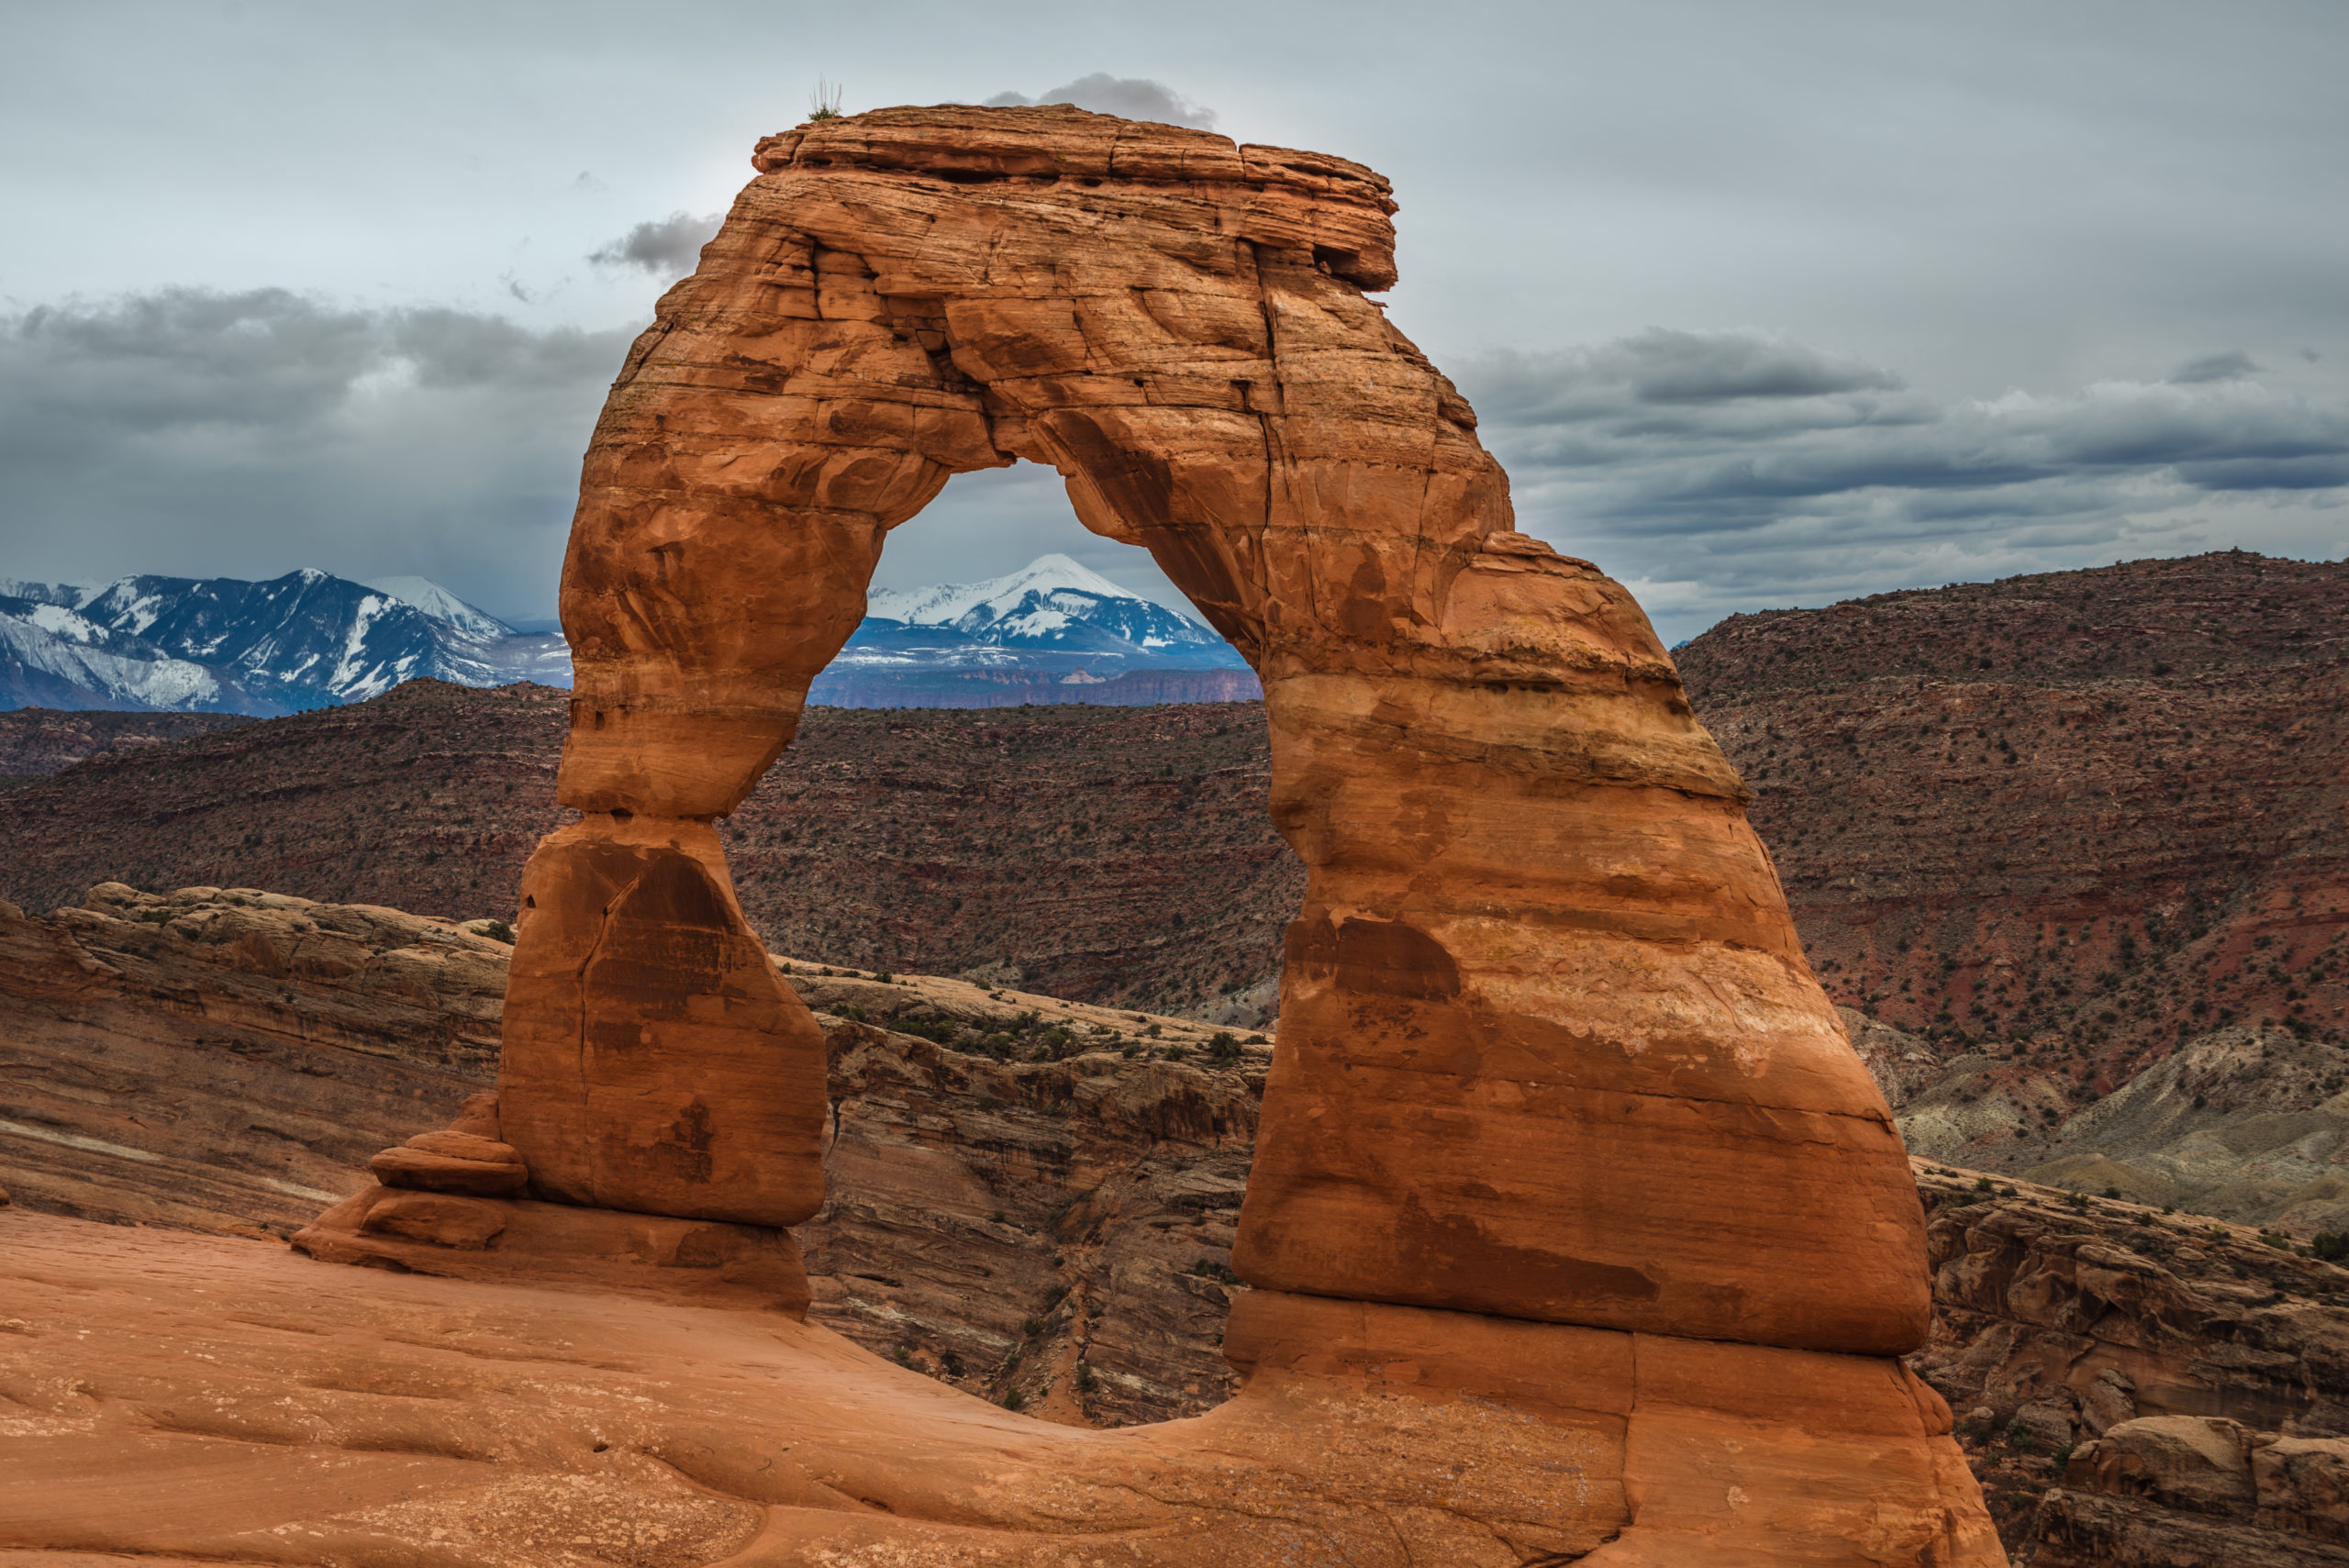
This is a very standard shot of Delicate Arch.
And it can be pretty fun sometimes to try out new angles. The subject might even become more interesting when you see it from a different viewpoint.
So next time you’re out shooting:
- Lay down
- Kneel
- Raise your Arms
- Jump (safely)
- Take a picture upside down!
Try all of these out and then think of some more. And have fun with it!
A nice way to think about it is when you are about to take a picture, think to yourself, how would an ant see this, or how would a bird flying in the sky see this. These are the unique images you want to capture to have your work stand out from the rest.
4. Texture
Texture in photography is meant to build a connection. When someone views your image, you want them to feel like they are touching the object in the picture. They can feel the gravel road or the rough bark on a tree.
Texture is a very good memory provoking composition technique because the sensation of touch is unforgettable. Use this to your advantage and try and focus on textured items.

This could be anything from a door to water droplets on leaves. This also works well with portraits if you really want to show off the old, withered wrinkles on someone.
If you are at the beach or in the desert, focus on the individual grains of sand, or if you want a wider shot, be sure to have the sand in focus, as it can be a very captivating element in your scene.
Imagination is key when taking images involving texture. Before you press the shutter button, think to yourself what you want the viewer to feel and experience.
5. Background
Background is a crucial element in photography.
It is something that can make or break a great photo.
Have you ever taken a photo, been really proud of it, only to realize later that the background was extremely distracting or someone photobombed it?
A distracting or busy background pulls the focus away from your main subject, ruining the image.

This is an example of a bad background. The tower pulls the focus away from the main subject.
Good backgrounds are essential for good photos.
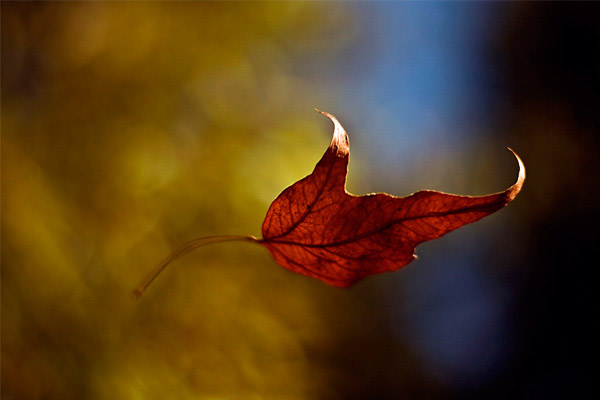
This is an example of a good background because all the focus is on the leaf, while the background is blurred out.
So how do you make sure your background is good?
- CHECK before you take the picture: This can seem like common sense, but in reality, it gets forgotten very easily. ALWAYS check your frame to make sure nothing is pulling the focus away from the main subject or scene. This can include photobombers, lamp posts, trash cans, etc.
- Blur the background: What if you can’t “get rid” of the background or wait for someone to move? Just blur the background! Use a low aperture (like f/3.5) and focus on the main subject. This is a very easy way to remove a distracting background.
- Change your viewpoint: If you can or your picture allows, change your position. Take 2 steps to the right/left, get lower, turn your body. Try any of these and you will see how easy it is to get rid of a certain background.
- Move your subject: This one really only works with portraits as you cannot move mountains, but if you see a distracting background, simply tell your subject to move to a different spot. This is also a really easy technique to make sure your background is non-distracting.
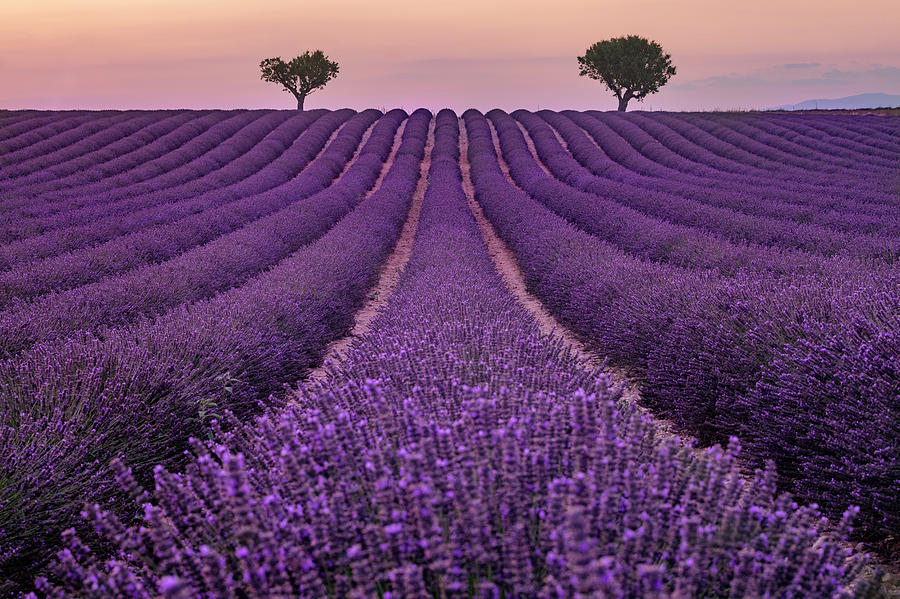
6. Symmetry/Patterns
Last but not least, symmetry and patterns.
This type of composition can be a fun one to look for, as you sometimes have to get creative with it.
For symmetry, the easiest way of achieving this type of shot is to create an image that can be divided into two equal parts. Symmetry can also be found in architecture, such as buildings or windows, or in flower petals, snowflakes, bridges, spider webs and so much more!

In photography, symmetry and patterns can be used to create a sense of balance and harmony. It is also very eye appealing.
An important aspect to remember while shooting for symmetry is to photograph from the center of the subject. Doing this will allow you to divide both scenes evenly.