White balance is a setting many beginning photographers shy away from. Either they don’t know what it does, don’t think it’s that important, or maybe have never heard of it.
To be honest, I didn’t pay that much attention to the white balance setting my first few months of photography, but after taking the time to experiment with it and learn how it can elevate my photography, I started focusing on it a lot more!
And that is what the focus of this article is going to be about. Because just like all settings, white balance is a tool that is designed to make your photography more creative and better!
So let’s dive right in!
If you want to watch the video I made about white balance, click here!
What is White Balance?
White balance is the setting that adjusts your camera so it produces white accurately.
Yep, hence the name, white balance, the settings are all about seeing white anywhere!
But what does that mean?
A simple example is if you hold up a white piece of paper. Now go outside and hold it up… Still white, right?
It doesn’t matter if you are outside, indoors, in a snowstorm or thunderstorm, a white piece of paper will look white in all of these conditions.
The color white is great because it reflects all wavelengths of light. Whatever color you shine on a white piece of paper is the color the paper will become.
Technically, however, the white piece of paper in different situations is not always white.
It can be warmer (more orange) or cooler (more blue) depending on where it is.
Our eyes are extremely good at blocking out these slight color variances and make us see a white piece of paper anywhere.
A camera, on the other hand, does not block out these extra colors.
Controlling the white balance is a technique you can use to adjust from those warmer or cooler tones to a more neutral image.
When do I use it?
You can also use white balance to make the image warmer or cooler if need be.
This would be in the instance if you wanted to emphasize certain colors in the picture.
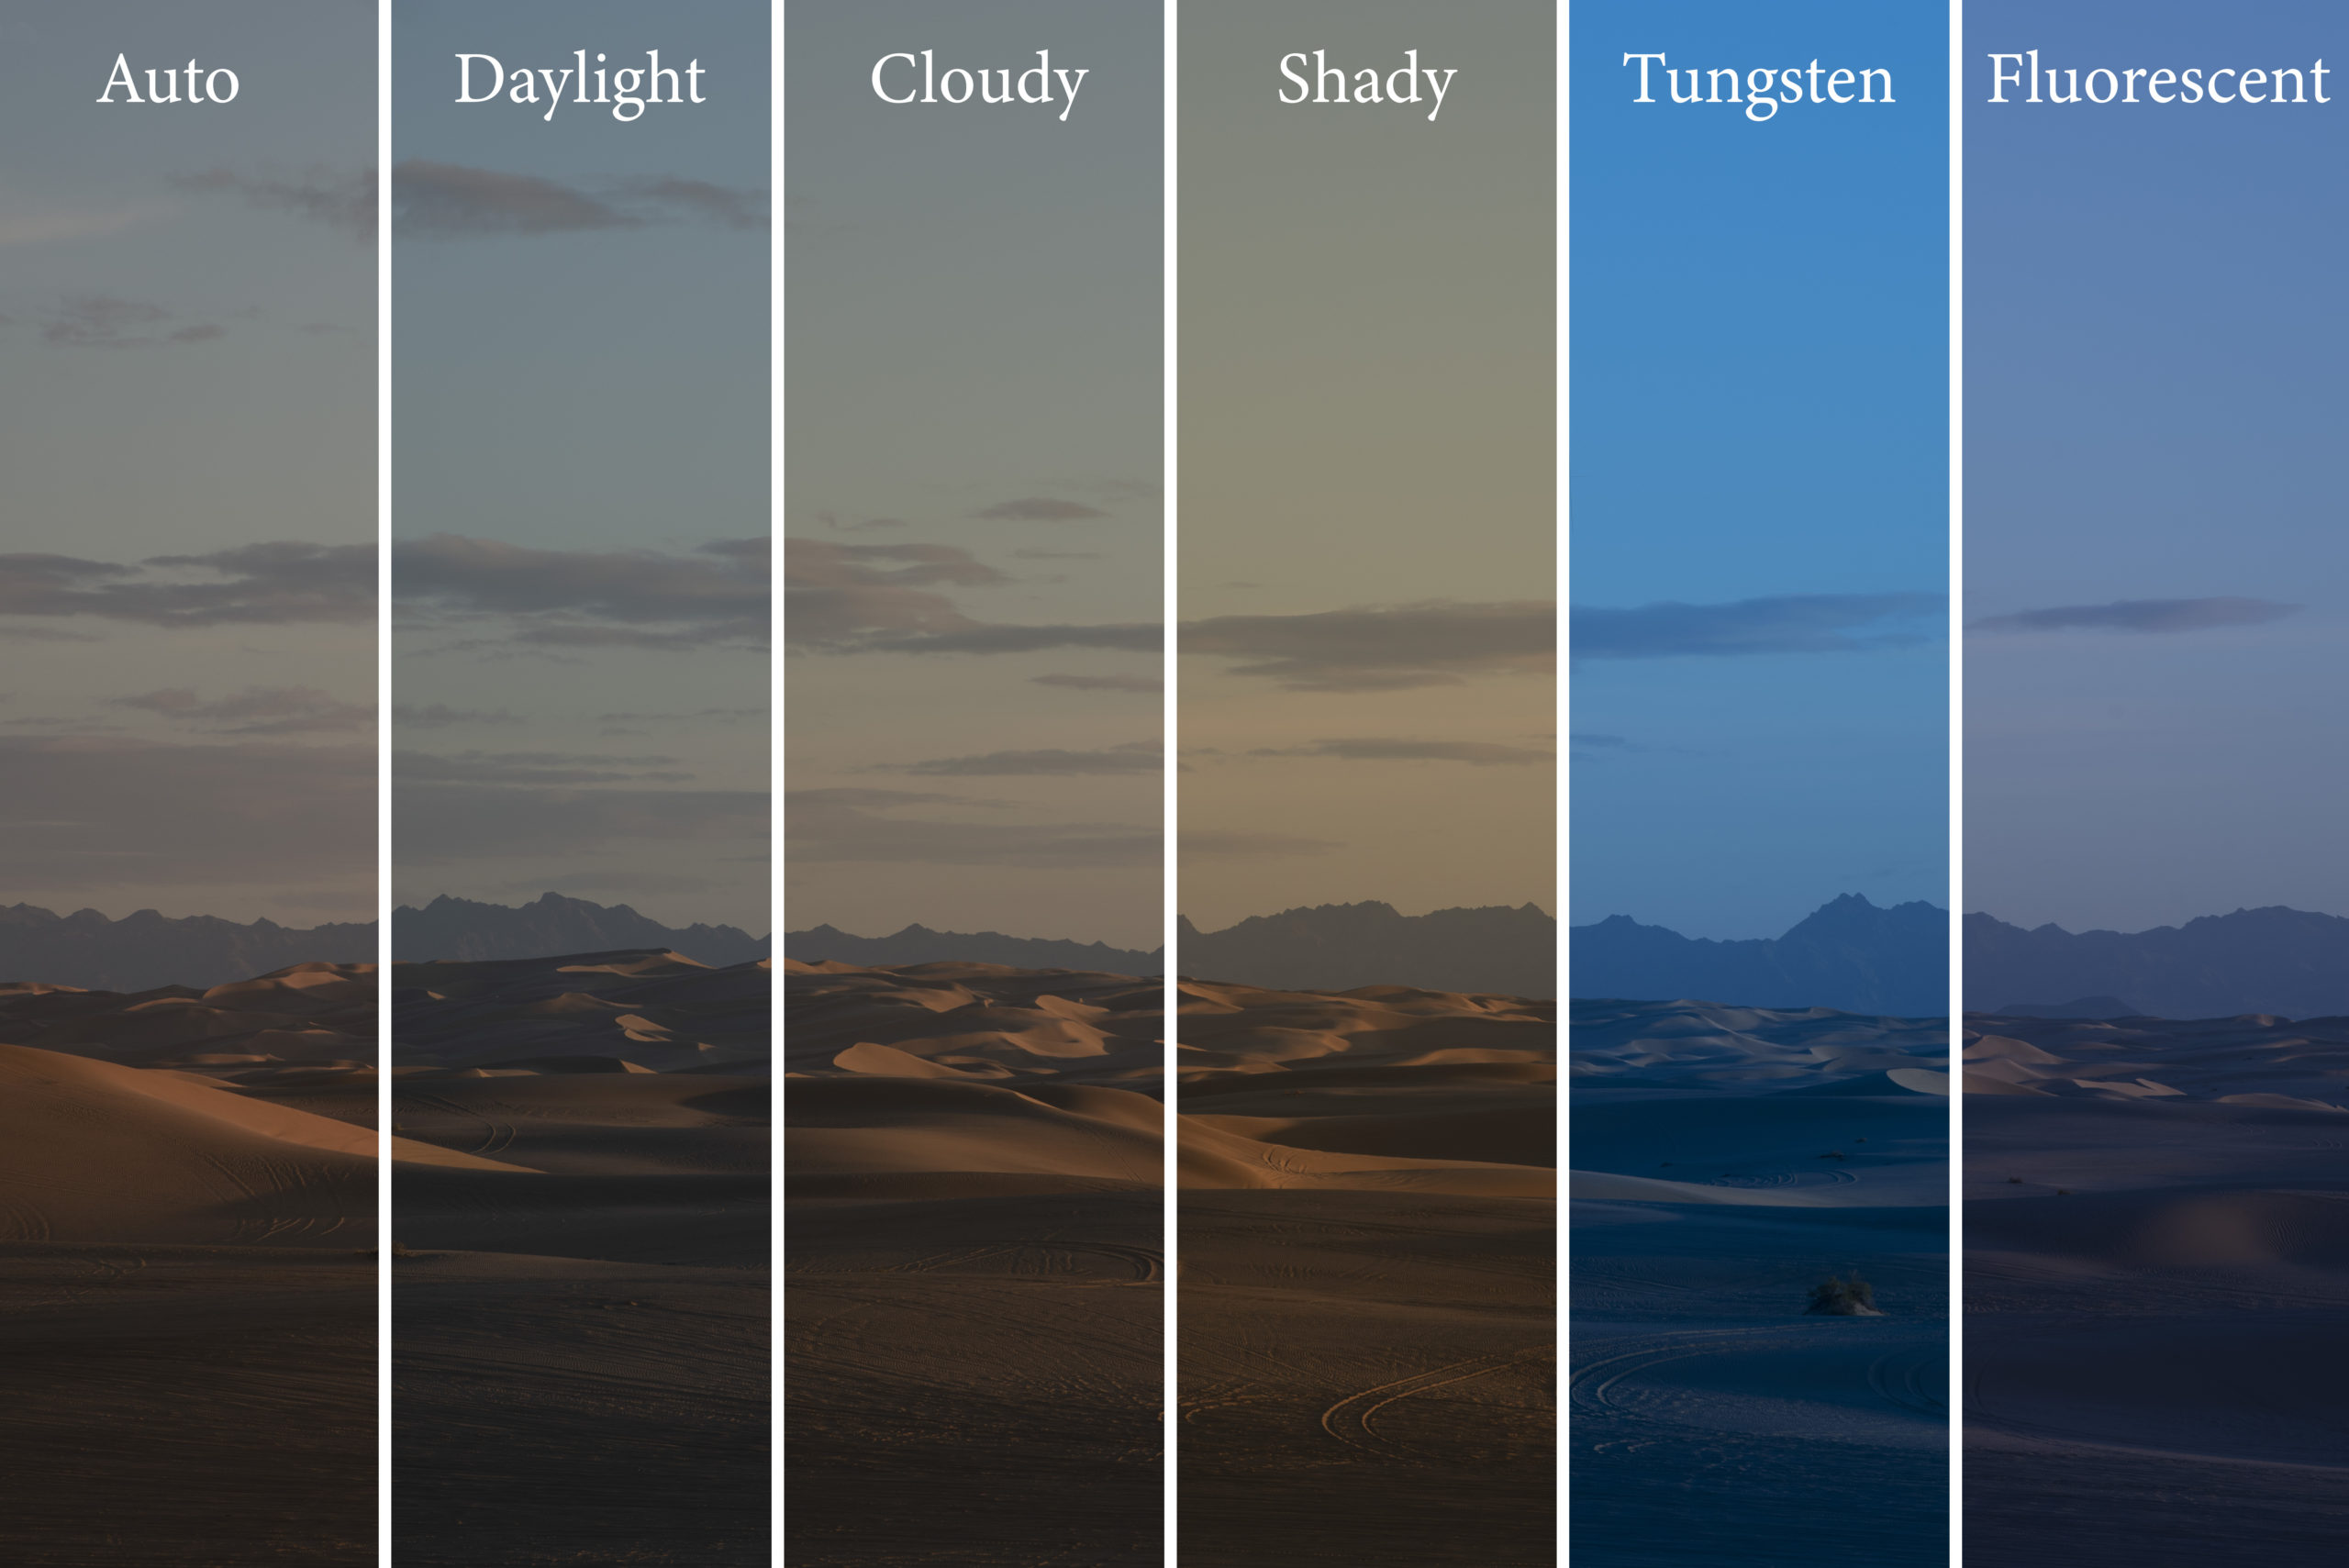
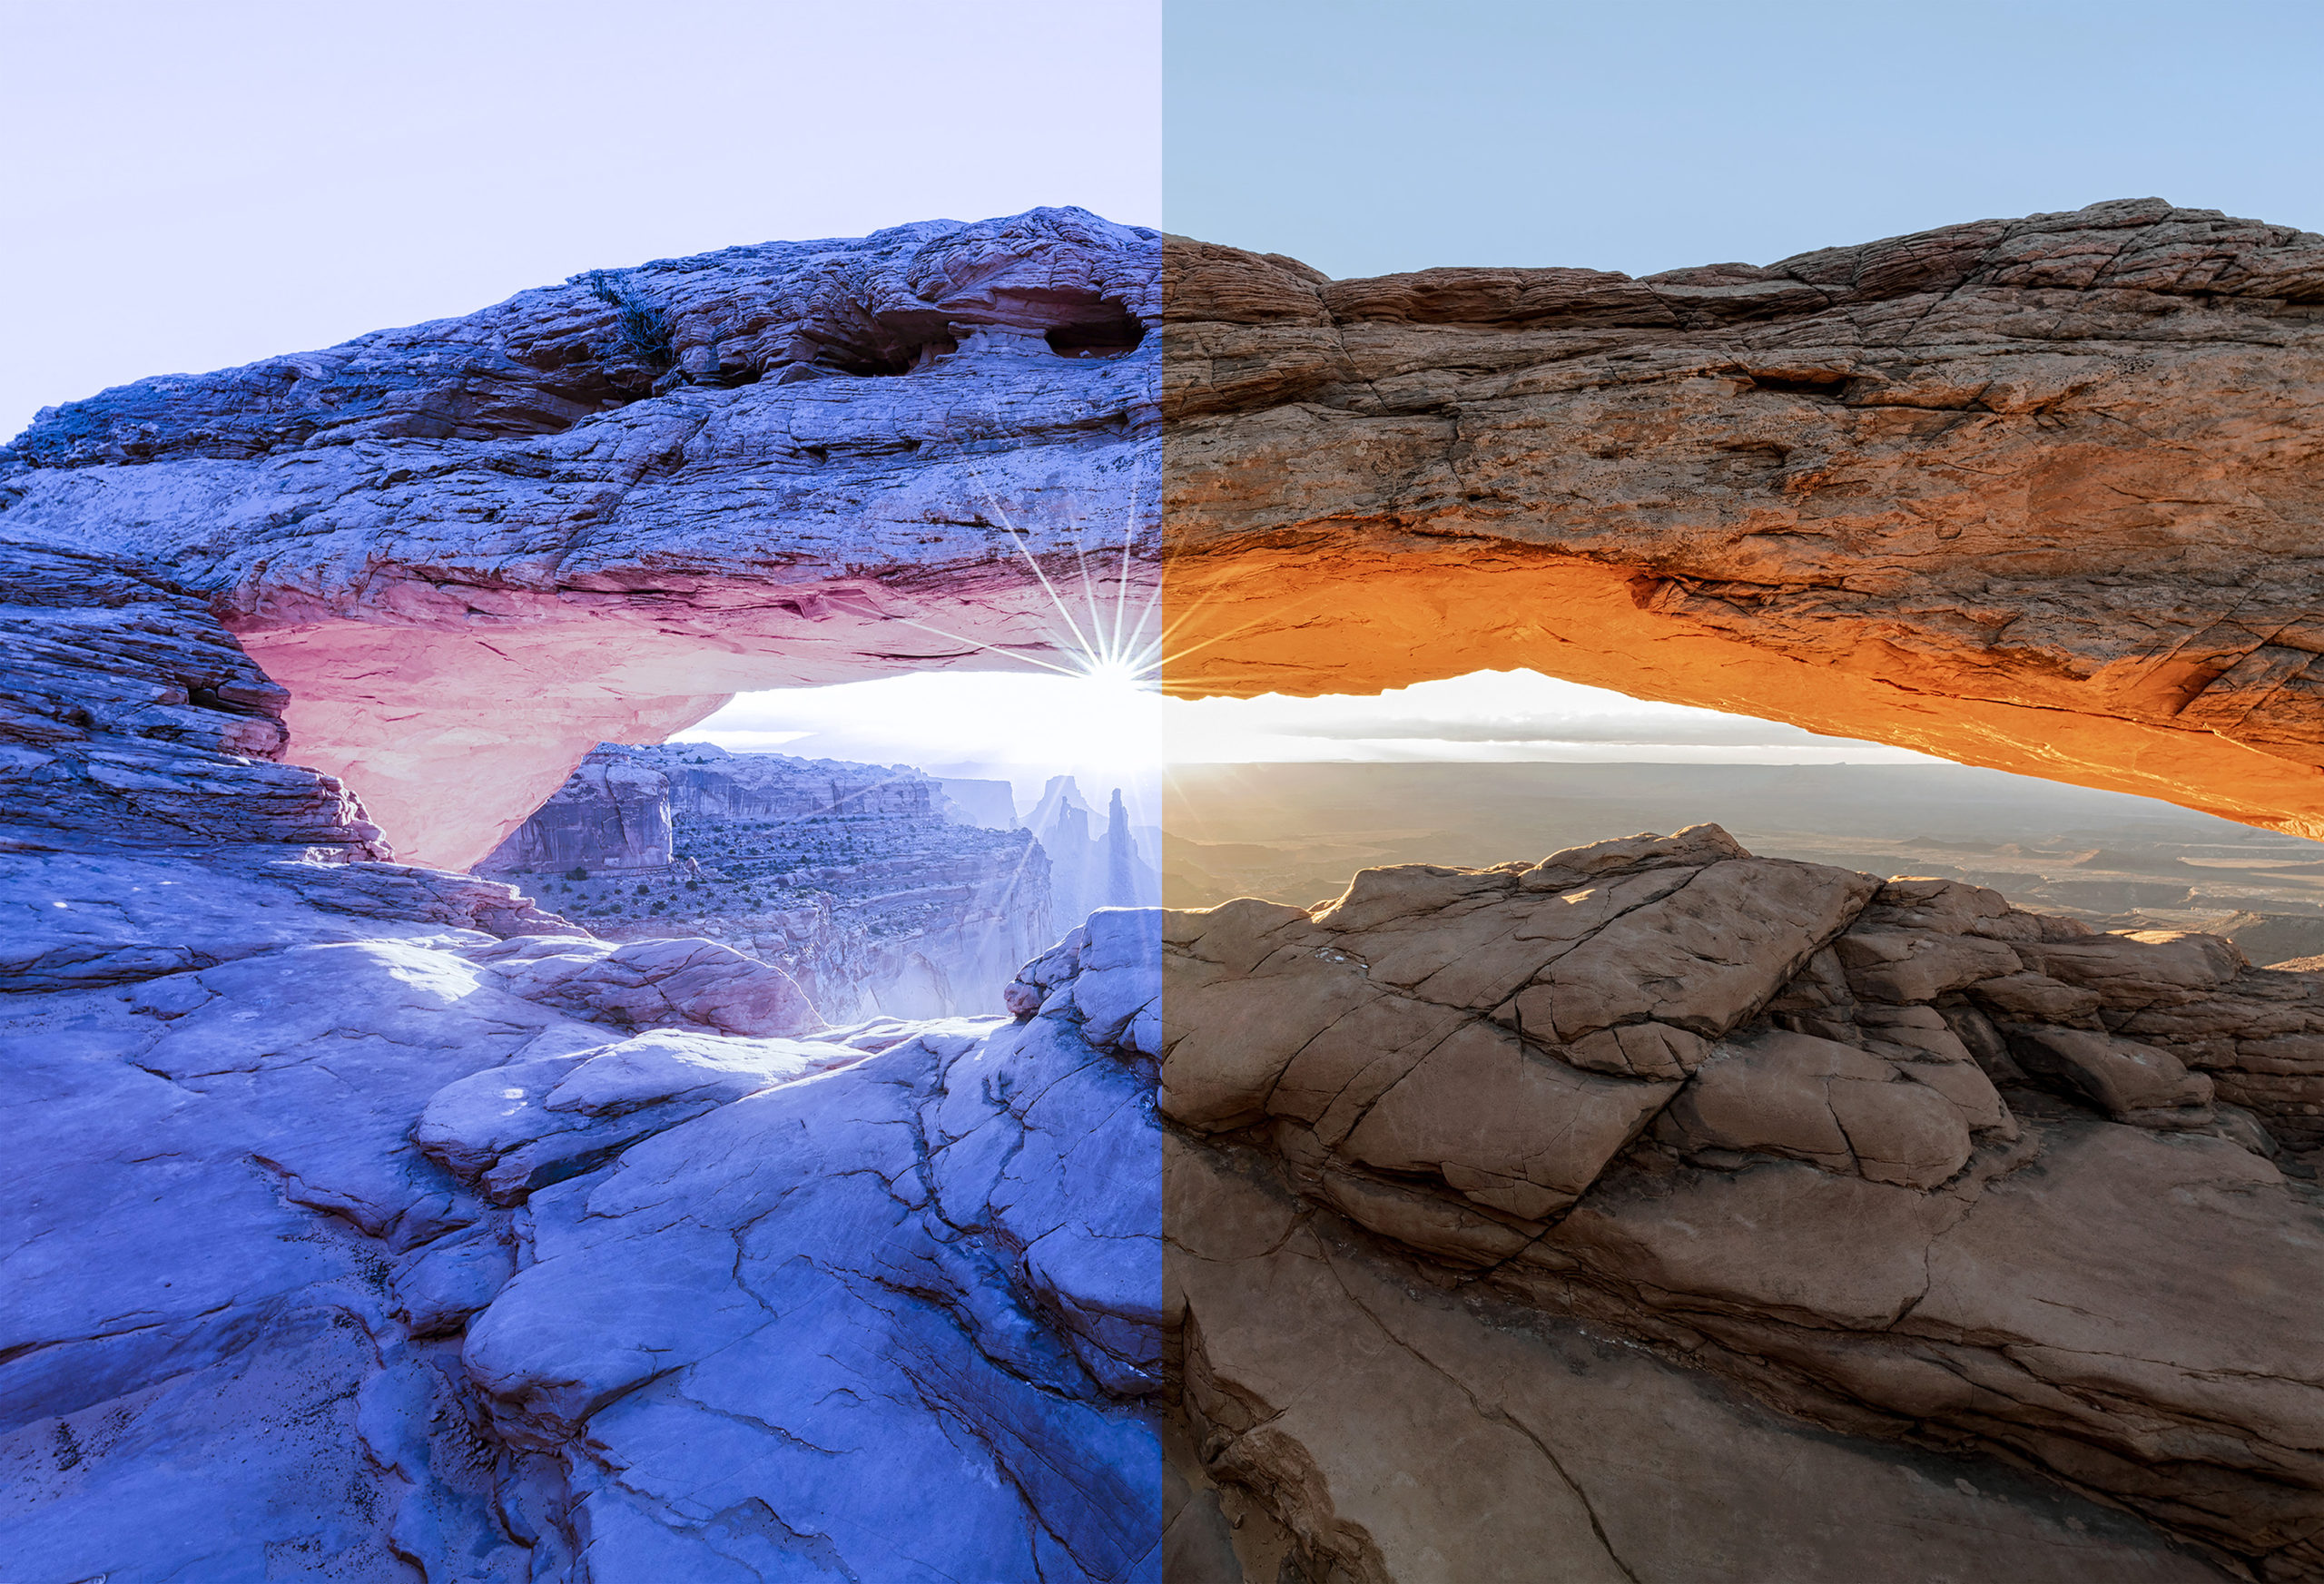
As you can see, different white balance settings can have dramatic effects on the image.
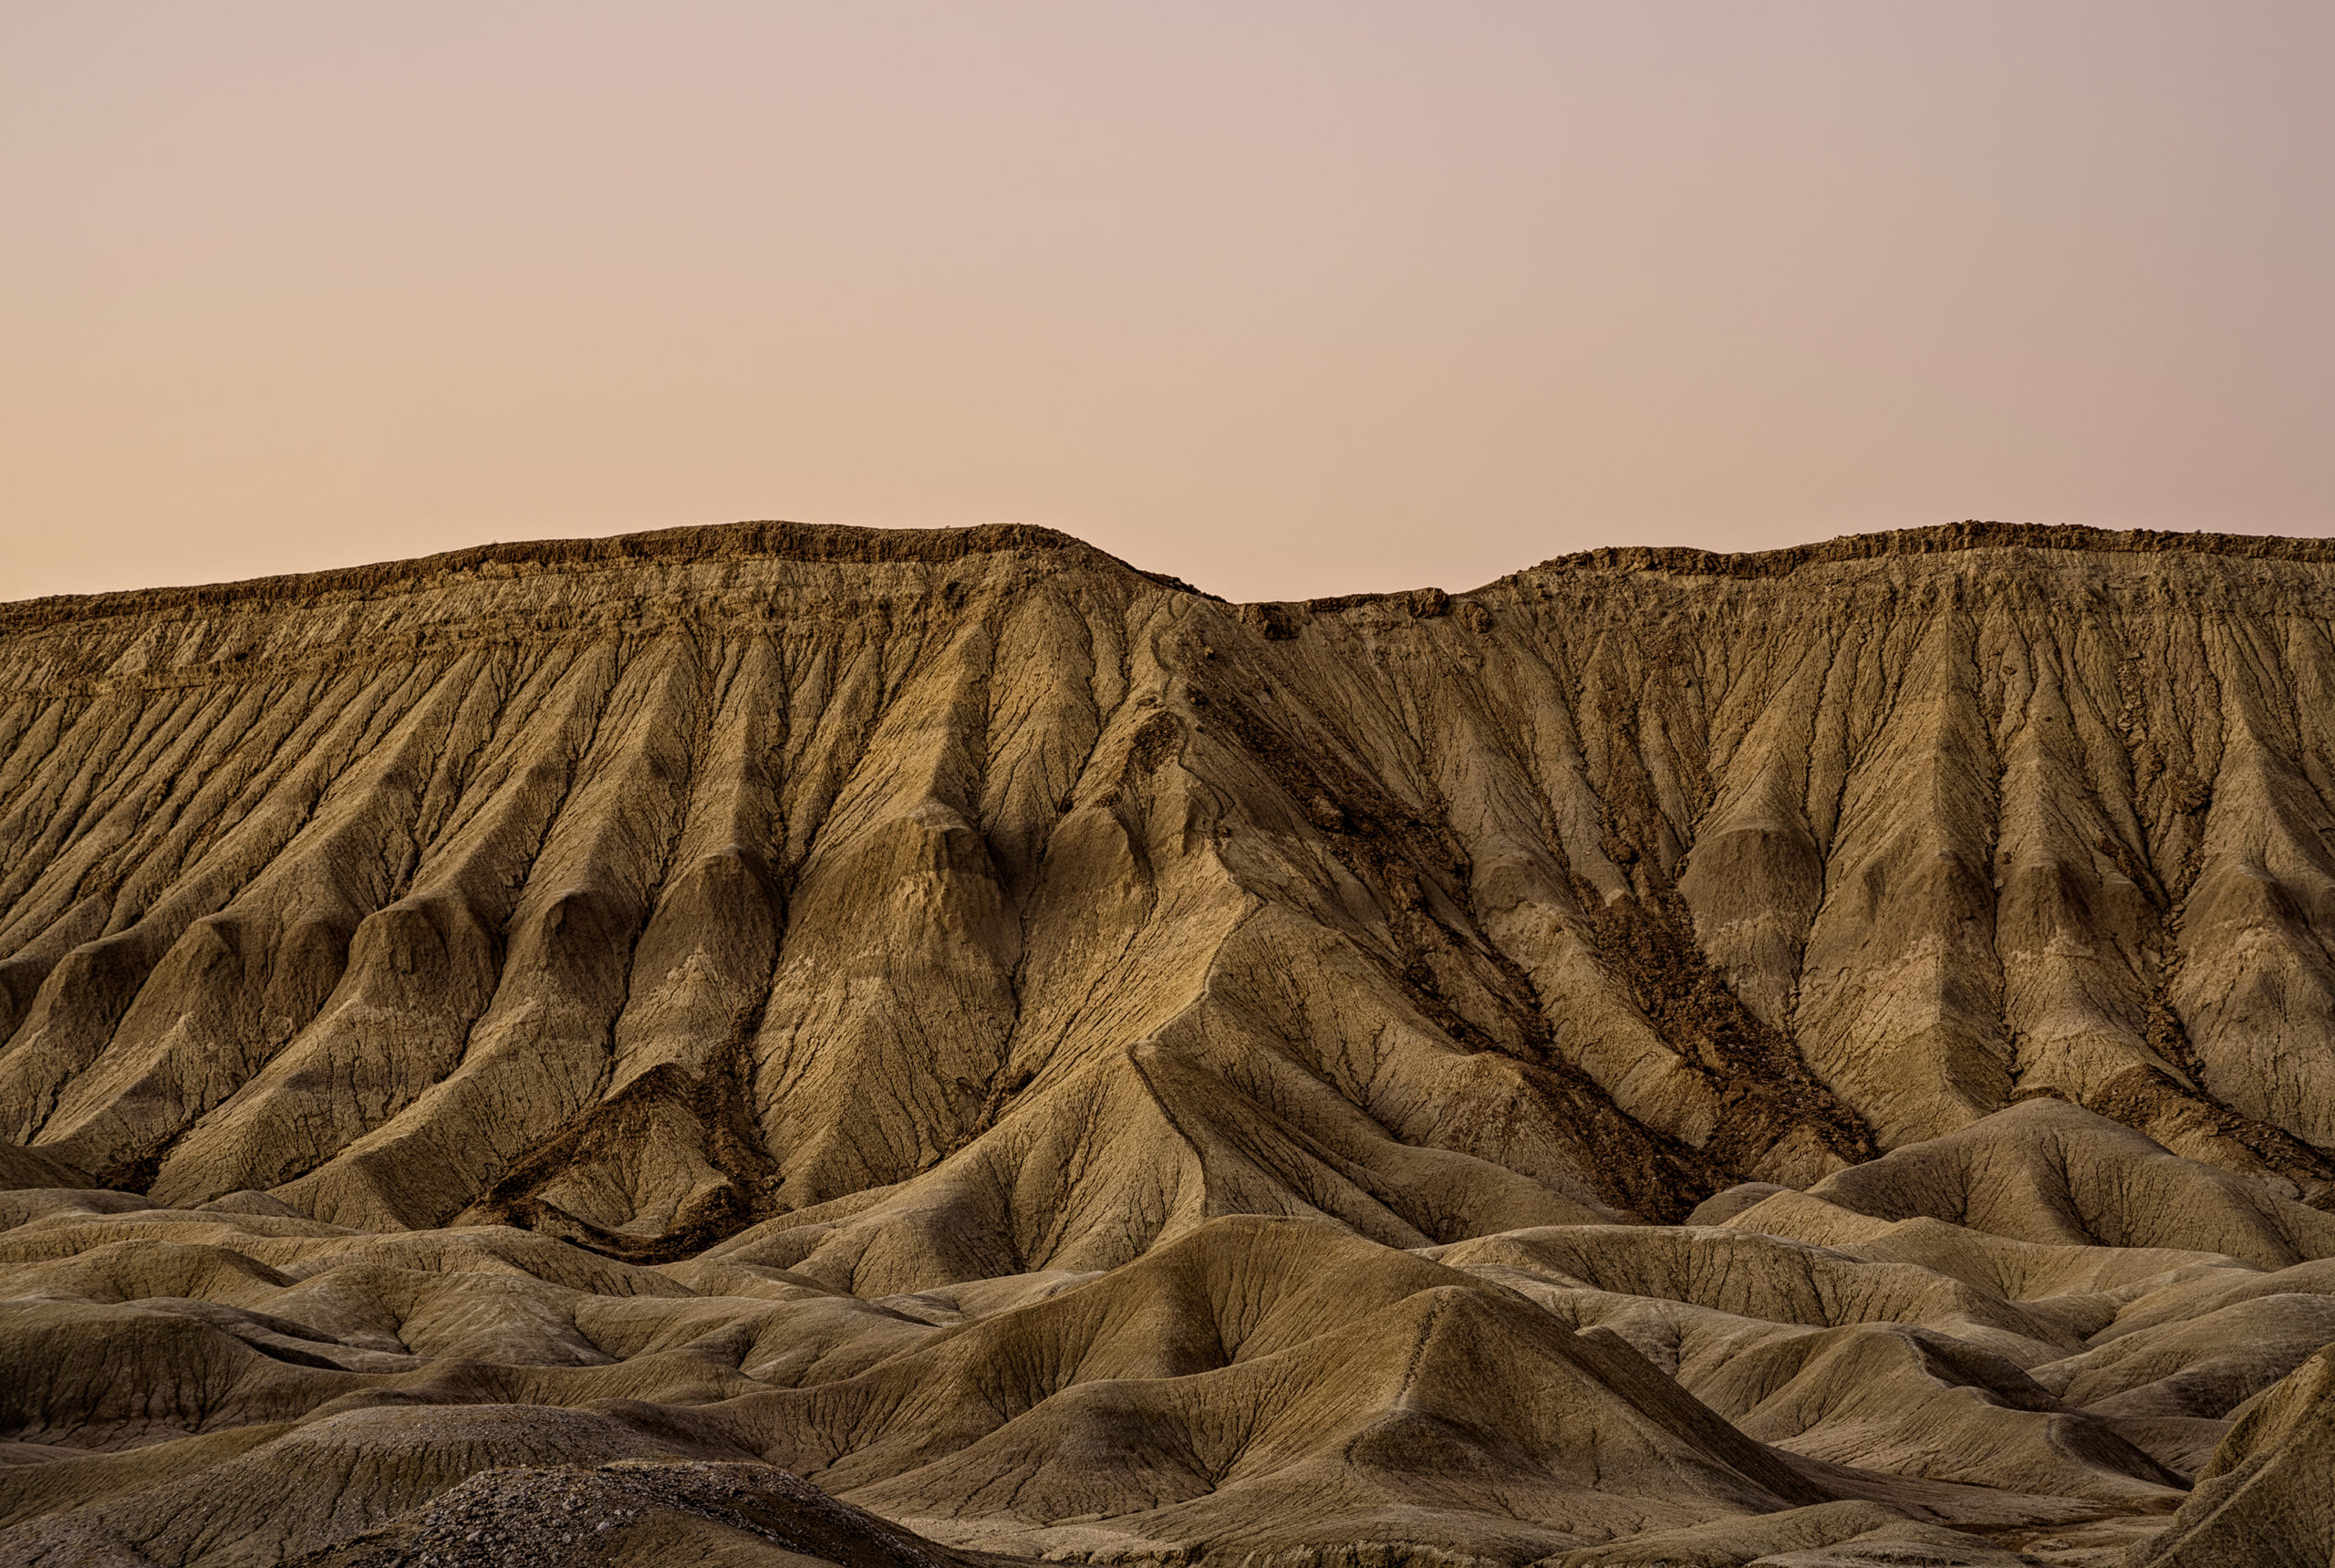
Imagine you’re photographing a sunset or sunrise. The sunlight combined with the cloud color tends to lean toward a warmer tone.
An easy way to slightly boost this effect is to change your white balance to add a bit of warmth to the scene.

On the left side, the white balance is set to AUTO. On the right side, it is set to Cloudy. Since this is a desert scene at sunset, I prefer Cloudy as it gives more of a desert/warmer feel.
So that solves changing your white balance to a warmer tone, but what about cooler tones?
Cooler tones can be chosen at scenes that are already filled with blue tones. This could be anywhere from the beach to an ice cave.
White balance can be extremely powerful because changing the color of the scene can have very impactful changes to your images and the feeling it gives viewers.
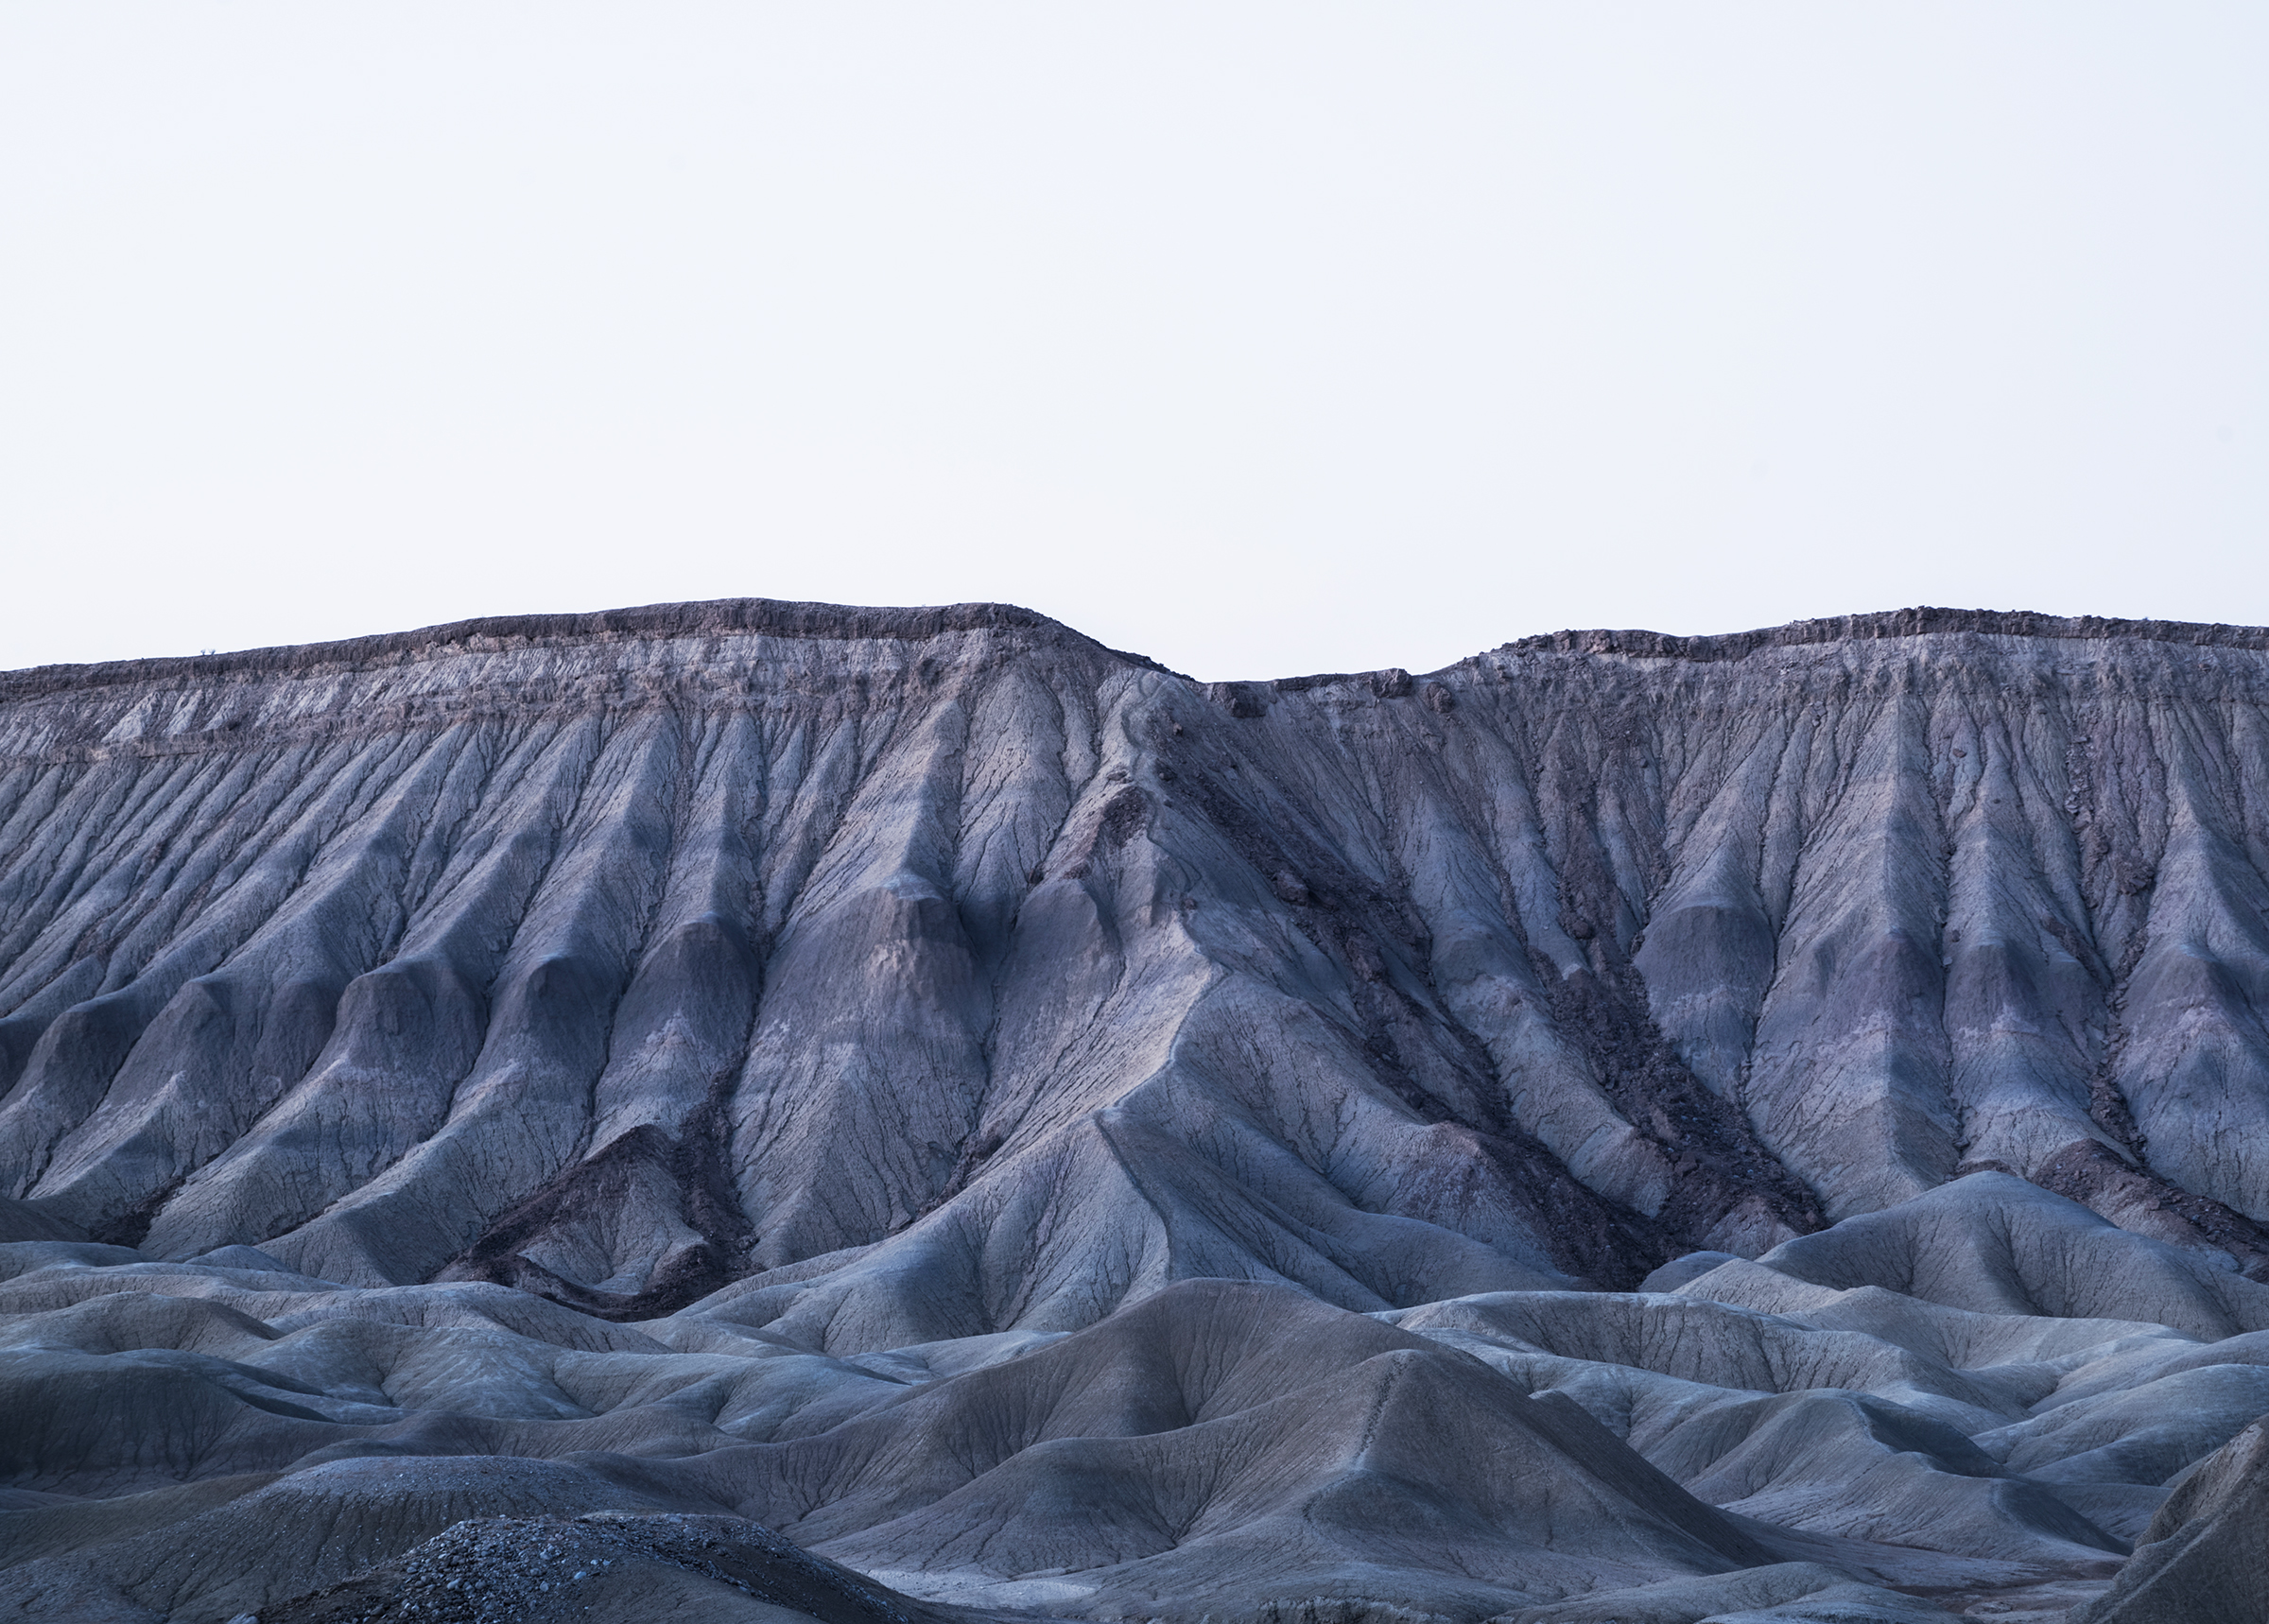
As you can see, even though both images are of the same scene, they deliver different feelings.
Every camera has white balance presets. These presets include:

Credit: gottapics.com

These icons are placed in the color they reflect most. (Credit: shuttermuse.com)
These presets can be very useful if you want to quickly adjust your white balance.
But what if you want to make selective adjustments to the white balance?
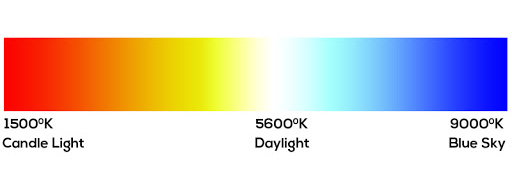
The Kelvin Scale
Kelvin (K) is a unit of measurement for temperature. Cameras usually range from 2000K to about 9000K.
Credit: brixton.lighting
At 2000K, your image will be very warm (orange). On the other end at 9000K, your image will be very cool (blue).
Using the Kelvin Scale will help you fine-tune your white balance so you can get the exact colors you want.
Don’t wait to change the White Balance in Editing
Too many times have I heard, “It’s okay if my white balance is off right now, I can always change it in editing.”
Although this is true, not taking the time to correct it while out in the field can be a big limitation on your creativity and ultimately your images.
Changing your white balance in camera gives you CONFIDENCE!
Imagine having a cool white balance and taking a picture of a sunset/sunrise. Doesn’t look that good, right?
But if you change it to a warmer, tone, the light and clouds start looking better. You’re happier, your image is better, win-win!
During multiple trips, I had started to capture images of a sunset and then changed my white balance to Shade or Cloudy. Once I saw warmer tones, my image looked better and my confidence and excitement started to increase.
I then start noticing more compositions and just enjoyed the moment more. There have been many instances where if I wouldn’t have changed my white balance in camera, I never would’ve looked around and captured a different shot.
And it is usually within these “different shots,” that you create the best images!
Once you start editing, you can’t magically change the composition, so make the most of it when photographing!
Now that you have white balance dialed down (see what I did there), go out, use your new knowledge, and have fun photographing!